12 Eos Apex, Eos Ti, Gio, Gio @5, Ion Xe, Ion Xe 20, and Element 2 User Manual
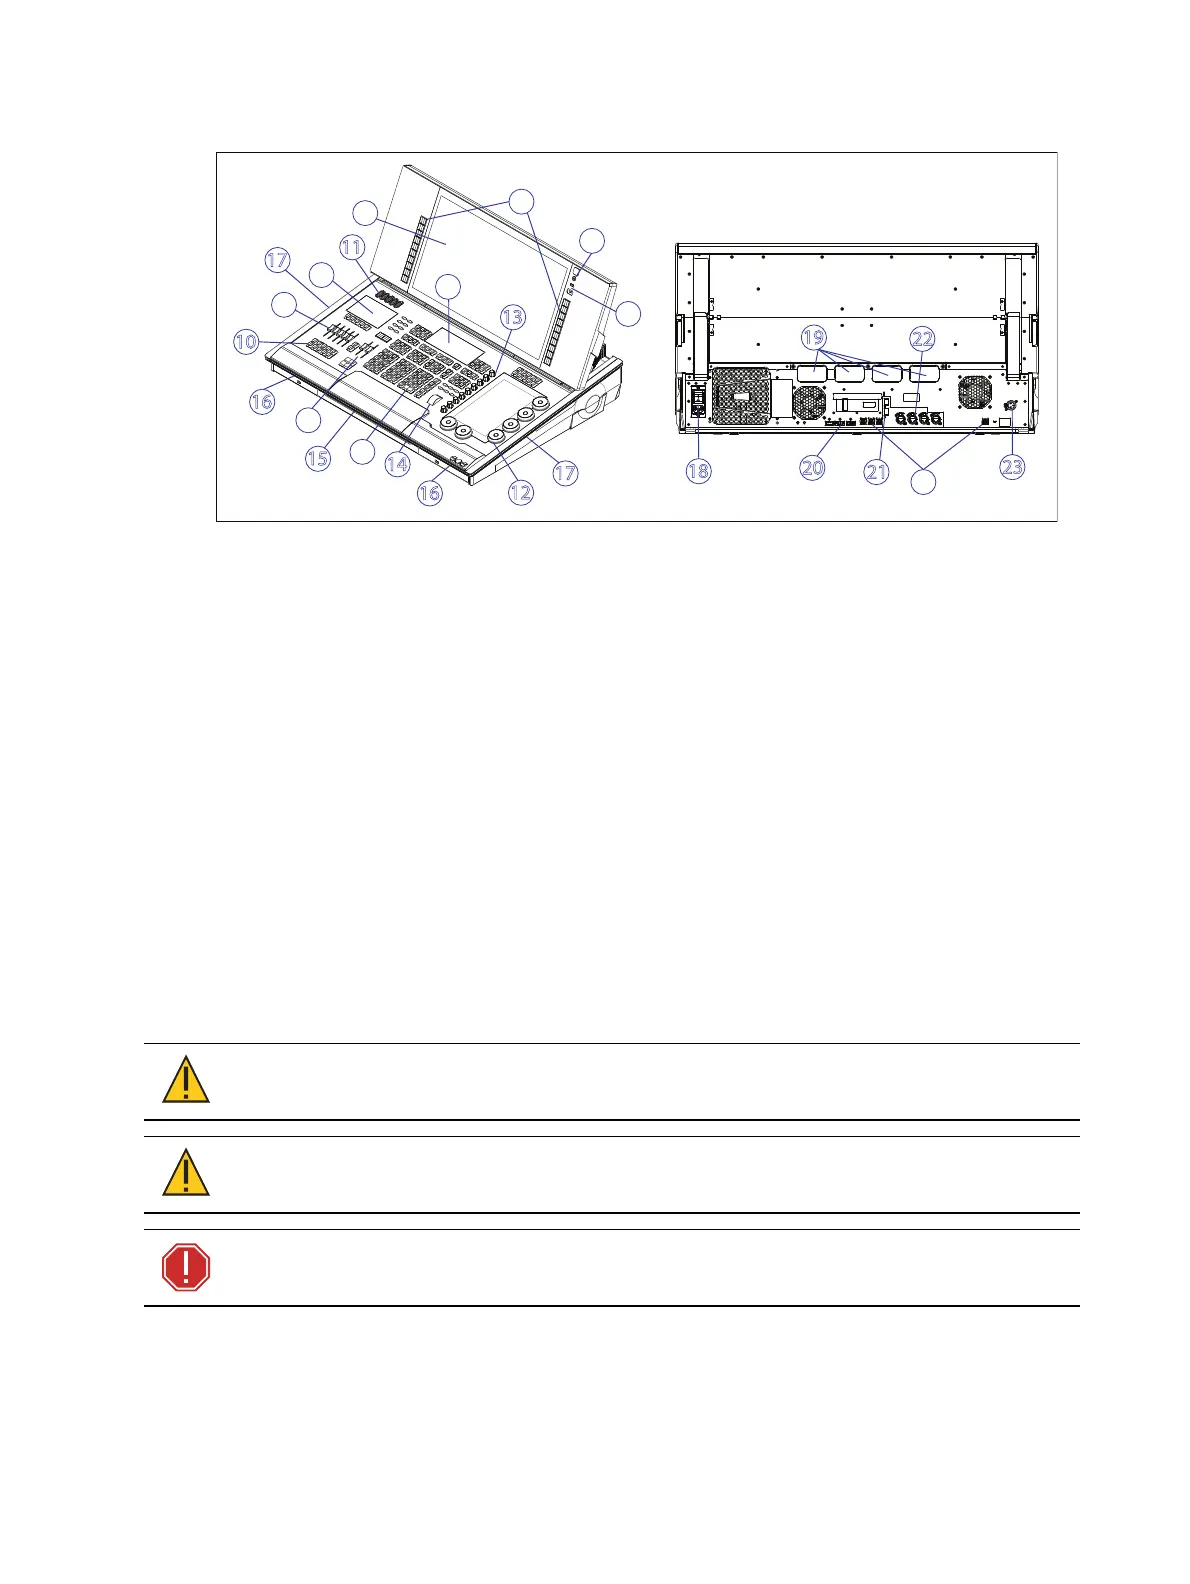
Eos Apex 5 Layout
2
21
1
2
3
4
5
6
7
8
9
10
11
12
13
14
15
16
17
17
19
20
18
22
23
16
1. Power button
2. USB-A&USB-C (data)
3. Internal touchscreen
4. Keypad
5. Keypad touchscreen
6. Target keys
7. Main playbacks
8. Motorized faders
9. Fader touchscreen
10. Configurable fader buttons
11. Endless fader wheels
12. Encoders
13. Mini encoders
14. Level wheel
15. Keyboard / accessory tray
16. USB-A (power only)
17. Book lights
18. Hard power switch /IECsocket
19. IOgarage
20. Display Port
21. SFP+
22. Ethernet
23. Littlite
Eos Apex 5 Components
Power Button
The power button on the front of the console is used to power up or power down. A separate
hard power switch, located on the rear panel, can be used to disconnect power from the
console’s internal components.
CAUTION:
It is recommended that you safely power down the console via
Displays > Power Off Device before disconnecting power from the console.
CAUTION:
Power cord must be connected using an earth ground
connection.
WARNING: Before servicing your console, you must switch off the power
on the rear panel and disconnect the power cord completely.



 To Next Page