DMP 128 FlexPlus • DSP Configurator Software 39
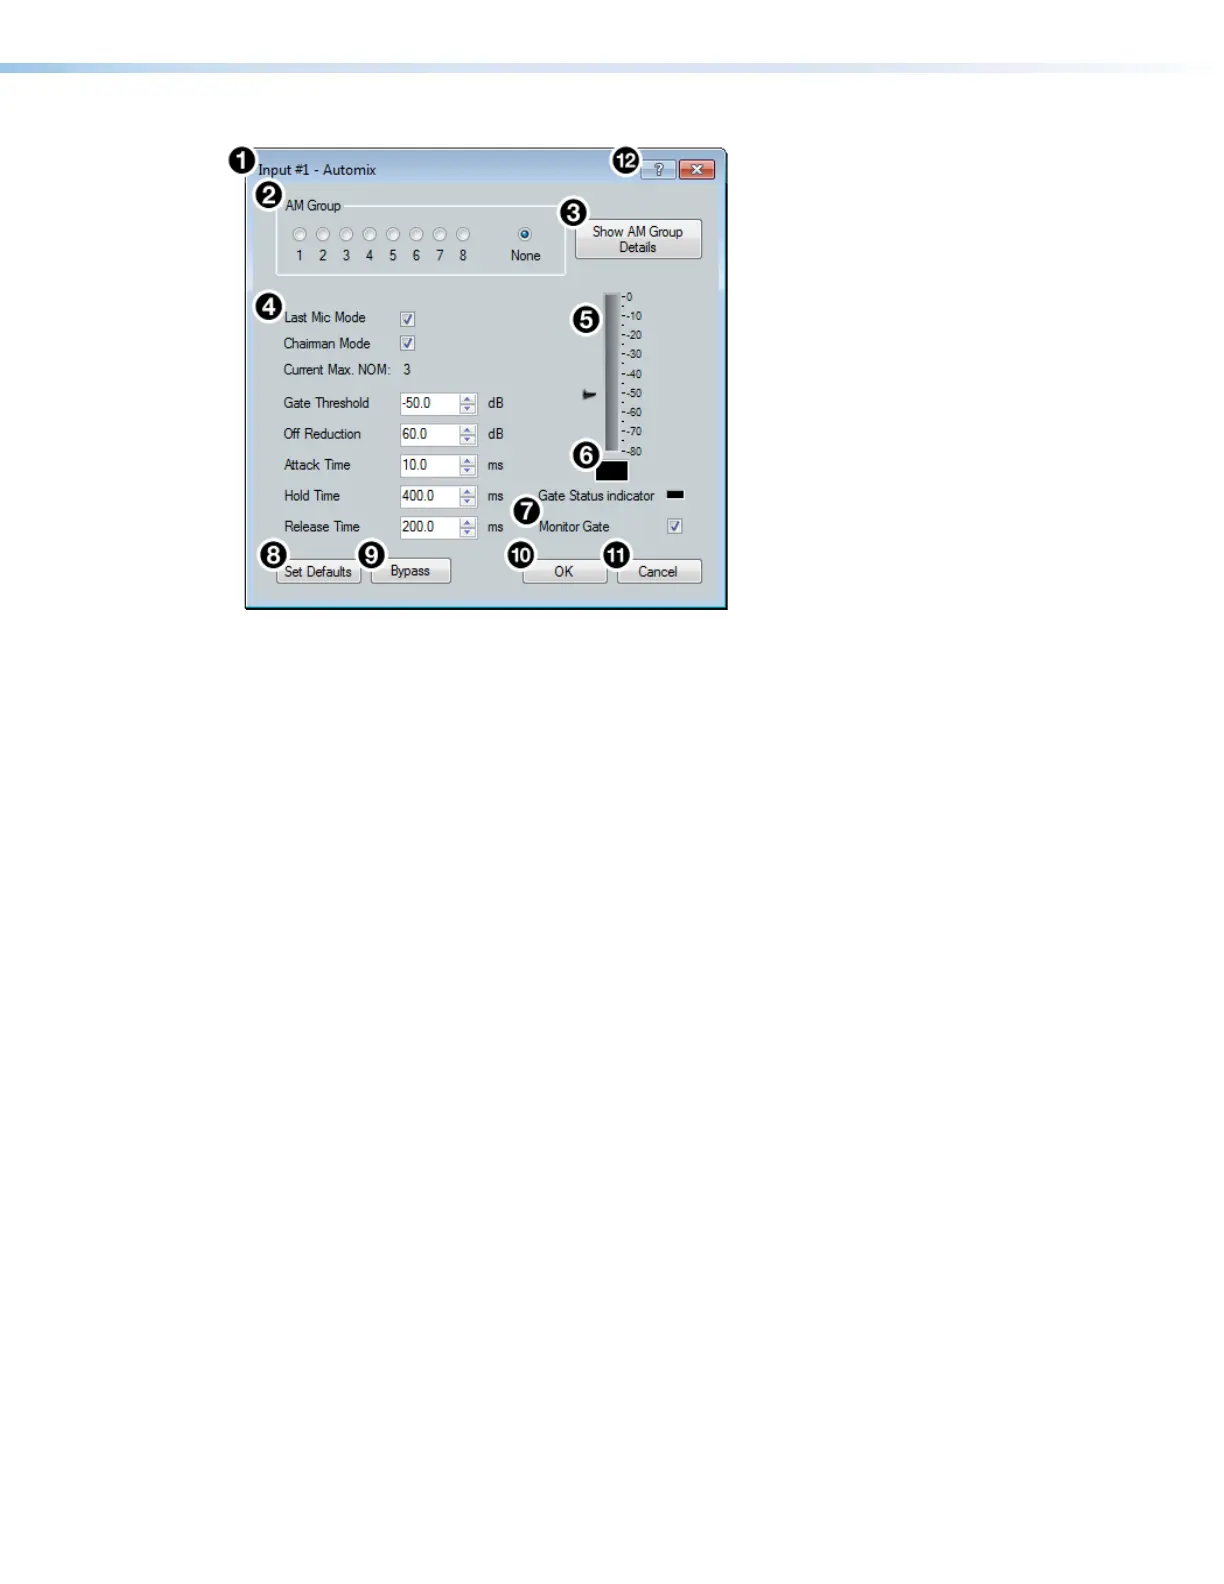
Figure 64. Automix Dialog Box
1
Automix Channel Name — This name changes to match the default or user defined
input name.
2
AM Group Assignment Panel — Provides nine radio buttons to assign the current
automix processor to an AM (automix) group. The default is None and leaves the
automixer unassigned.
3
Show AM Group Details Button — Opens the Automix Groups dialog box (click the
Automix Help button for more information regarding Automix Groups).
4
Automix Parameters — Provides configuration controls for all automix parameters.
5
dBFS Meter — Displays the post-automix signal level.
6
Gate Status Indicator — This LED lights when monitoring is enabled and the gate is
open.
7
Monitor Gate Checkbox — Click the Monitor Gate checkbox to enable SIS
responses regarding gate status (see Automixer Gate Monitoring on the next page).
8
Set Defaults Button — Resets all automix parameters to their default settings.
9
Bypass Button — Bypasses the automix processor. When the button is red, bypass is
enabled.
¢
OK Button — Confirms changes made to the contained parameters and closes the
Automix dialog box.
£
Cancel Button — Reverts any changes made to the contained parameters back to
their states when the Automix dialog box was opened and closes the dialog box.
¤
Automix Help Button — Opens the Automix topic of the DSPConfiguratorHelp file
for further assistance in configuring the automix processor.
figure 56. Automix Dialog Box
1
Automix Channel Name
2
AM Group Assignment Panel
3
Show AM Group Details Button
4
Automix Parameters
5
dBFS Meter
6
Gate Status Indicator
7
Monitor Gate Checkbox
8
Set Defaults Button
9
Bypass Button
¢
OK Button
£
Cancel Button
¤
Automix Help Button