DMP 128 FlexPlus • Configuration Tools 72
Digital I/O
The DMP 128 FlexPlus rear panel has two sets of digital I/O ports (see figure 2,
B
on
page5). Each set has one digital input and one digital output. These digital I/O ports can
be configured from DSPConfigurator. The Configure Digital I/O dialog box allows the
user to select from a list of actions, then have the script complied and implemented on the
device.
Each of the digital I/O sets has two panels for configuration. One panel for Digital In and
one for Digital Out. The Digital In panel contains a drop-down for the action and a
drop-down for the element being acted upon. Digital Out 1 contains drop-down menus
for the mode and the input being acted upon.
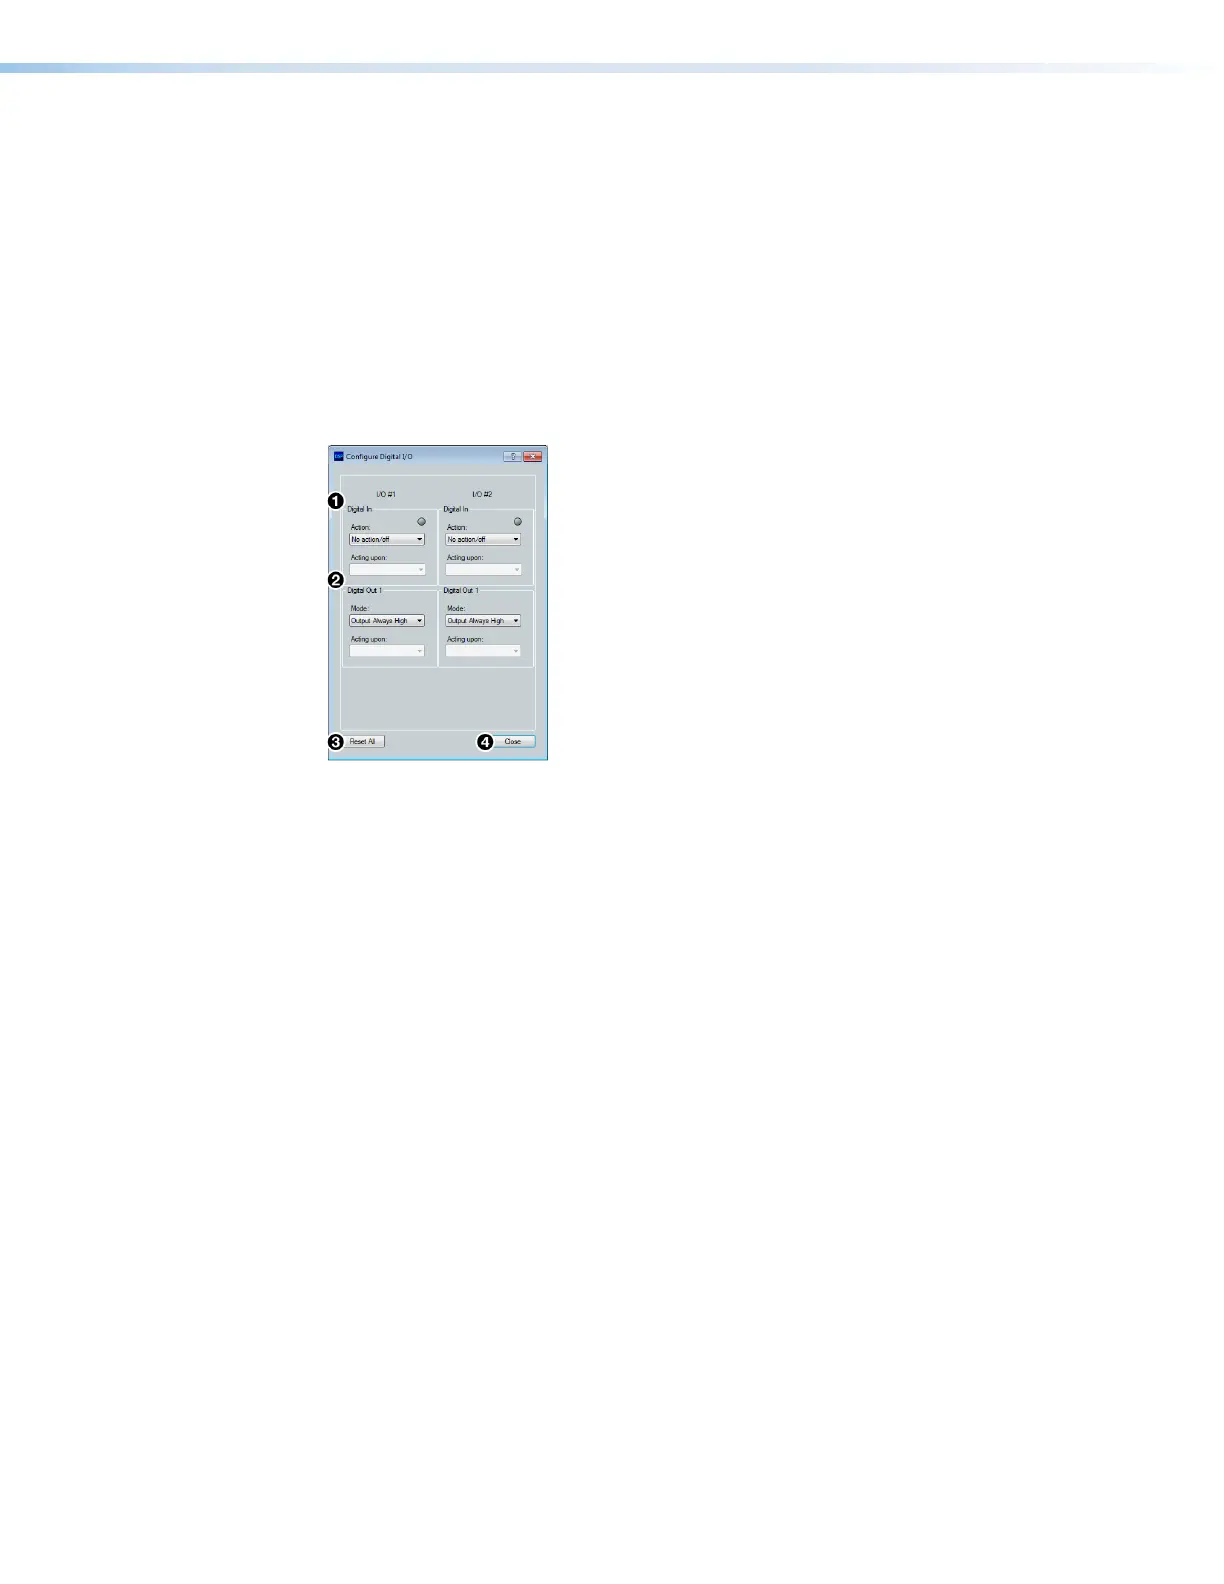
Click Tools > Configure Digital I/O to open the Configure Digital I/O dialog box.
1
Digital In Panel
3
Reset All Button
2
Digital Out 1 Panel
4
Close Button
Figure 125. Configure Digital I/O Dialog Box
1
Digital In Panel — Provides the following configuration options for the digital input.
a. Status LED — Displays the current status of the digital input. When the input is
high, the LED lights green. When the input is low, the LED is black. When DSP
Configurator is in Emulate mode, the LED is gray.
b. Action Drop-Down — Provides a list of actions for the digital input to trigger,
depending on the status of the digital input.
c. Acting Upon Drop-Down — Provides a list of inputs, groups, macros, and
presets for the action to affect.
2
Digital Out 1 Panel — Provides the following configuration options for the digital
output.
a. Mode Drop-Down — Provides a list of modes for the first digital output.
b. Acting Upon Drop-Down — Provides a list of inputs, groups, macros, and
presets for the mode to affect.
3
Reset All Button — Resets all I/O configuration data to default.
4
Close Button — Closes the dialog box, retaining the configuration data.
figure 117. Configure Digital I/O