DMP 128 FlexPlus • DSP Configurator Software 44
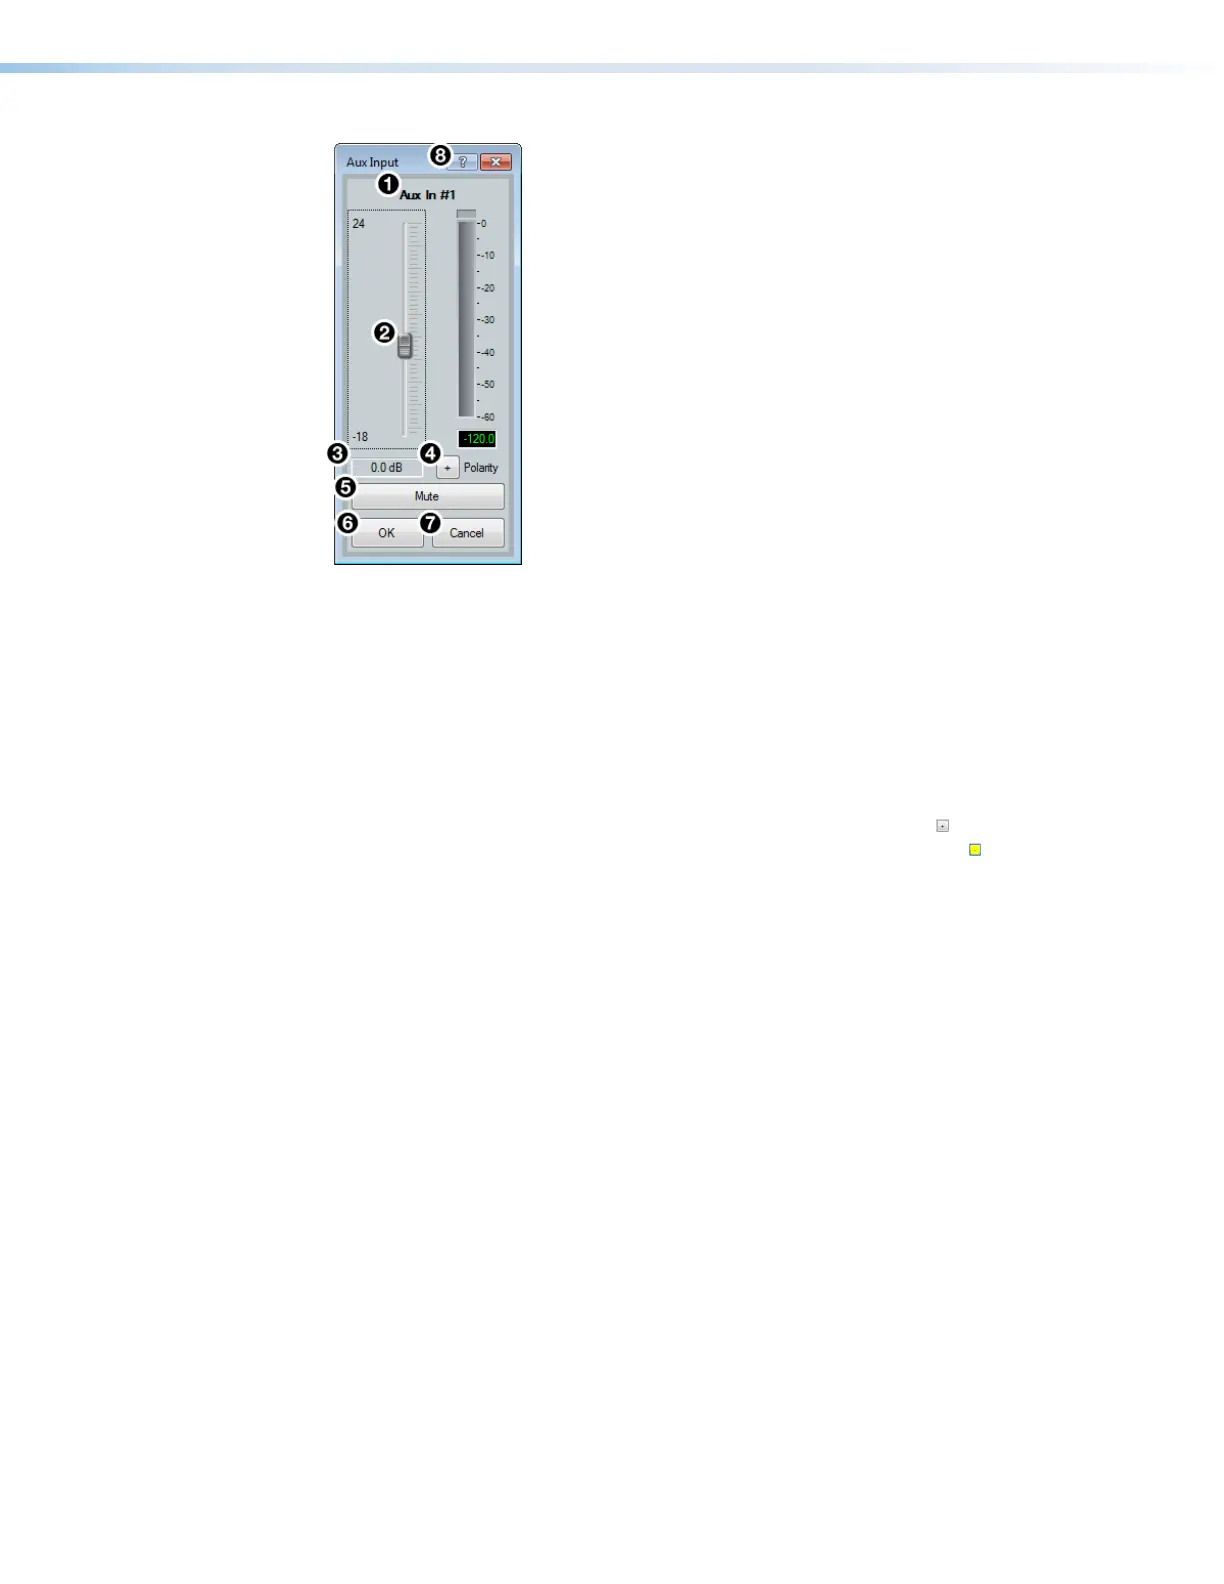
Figure 75. Aux Input Gain Dialog Box
1
Input Name — This name changes to match the default or user defined Aux input
name.
2
Aux Input Gain Fader — Click and drag the gain fader to provide up to 24 dB of
gain or 18dB of attenuation in 1 dB steps. Click the fader and use the <Up Arrow> or
<Down Arrow> keys to adjust the fader up or down in 1 dB steps.
3
Aux Input Gain Text Box — Enter a gain or attenuation value in 0.1 dB steps.
4
Polarity Button — Click this button to invert the signal polarity of the selected Aux
input. When the button displays the black + symbol on a gray field ( ), the polarity is
normal. When the button displays the black - symbol on a yellow field ( ), the polarity is
inverted.
5
Mute Button — Mutes signal at the Aux input stage, preventing it from going any
further in the signal processing chain.
6
OK Button — Confirms changes made to the contained parameters and closes the
Aux Input dialog box.
7
Cancel Button — Reverts any changes made to the contained parameters back to
their states when the current instance of the Aux Input dialog box was opened and
closes the dialog box.
8
Aux Input Help Button — Opens the Aux Input topic of the DSPConfiguratorHelp
file for further assistance in configuring Aux input sources.
Aux Input Filter Block
One filter block is available for each Aux input channel. This filter block functions the same
as the mic/line input filter block (see Input Filter Block on page24 for information on
configuring the Aux input filter block).
figure 67. Aux Input Gain Dialog Box
1
Aux Input Name
2
Aux Input Gain Fader
3
Aux Input Gain Text Box
4
Polarity Button
5
Mute Button
6
OK Button
7
Cancel Button
8
Aux Input Help Button