Scanning 211
Scanning Using the TWAIN Driver
Your printer supports the TWAIN driver for scanning images. The following procedure uses Windows 7 as an
example.
NOTE:
• Ensure that the printer is connected to the computer via the USB cable or to a network.
The following procedure to scan an image uses Clip Organizer as an example.
1 Load the document(s) face up with top edge in first into the DADF.
OR
Place a single document face down on the document glass, and close the document cover.
See also:
• "Making Copies From the DADF" on page 193
• "Making Copies From the Document Glass" on page 191
2 Click Start → All Programs → Microsoft Office → Microsoft Office 2010 Tools → Microsoft Clip Organizer.
3 Click File → Add Clips to Organizer → From Scanner or Camera.
4 In the Insert Picture from Scanner or Camera dialog box, under Device, select your device.
5 Click Custom Insert.
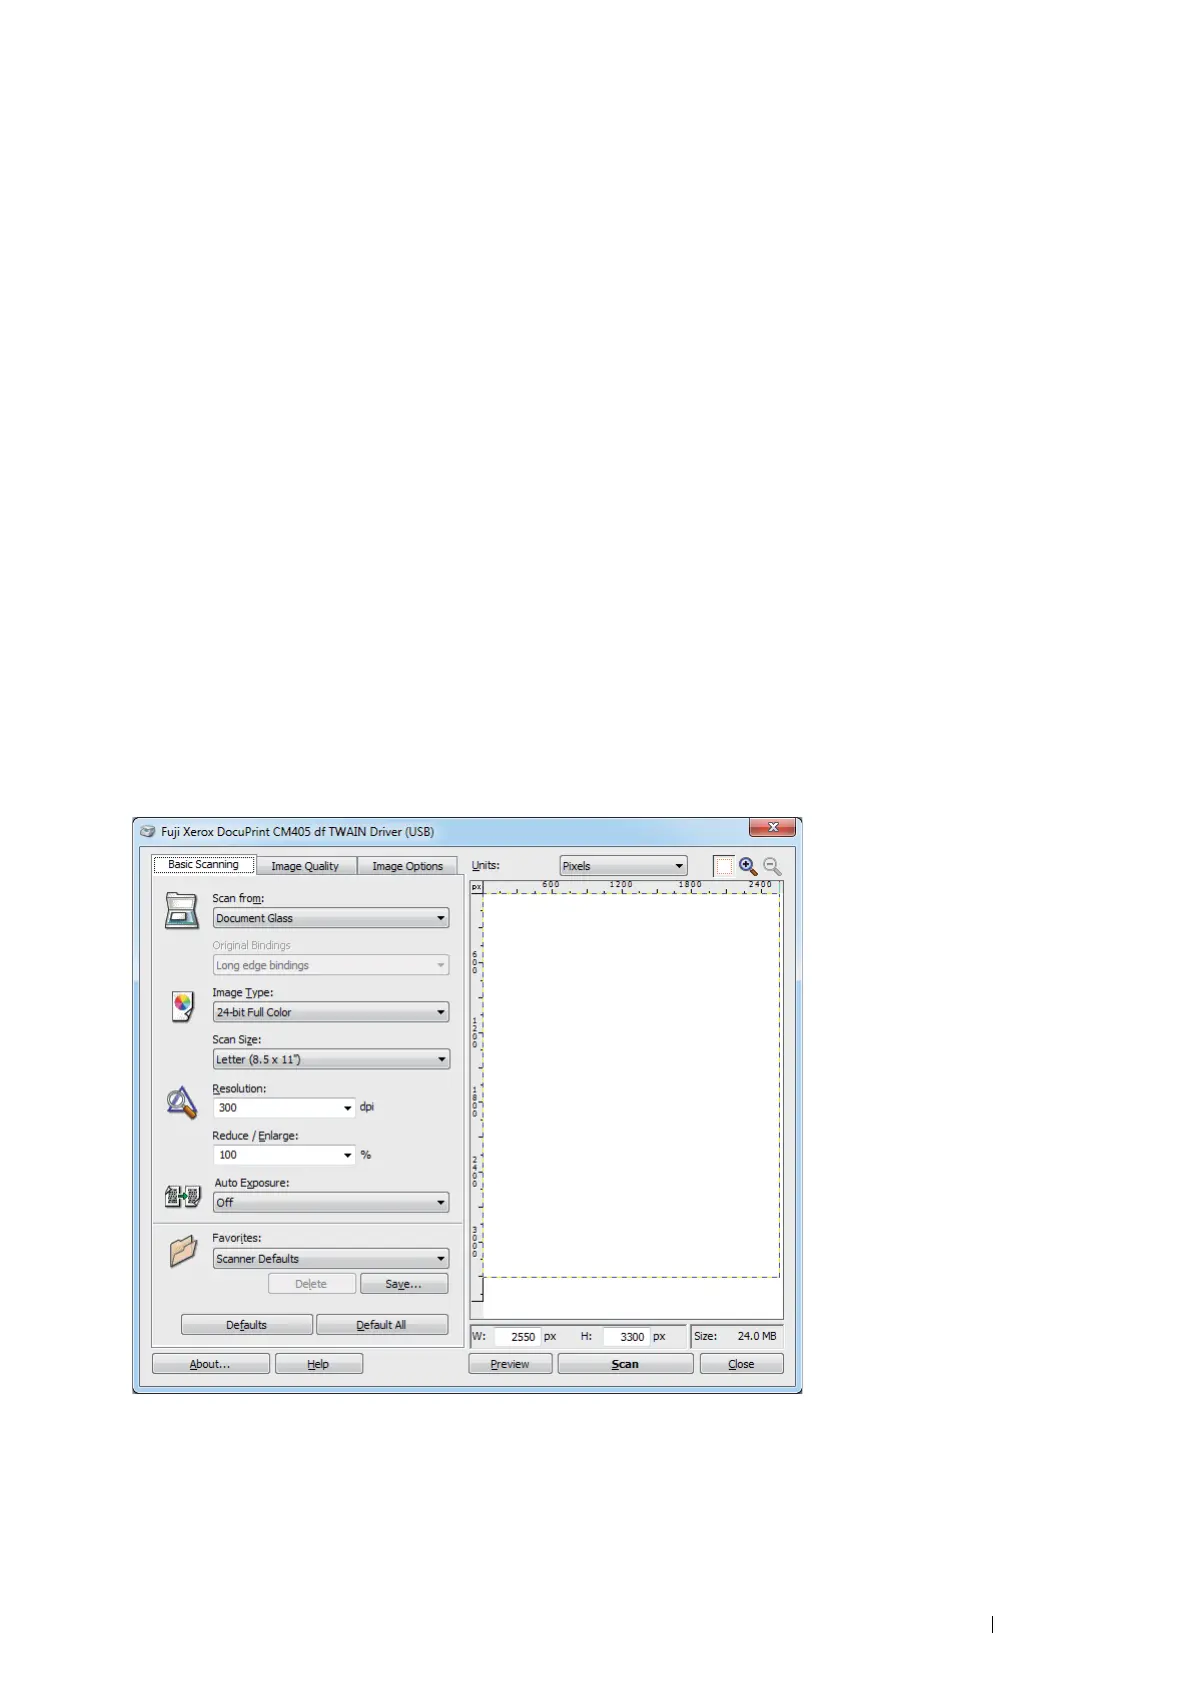
6 Select your scanning preferences and click Preview to display the preview image.
NOTE:
• Preview is grayed out and disabled when you select Document Feeder from Scan from.
• The illustration may vary for different operating systems.
7 Select the desired properties from the Image Quality and Image Options tabs.
8 Click Scan to start scanning.
The scanned image file is generated.

 Loading...


