222
Program description - Teacher/pupil
Wireless HoTT system
Wireless operation of the mc-16 HoTT and mc-
20 HoTT trainer mode system is also possible. To do
so, the teacher transmitter must be “connected” to
a pupil transmitter as described below. Prior to this,
however, the training model’s receiver must be bound
to the PUPIL transmitter. This configuration is possible
between transmitters which have the “BIND:” option in
the »Teacher/pupil« menu.
Preparing for training mode
Teacher transmitter
The training model must be programmed completely,
i. e. with all of its functions including trims and any
mixer functions, in one model memory of the HoTT
teacher transmitter.
The model to be used for training must
therefore be under the complete control of
the teacher transmitter.
mc-16 Firmware up to V 1.002
mc-20 Firmware up to V 1.019
The nal step in preparation, however, is to bind
the training model to the pupil transmitter. For
a detailed description of the binding process,
please consult pages 80 and 90.
mc-16 Firmware V 1.003 or higher
mc-20 Firmware V 1.020 or higher
The training model remains bound to the teacher trans-
mitter.
Important note:
Completely independent being bound to the
pupil transmitter of the relevant provisions of
the teacher transmitter, the training model
MUST always be bound to a student type transmitter
mx-10 HoTT with firmware version V 1a20, . In addi-
tion, it is imperative for proper training operation that
the model memory of the Teacher transmitter used to
train are deleted in the line “module” of the menu
“Basic adjustment model”, page 79 and 89, the right of
“HOTT” any particle receiver bonds. Is “n / a” regis-
tered so in the two values fields over BD1 and 2
respectively.
Pupil transmitter
If you are using an “
mc” or “mx” or “mz” series
transmitter, it is best to activate a free model memory
with the required model type (“Fixed-wing” or “Heli”).
Assign the model name “Pupil” and set up the stick
mode (mode 1 … 4) and “Throttle (or collective pitch)
min. forward/back” to suit the pupil’s preferences. All
other options are left at their default values. All other
settings, including all mixer and coupling functions, are
confi gured exclusively on the teacher transmitter, which
in turn transmits them to the model.
When assigning control functions, the usual conven-
tions must be observed:
Channel Function
1 Motor throttle/collective pitch
2 Aileron/roll
3 Elevator/pitch-axis
4 Rudder/tail rotor
If other control functions are to be transferred to the
pupil transmitter in addition to the functions of the two
dual axis sticks (1 … 4), access the »Control adjust«
menu in the pupil transmitter and assign those inputs
which correspond to enabled function or transmitter
control inputs 5 … max. 12 as shown in the »Teacher/
pupil« menu of the teacher transmitter. Afterwards, as-
sign the operating elements appropriately.
Important:
If you should forget to assign a transmit-
ter control on the pupil side, then the
affected servo or servos will remain in the
centre position when the transfer is made to the
pupil transmitter.
Preparing the teacher and pupil transmitters
Once you have bound the training model to the pupil
transmitter, now switch on the teacher transmitter. On
both transmitters, use the selection keys on the left or
right four-way button, to page to the »Teacher/pupil«
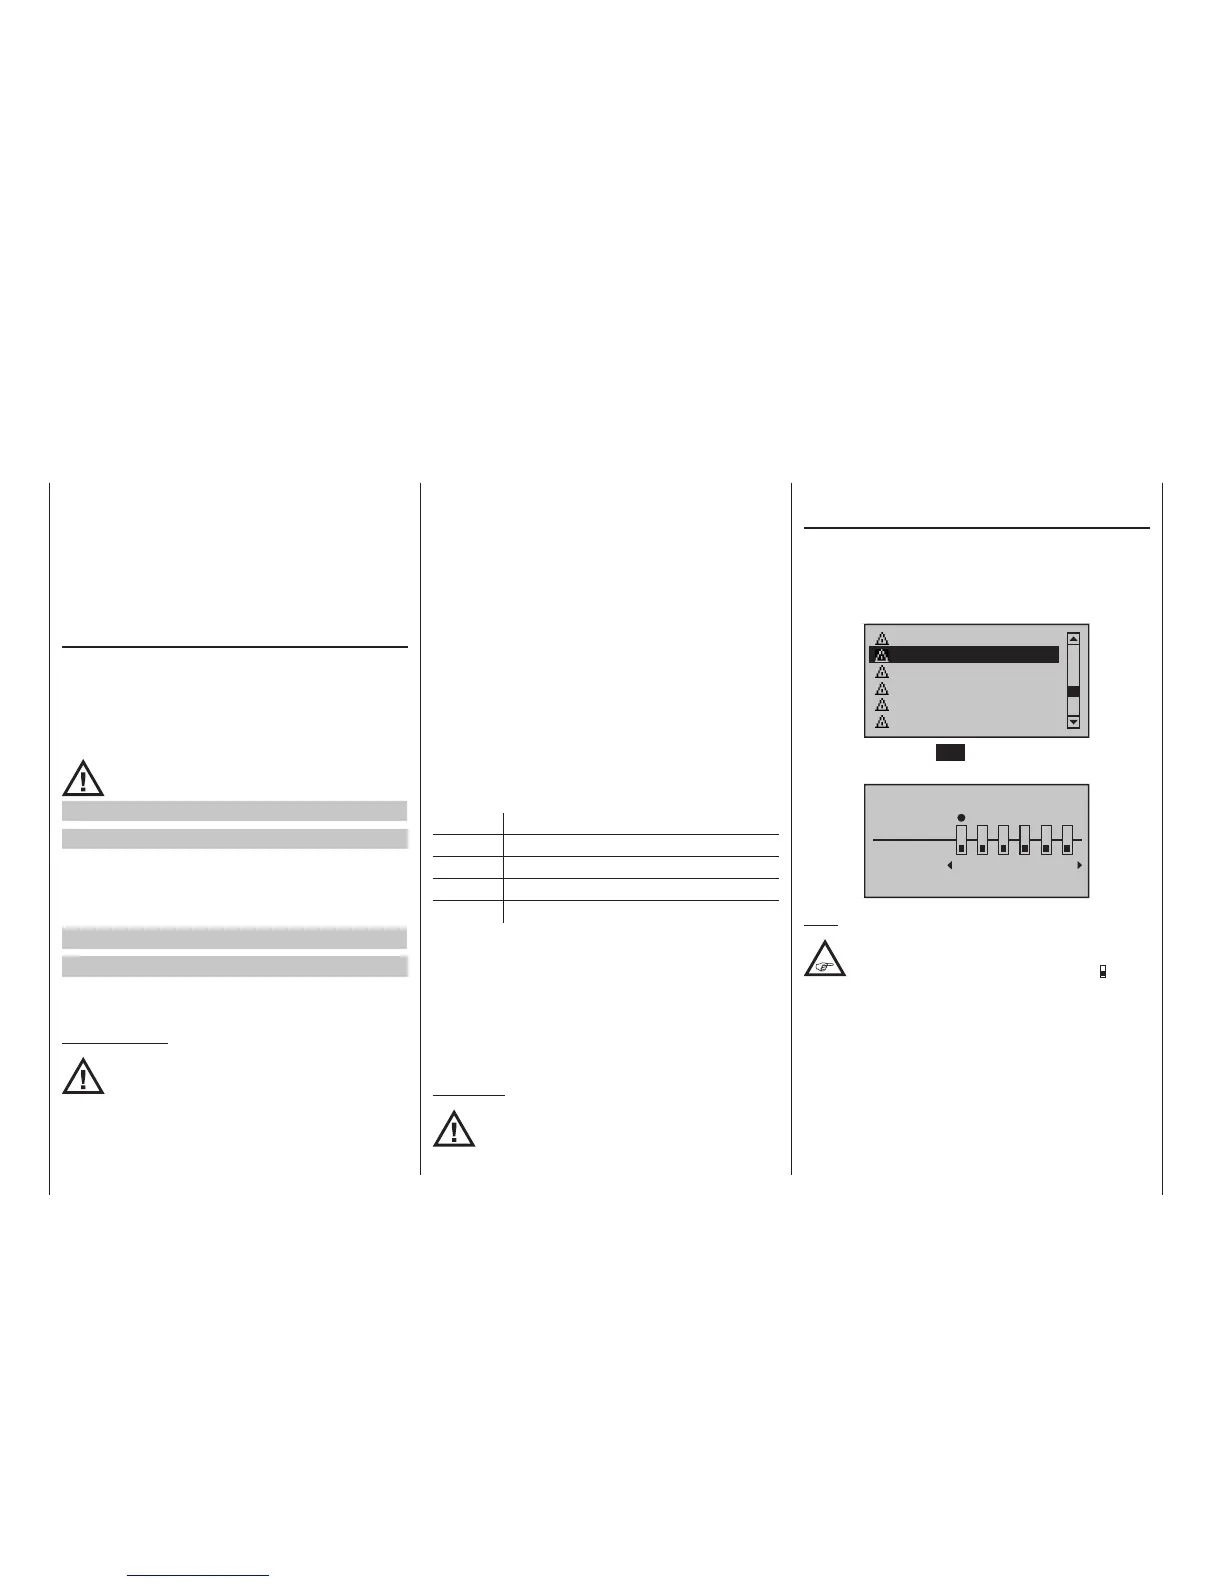
menu option on the multi-function menu:
Tx. output swap
Telemetry
Fail-safe adjust
Profi trim
Trim memory
Teacher / pupil
Briefly tap the centre SET key of the right four-way but-
ton to open this menu option:
Teacher / Pupil
Pupil
Teacher
2 3
4
5
BIND:SW: –––
1
n/a
6
Note:
The screen image shown above shows the
menu in its initial state: No transmitter con-
trols have been released to the pupil (
) and
no switch has been assigned (“SW: ---” bottom left in
the screen image).
Pupil transmitter
Use the selection keys on the left or right four-way but-
ton to move the marker frame to the “BIND” input field.
If there is a switch shown at the right of “SW:” then this
must first be erased, see screen image:

 Loading...


