310
Programming examples - Control of temporal processes
Control of temporal processes
using time delay and curve mixers
»Mix-only Channel« (page 212)
… of the selected control channel, “9” in this case, is
set to “only”:
MIX-only channel
only
normal
7 8 9
10
11
12
It is mandatory that this is set to “only (MIX)”, because
the control curves of the curve mixers described in the
following example only function on the output of the
same channel as desired if there is no direct connec-
tion between the control and output! Only then can the
linear control signal be manipulated almost arbitrarily
around a curve mixer and to the appropriate output.
Therefore, in the next step, switch to the menu …
»Free mixers« (beginning on page 201)
… and program a curve mixer for the same channel,
e. g. from “9” to “9”:
ty
fr
to
M8
C9
C10
??
??
9
9
C11
C12
??
??
??
??
??
??
On this second screen the desired path of the control
curve is then set, whereby the following examples
should only be “food for thought” for the design of your
own control curves.
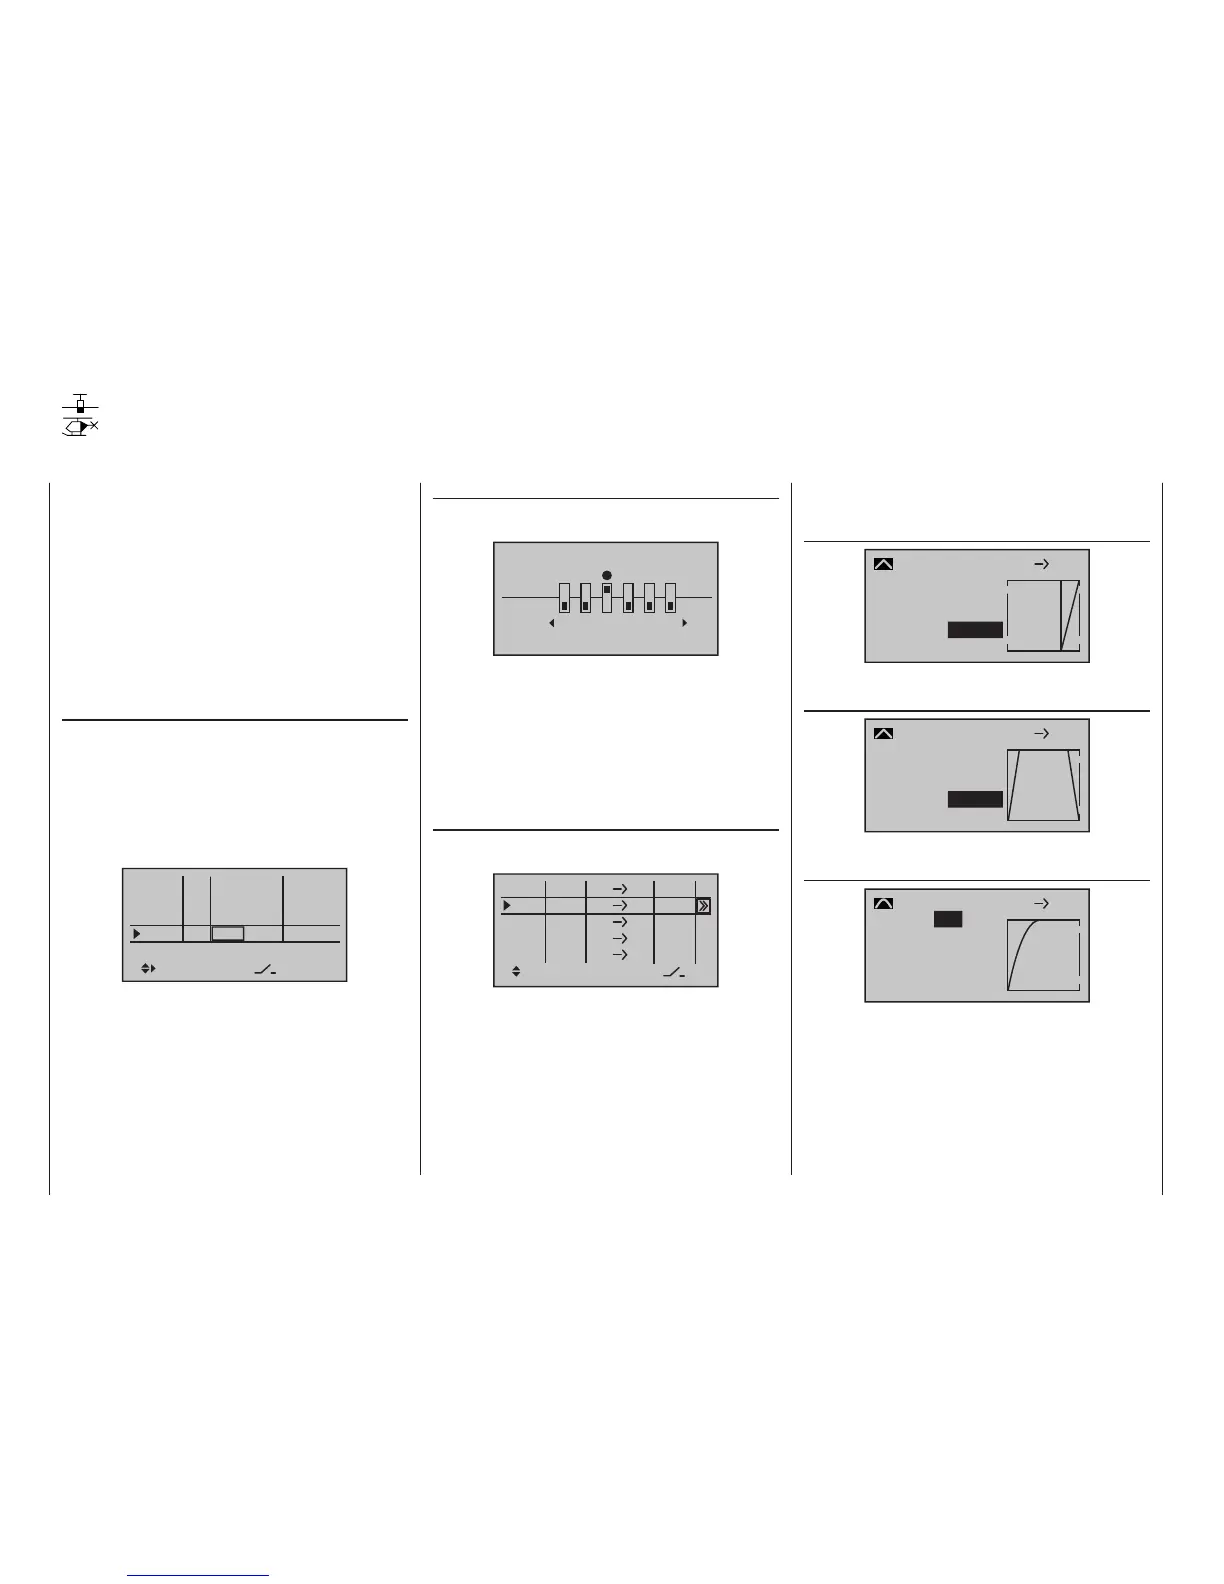
For example, the control curve could be for …
… delayed lighting of a headlight after the begin-
ning of the extension of the landing gear:
+50%
–100%
Input
Output
Point
1
C.Mix 9
normal
Curve
off
9 9
–100%
… the control of a landing gear ap which closes
again after the landing gear is extended:
–100%
–100%
L
normal
9 9
–100%
Input
Output
Point
C.Mix 9
Curve
off
… a smooth motor start-up or the extension of a
self-launch …
–100%
–100%
L
normal
9 9
–100%
on
Input
Output
Point
C.Mix 9
Curve
… triggered by the same switch, but with a de-
layed startup of the drive motor connected to
Output 10:
An interesting, but little known, facility included in the
software of the »MIX-only channel« and «Channel
sequencer« options, of the mc-20 HoTT transmit-
ter, is the ability to set up virtually any servo movement
to last up to 9.9 seconds via a switch, in addition to the
features available in the »Channel sequencer« menu;
see page 254.
The programming for this should be shown on the
basis of some examples in the following. Additional
applications can certainly be found once you become
familiar with these capabilities.
The programming is begin in the menu …
»Control adjust« (page 112 or 116)
… and in order to be able to approach any point of the
control curve during the programming, first assign one
of the proportional controls to the desired control chan-
nel – in this example the side-mounted left proportional
slider “Lv1” to the Input 9. However, leave the standard
default “GL” in the “typ(e)” column so that this setting
is effective for all flight phases analogously to the free
mixers to be programmed in the following:
In6
offset
0%
0%
0%
–––
0%
In7
In8
In9
–––
–––
GL
GL
GL
GL
typ
normal
fr
fr
fr
–––
Lv1
SEL
However, if necessary you can create phase-specific
sequences using the “PH” option in the »Control ad-
just« menu, and the »Mix active / phase« menu; see
page 211.
The input of a time delay in the “- time +” column most
right should also be dispensed with initially:
Then in the menu …

 Loading...


