164
Installation
8.4.3.3
CAUTION OF THE PRESSURE BY CHECK JOINT
When the pressure is measured, use the check joint inside
the unit, as shown below.
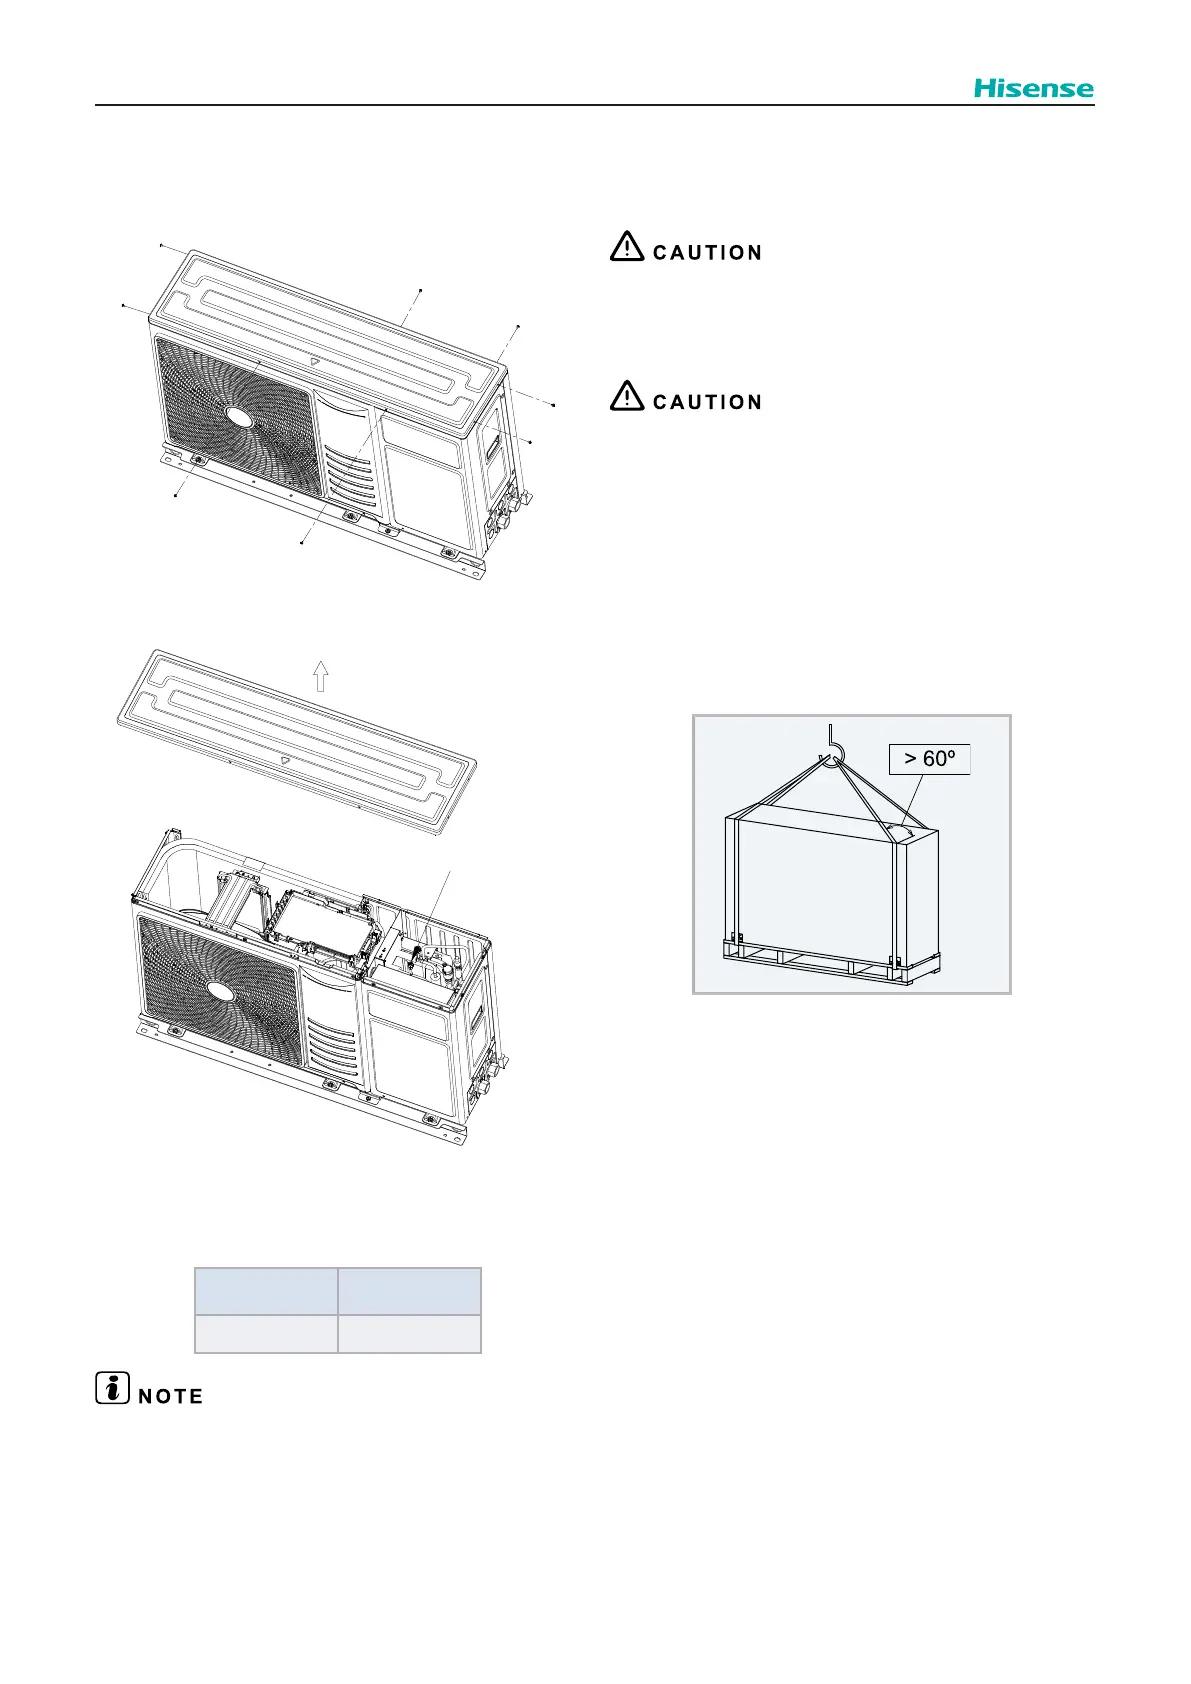
Step1: Remove the screws(8 pc) around the top cover.
Check joint
Step2: Remove the top cover.
Step3: Connect the pressure gauge to the check joint
according to the following table because of high pressure
side and low pressure side changes by operation mode.
Check joint:
Cooling
operation
Heating
operation
Low pressure High pressure
Be careful that refrigerant and oil do not splash to the electrical parts
at removing the charge hoses.
8.4.4 TRANSPORTATION AND HANDLING
8.4.4.1
TRANSPORTATION
Transport the product as close to the installation location as
possible before unpacking.
Do not step on or put any materials on the product.
Apply two lifting wires onto the unit when lifting it by crane.
8.4.4.2
HANDLING
Do not step on or put any materials on the product.
Do not put any foreign material into the unit and check to
ensure that none exists in the unit before the installation and
When hanging the unit, ensure a balance of the unit, check
safety and lift it up smoothly.
Do not remove any packing materials.
Hang the unit under packing condition with two ropes.
does not lean.
Two or more personnel should be used to move the unit.
 Loading...