445
Hi-Therma Monobloc System (AHZ-044/080HCDS1)
2.4.5.2
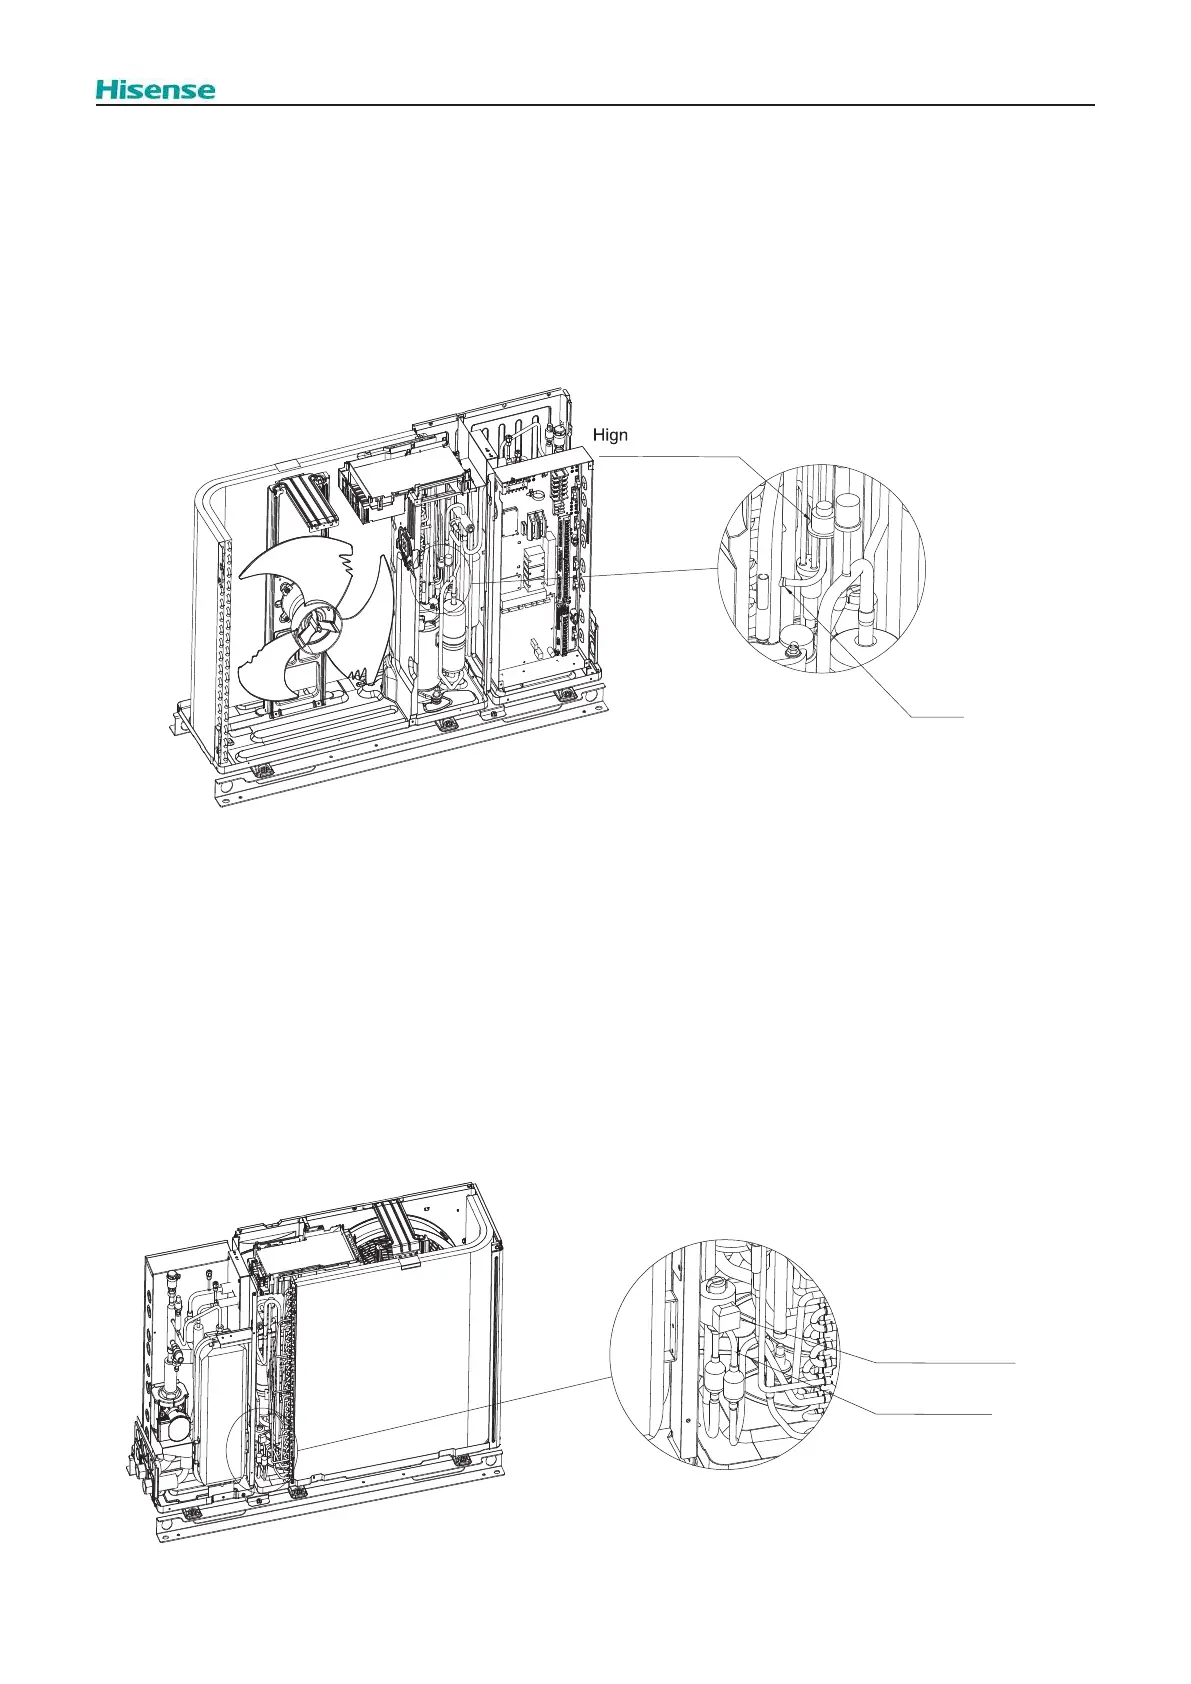
Removing the High Pressure Switch (PSH)
Remove the Upper cover, as explained in “2.3.1.1 Removing the Upper cover”
Remove the service cover, as explained in “2.3.1.2 Removing the Service cover”
Remove the electrical box cover, as explained in “2.3.1.3 Removing the Electrical box cover”
Remove the front cover, as explained in “2.3.1.4 Removing the Front cover”
Then,
1. Collect the refrigerant from the check joint.
2. Disconnect the PCN8 connector from the O.U. main PCB.
3.
4. Remove the High pressure switch with a blow torch.
2.4.5.3
Removing the Expansion Valve and Coil
Remove the Upper cover, as explained in “2.3.1.1 Removing the Upper cover”
Remove the Service cover, as explained in “2.3.1.2 Removing the Service cover”
Remove the Rear cover, as explained in “2.3.5 Removing the Rear cover”
Then,
1. Disconnect the CN5A connector at the O.U. main PCB.
2. Hold and disconnect the coil of the expansion valve. The expansion valve coil is equipped with a lock mechanism.
Ensure that the coil is locked when replacing.
3. When removing the electronic expansion valve coil, it is necessary to rotate and pull out the coil at the same time,
necessary to push the electronic expansion valve coil onto the electronic expansion valve body, and rotate the coil
mesh will be heard.
pressure switch
Brazing
Expansion valve coil
Expansion valve
 Loading...