Power Sensor Calibration Factor Entry
.f
‘_’
.$
”
,/
.“?
.~..~.,,
.
...,
;
.,...
_
_
. . .
...
5.
Press
@--+q
~~~~~~~~
~~~~~~~~~~
~~~~~~~~~~..;~~~~3..
i
“,..........
..,,..
~......,O
.
. . . . . . . .
. .
..L
.u;;:,..<<<.z.w;
.
.
. .
XL
. . . . .
zi
. . . . . .
_
_
i
_
i
. . . . .
i
. . . . . . . . . . . . . . . . . . . . . . . . . . . . . . . . . . . . . . .
.._.
__,
..;I.;.:.
..,
::::
..::.z
~~.:.:;.:~:.:.:.~.;..:.:::.:~:::.:::....
I
..:..
:::.: .:.:.:..“-
,::.:
::;
,&~.
y
. . . . .
..~..~~~‘~~~~~~~~~~~~~~~~~.,,~,~~.~~
~~:,~~~~~~;.~~~~~~:~~.
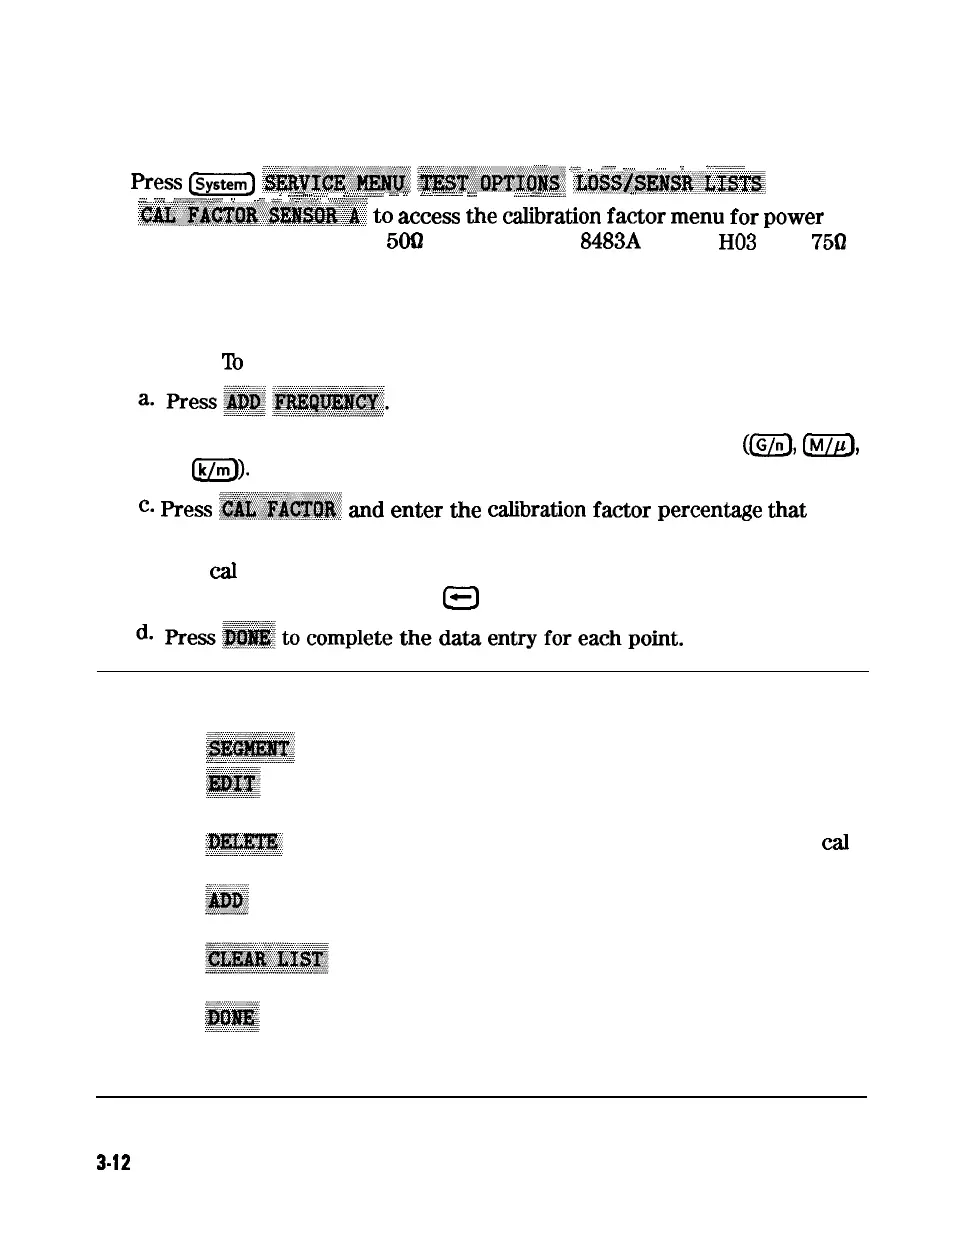
to
access
the
calibration
fador
menu
for
power
sensor A (HP 8482A for a
500
analyzer, or HP
8483A
Option
HO3
for a
75Q
analyzer).
6. Zero and calibrate the power meter and power sensor.
7. Build a table of up to 55 points (55 frequencies with their calibration
factors).
‘lb
enter each point, follow these steps:
b. Input a frequency value and then press the appropriate key
(@J,
m,
or
@I).
_..;
_
..,.
~
,/
._
. .
c.
Press
~.~~~.~~~~
ad
enter
the
cabration
fador
percentage
eat
corresponds to the frequency you entered.
The
cal
factor and frequency values are found on the back of the sensor.
If you make a mistake, press
a
and re-enter the correct value.
Note
The following terms are part of the sensor calibration menu:
allows you to select a frequency point.
allows you to edit or change a previously entered
value.
allows you to delete a point from the sensor
cal
factor table.
allows you to add a point into the sensor cal
factor table.
allows you to erase the entire sensor cal factor
table.
allows you to complete the points entry of the
sensor cal factor table.
3-12
Adjustments and Correction Constants