Chapter 10: M.A.R.S.
Recording
470/ 526 2.0 Eclipse User Guide
Track Arming
The next stage is to select which tracks you wish to record onto –
you could choose all 64 tracks, or a subset.
1. Using the page select buttons at the bottom right of the
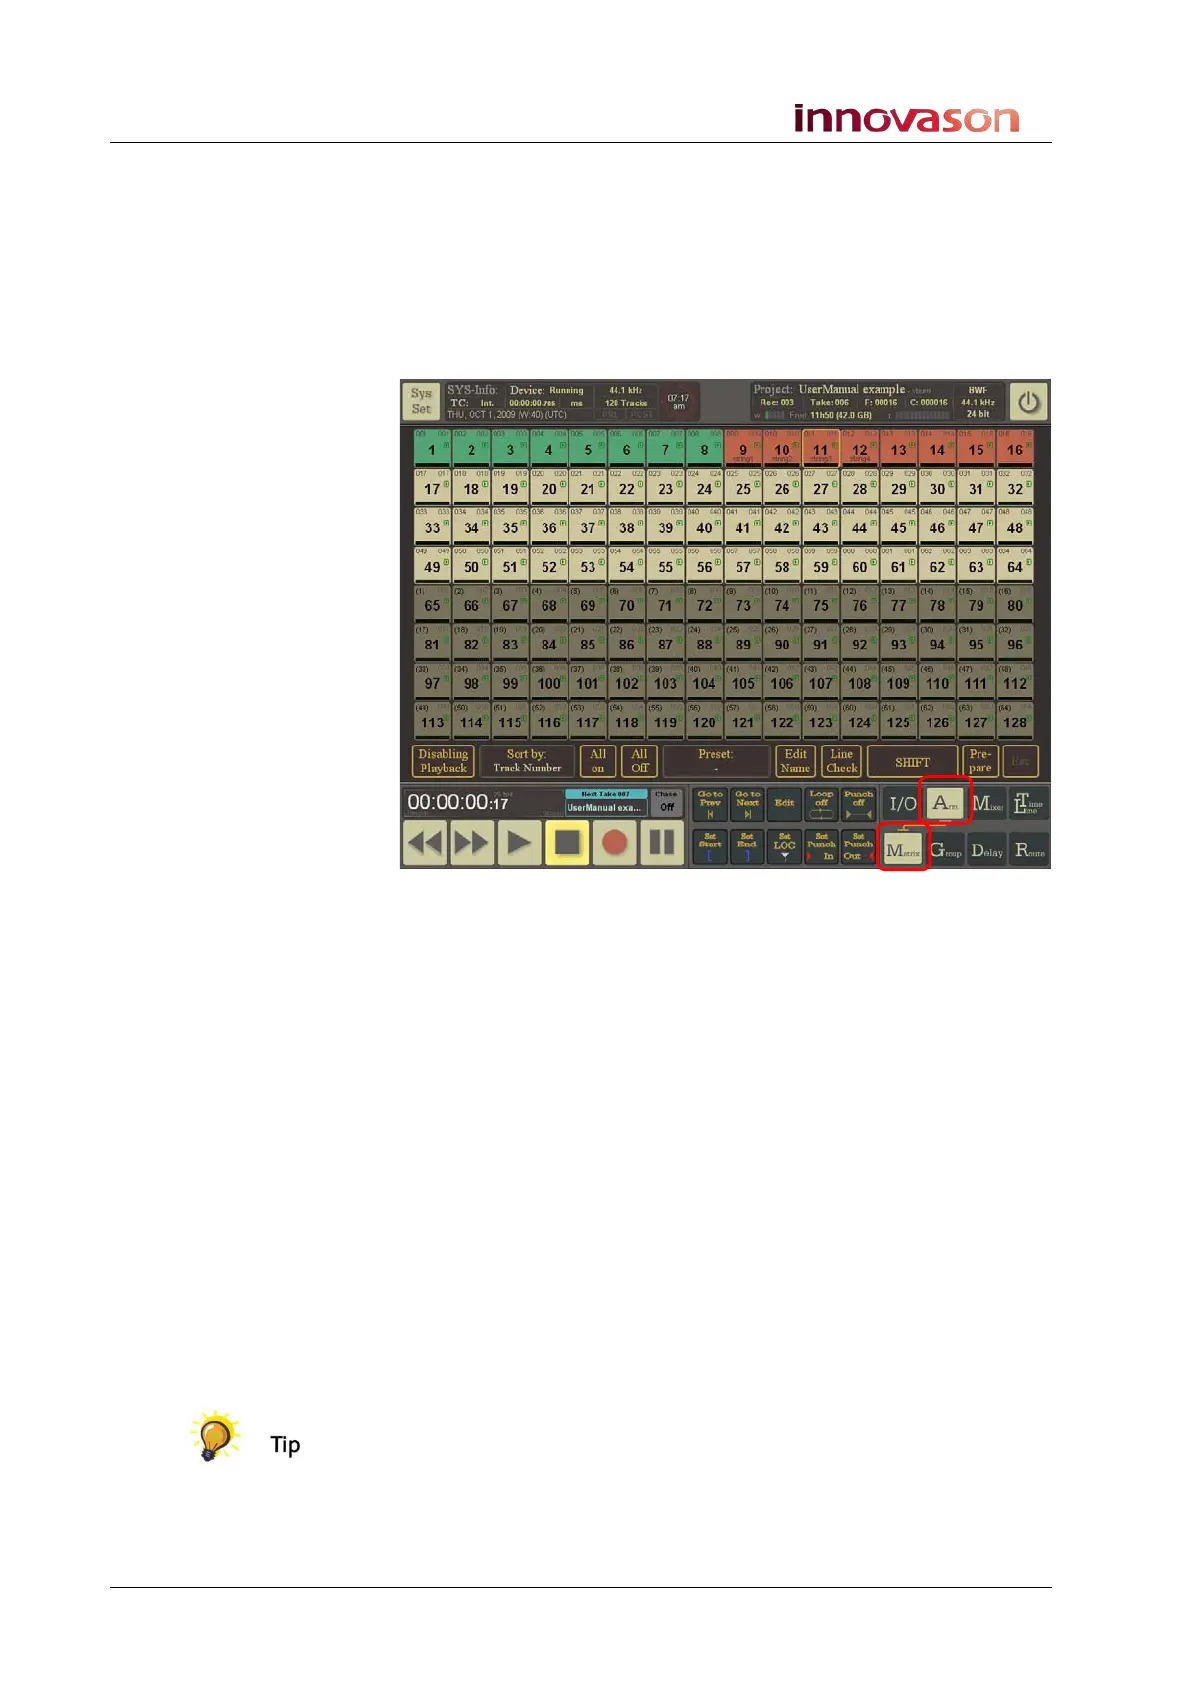
display, select Arm and Matrix:
The Arm -> Matrix page opens:
On your system all 64 track buttons should be white. The colour of
the track buttons indicates:
• White – no audio clips are present and the track is not
armed.
• Green – at least one audio clip is present on the track.
• Red – the track is armed for recording.
In our example, audio is already present on tracks 1 to 8, tracks 9
to 16 are record armed, and tracks 17 to 64 are empty.
2. Touch each of the track buttons you wish to record arm.
The button turns red when it is armed.
3. Select All on, below the track buttons, to quickly enable
record arming for all 64 tracks.
Note that when a track is record armed, it is automatically switched
to monitor incoming audio. Therefore, if audio is present on the
corresponding Ethersound channel, you will see the audio level in
the meter below each track button.
If you are going to export the recording to another system, then it
is a good idea to Label the M.A.R.S. tracks now. This way the clip
name will correspond to the track name. Eclipse provides a quick
way of transferring Labels from the console to M.A.R.S., see Page
475 for details. If you do not care about naming, then continue to
the next stage.