User Guide Chapter 5 Cues
Rev. 1.30.03.07.r1 Page 87
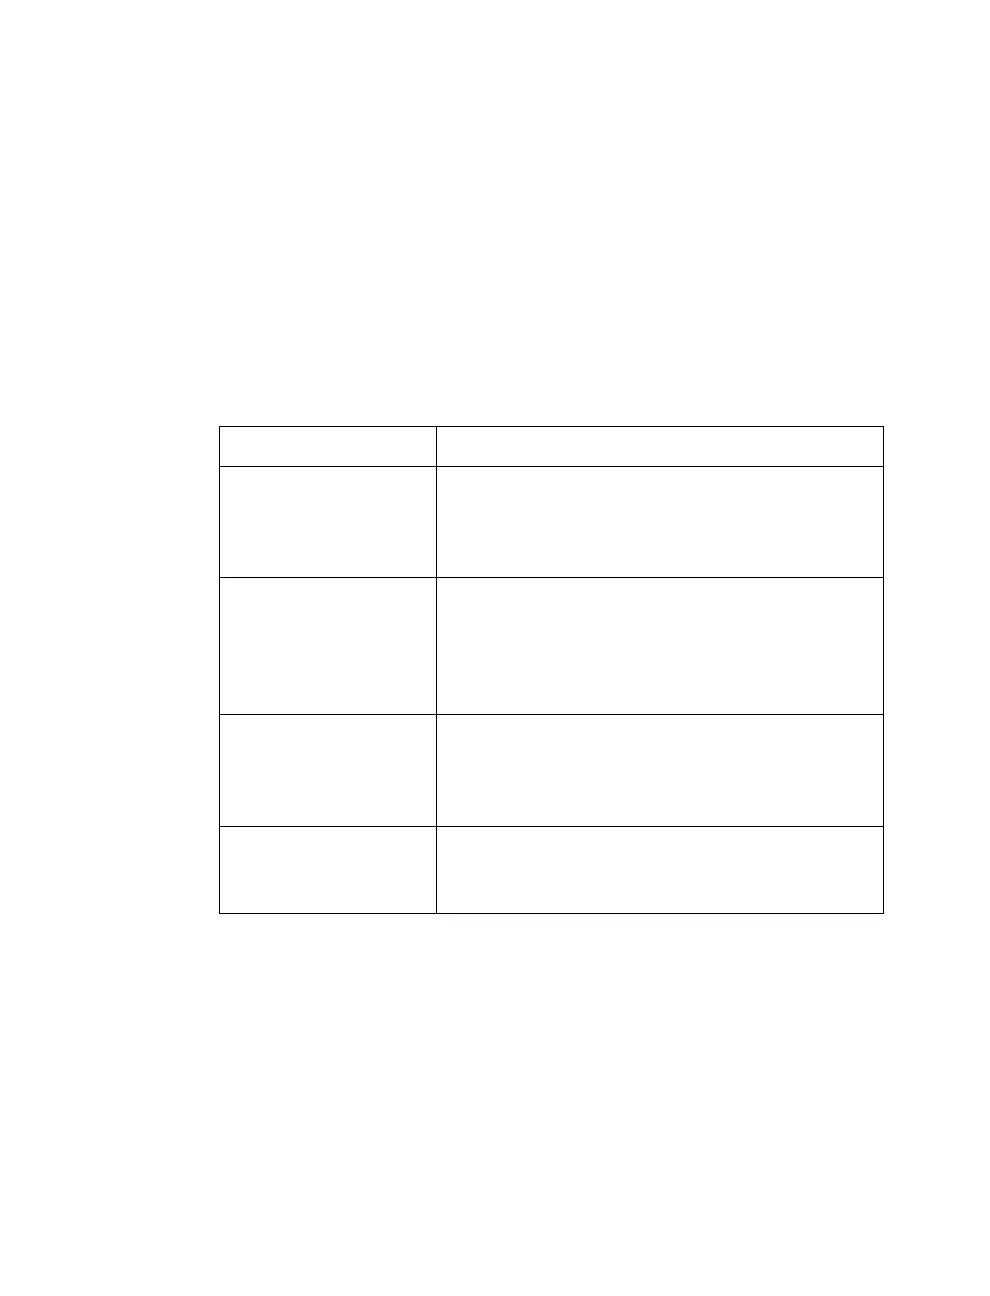
Navigating the Real Time Event sub-display
Use the arrow keys to move the cursor within the desired area of the Real
Time Events section of the display then press [ENTER]. This will open up a
pop-up display allowing you to add or edit the relevant information. Press
[ENTER] again to complete the assignment.
To select a menu item from the Real Time Menu section of the display use
the keypad to enter the menu item number. The cursor must first be placed
over an Event number (E #) for the Real Time Menu to be active; use the
arrow keys to move the cursor.
Descriptions of the Real Time Menu items follow:
Please see the following page for an example procedure where a cue is
assigned to be run automatically by using the Real Time Event Clock.
1. Clear Event Press [1] to delete a real time event.
2. Sort Table Press [2] to sort the real time events by time,
starting from lowest to highest. This is useful if
you have added or edited times and would like
to view the table chronologically.
3. Set System Day Press [3] to select the current day. A pop-up
menu of the days of the week will appear with
the menu item numbers 1 - 7 representing the
days of the week. For example, to set the
current day to Monday: Press [3] [2].
4. Set System Time Press [4] then enter the current time in 24 hour
clock format, (hhmmss: h = hour, m = minute,
s = sec.). For example, to set clock to 02:00pm
(14:00): Press [4][140000] [ENTER].
5. Scheduler This option must be selected to "ON" for the
real time event to execute. Press [5] to toggle
between "ON" or "OFF".