User Guide Chapter 9 Patching
Rev. 1.30.03.07.r1 Page 145
Dimmer Output Channel Level
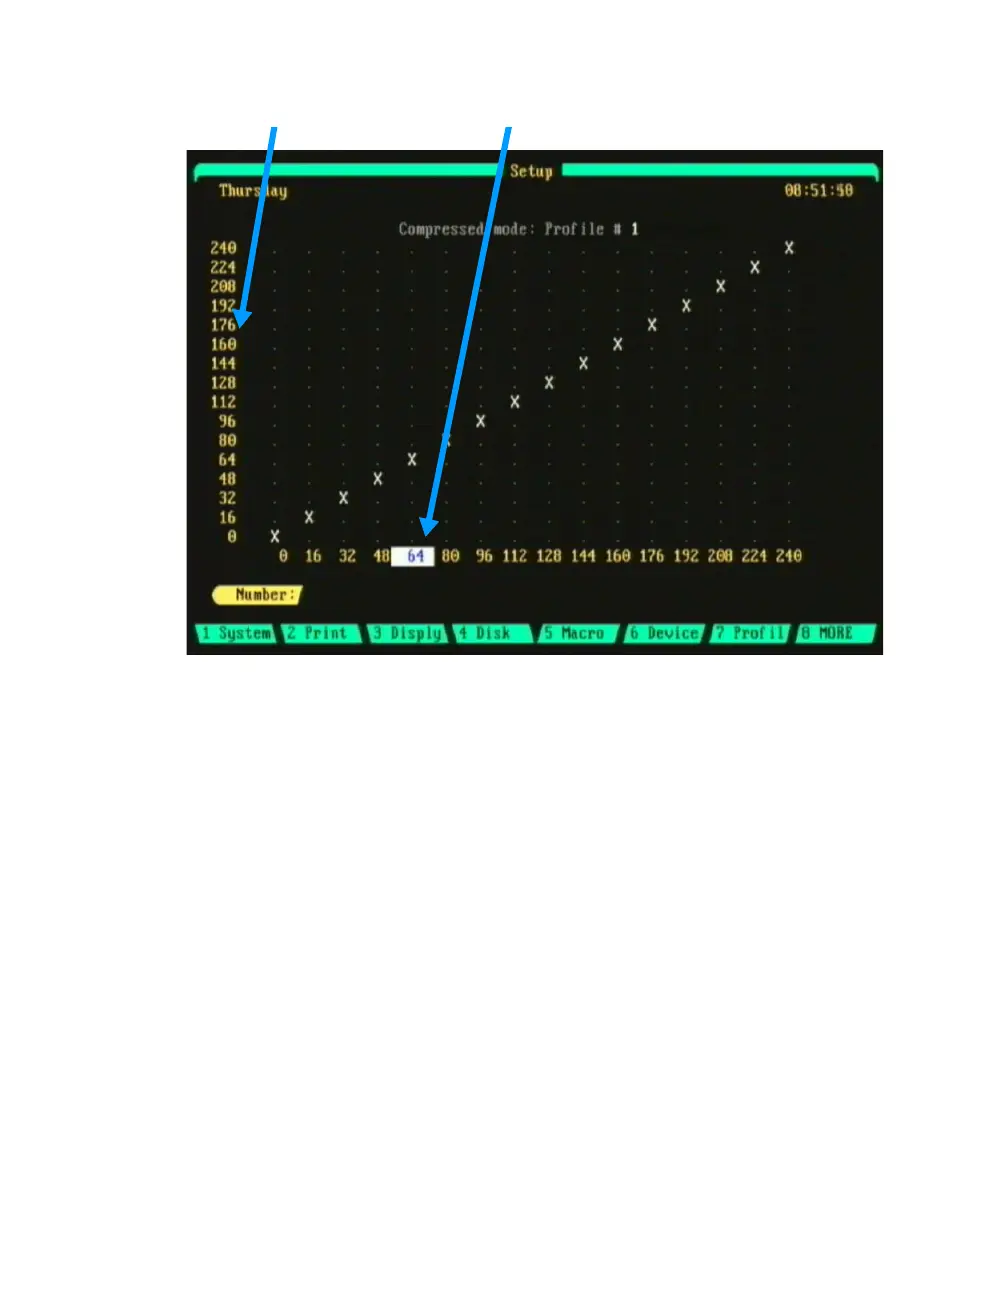
Figure 9.7 Profile Sub-Display
Navigating the Profile Sub-Display
Edits to profiles are made from the Profile sub-display of the Setup display.
The current profile for editing is shown at the top of the sub-display. Each
profile is divided into 16 equal sections (Compressed Mode, see below) and
numbered in increments of roughly 6.25%. Each 6.25% increment is called
a fade point.
The default curve (profile 0) is a straight line from 0 to 255 (though 240 is
shown, the step beyond which is not displayed is 255 meaning that at the
16 point, 6.25% of the total assigned output of the dimmer has been
achieved, at the 32 point, 12.5%, etc).
When the profile is assigned to a dimmer, the left column of numbers
represents the dimmer output and the bottom row of numbers represents
the channel level. Use the left/right arrow keys to move to the desired
channel level then use the up/down arrow keys to move to the desired
dimmer output level. See further below for an example procedure.