Diagnostic information 2-133
5026
Print quality—blank page
3
Check the high voltage contact from the
HVPS to the transfer module.
Is a problem found?
Replace the spring or the
transfer contact assembly.
Go to step 4.
4
Reseat the JHVPS connector.
Does this fix the problem?
Problem resolved. Go to step 5.
5
Replace the HVPS. See “High-voltage
power supply (HVPS) removal” on
page 4-123.
Does this fix the problem?
Problem resolved. Go to step 6.
6
Clean the printhead.
Does this fix the problem?
Problem resolved. Replace the printhead. See
“Printhead removal,
installation, and
adjustment” on
page 4-153.
Step Questions / actions Yes No
1 Is all the packing material for the
photoconductor unit in question removed?
Go to step 2. Remove the packing
material.
2
Replace the photoconductor unit for the color
in question.
Does this fix the problem?
Problem resolved. Go to step 3.
3
1. Enter the Diagnostics mode (turn off the
printer, press and hold buttons 3 and 6,
then turn on the printer).
2. Perform the appropriate cartridge drive
motor test for the missing color. See
“General motor tests procedures” on
page 3-10.
Did the motor run?
Go to step 4. Replace the EP drive
assembly. See
“Electrophotographic
(EP) drive assembly
removal” on page 4-98.
Step Questions / actions Yes No
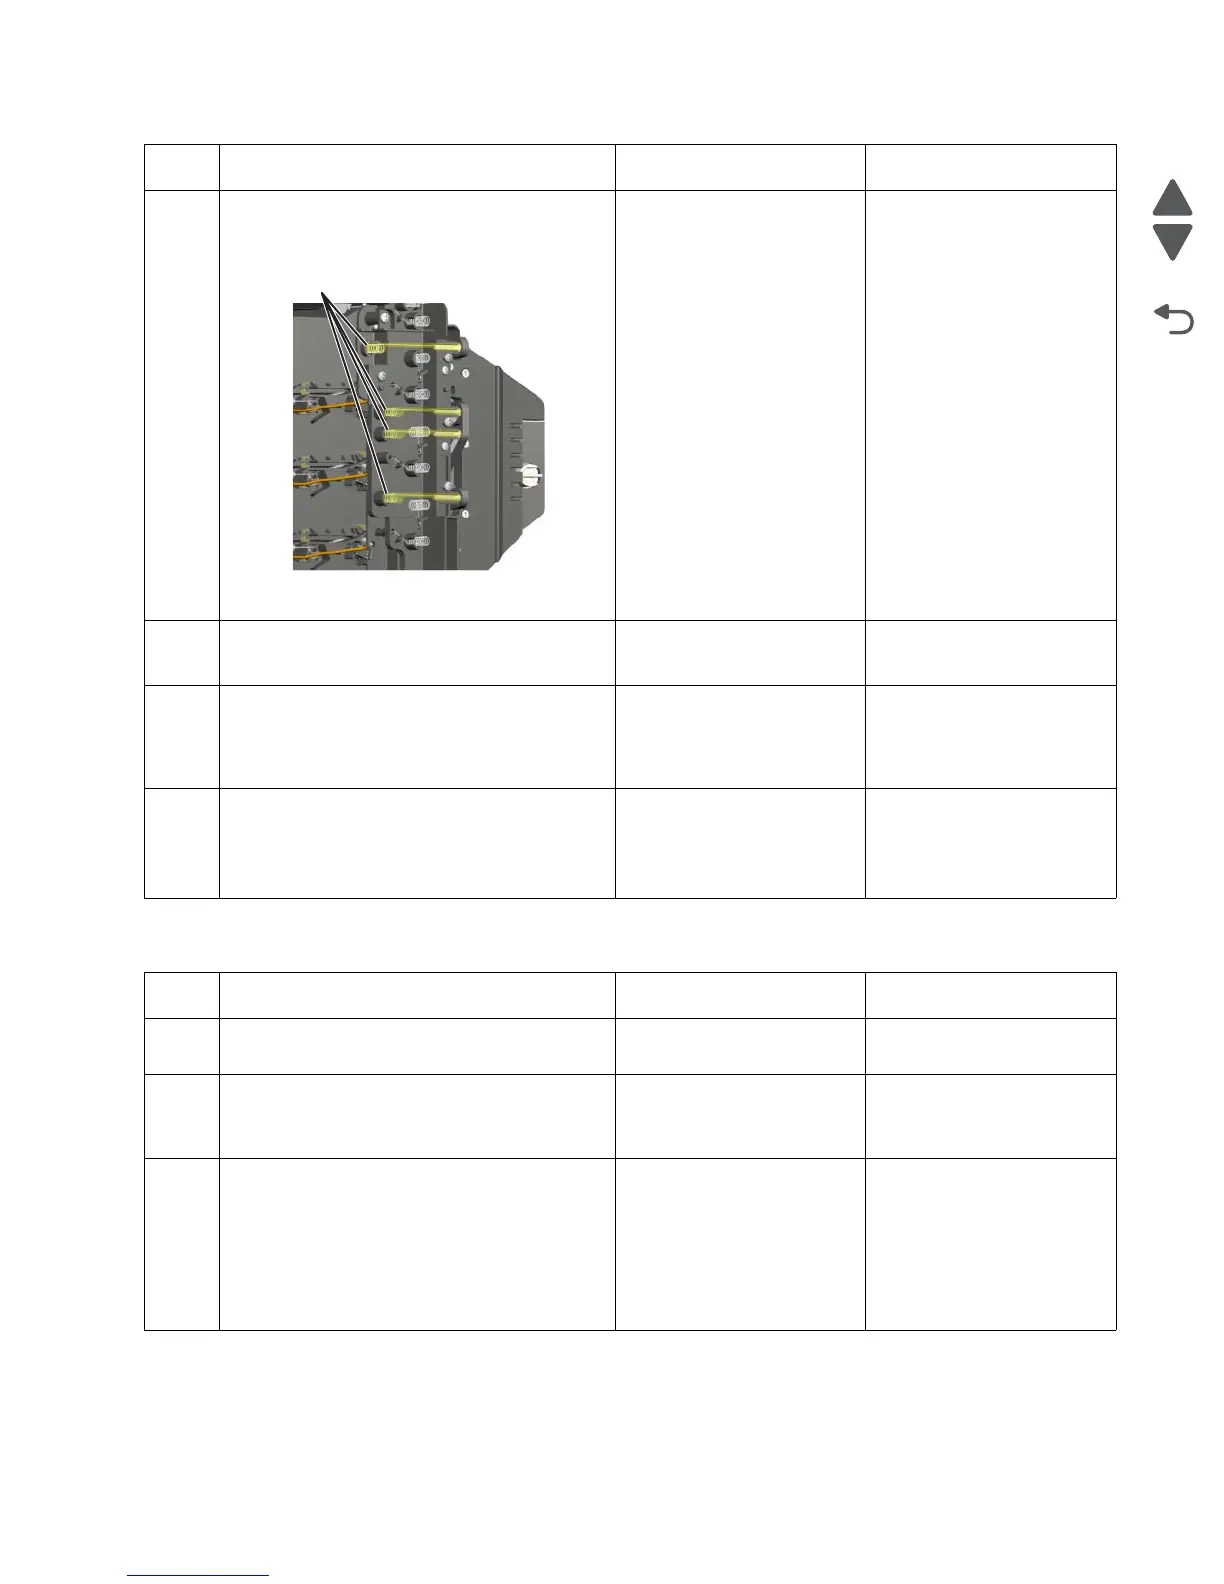
Transfer belt high voltage
path (typical 4X)