10 - 23
10.9.2 Enabling QT/QTc Monitoring
The QT monitoring function is disabled by default. Before you start QT monitoring, enable the QT function. To do
so, follow this procedure:
1. Select the QT numerics area, ECG numeric area, or waveform area to enter the ECG menu.
2. Select the QT tab→ select the Setup tab.
3. Switch on QT Analysis.
10.9.3 Displaying QT/QTc Numerics and Segments
To display QT/QTc numerics and Segments, follow this procedure:
1. Access Tile Layout by either of the following ways:
◆ Select the Screen Setup quick key → select the Tile Layout tab.
◆ Select Main Menu quick key → from the Display column select Tile Layout.
2. Click the parameter numeric area where you want to display the QT numerics, and then select ECG → QT/
QTc.
• QTc values are calculated based on the QT-HR, not the ECG HR. For more information, see
10.9.4Entering the QT View.
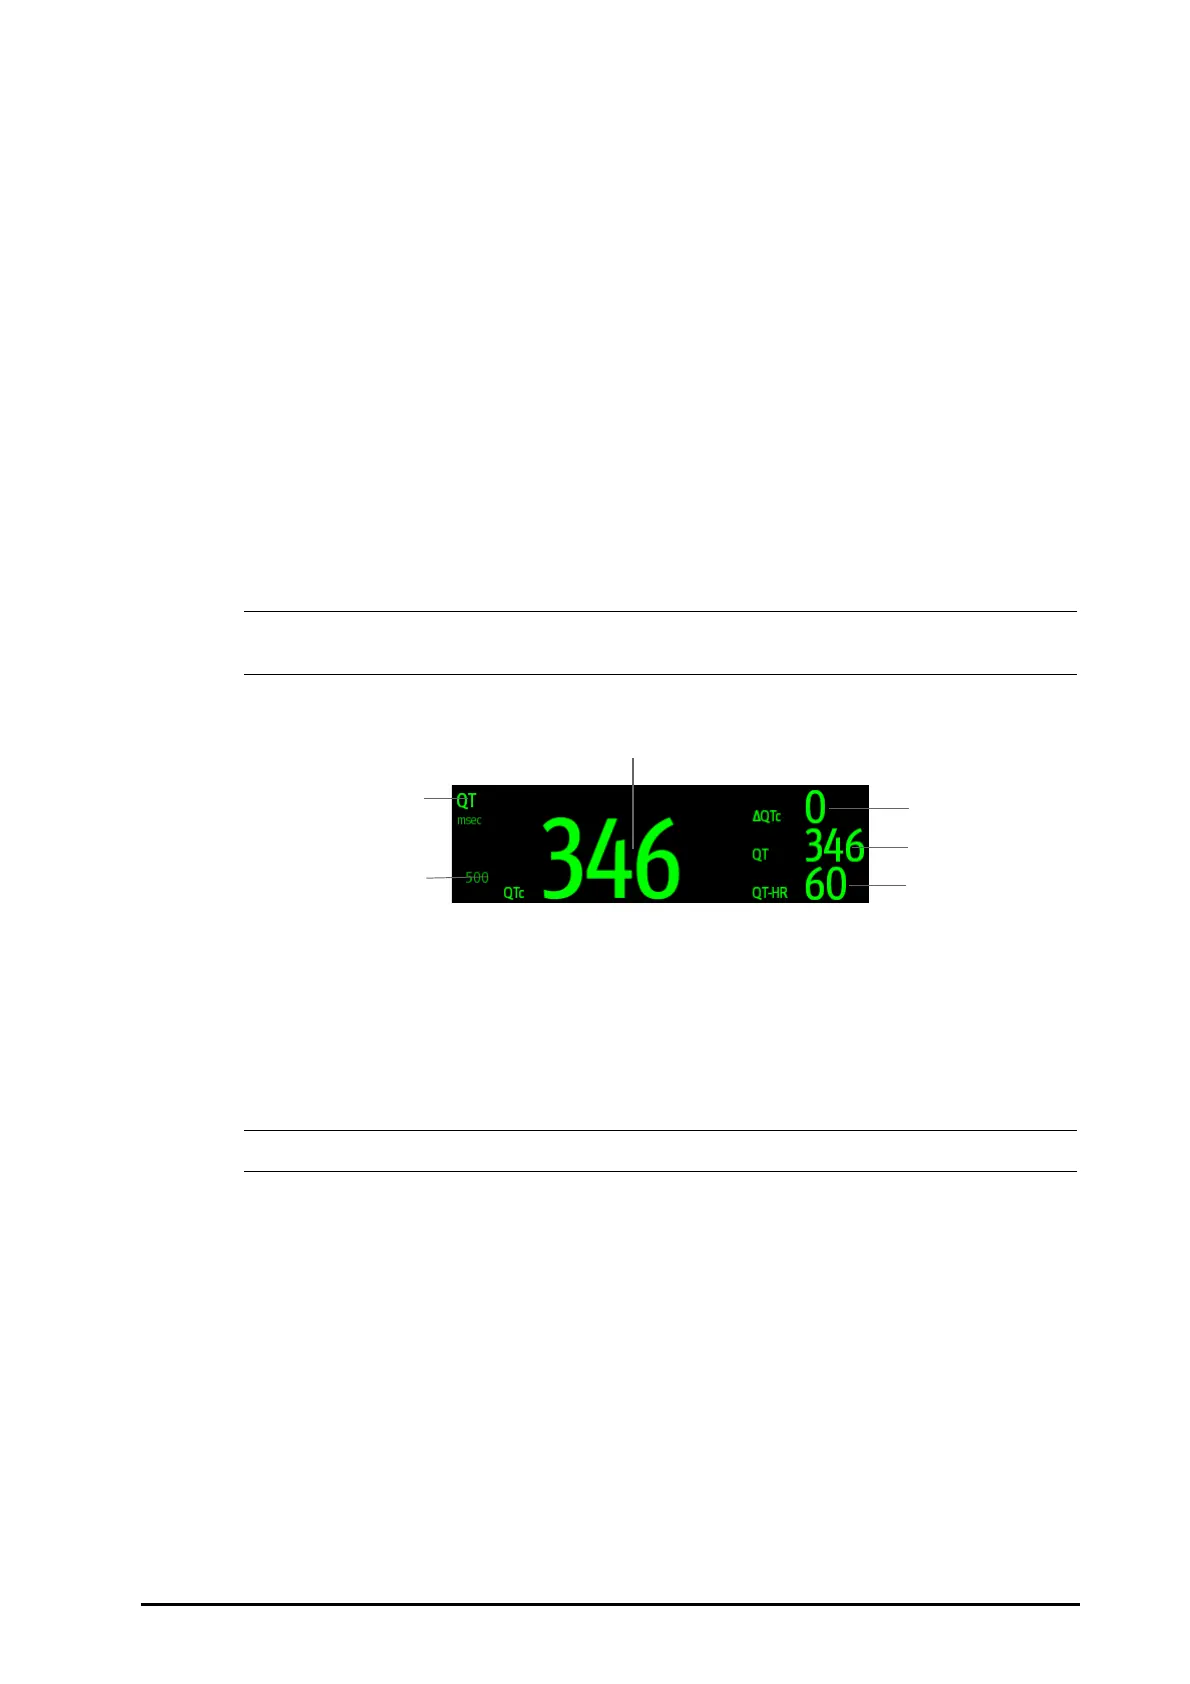
The following picture shows the QT numeric area. Your monitor screen may look slightly different:
• The display of the QT numeric area differs as related settings change.
10.9.4 Entering the QT View
QT View shows the current and baseline QT parameter values and waveforms. To enter the QT View, follow this
procedure:
1. Select the QT numerics area, ECG numeric area, or waveform area to enter the ECG menu.
2. Select the QT tab.
3. From the bottom of the menu, select QT View.
(1) QTc alarm limit (if QTc alarm is off, the alarm off symbol is displayed)
(2) Parameter label (3) QTc value
(4) QTc value (the difference between the current and baseline QTc values)
(5) QT value (6) QT-HR value