Dust Control/DustGuard
™
Systems 93Service Manual – CS7000
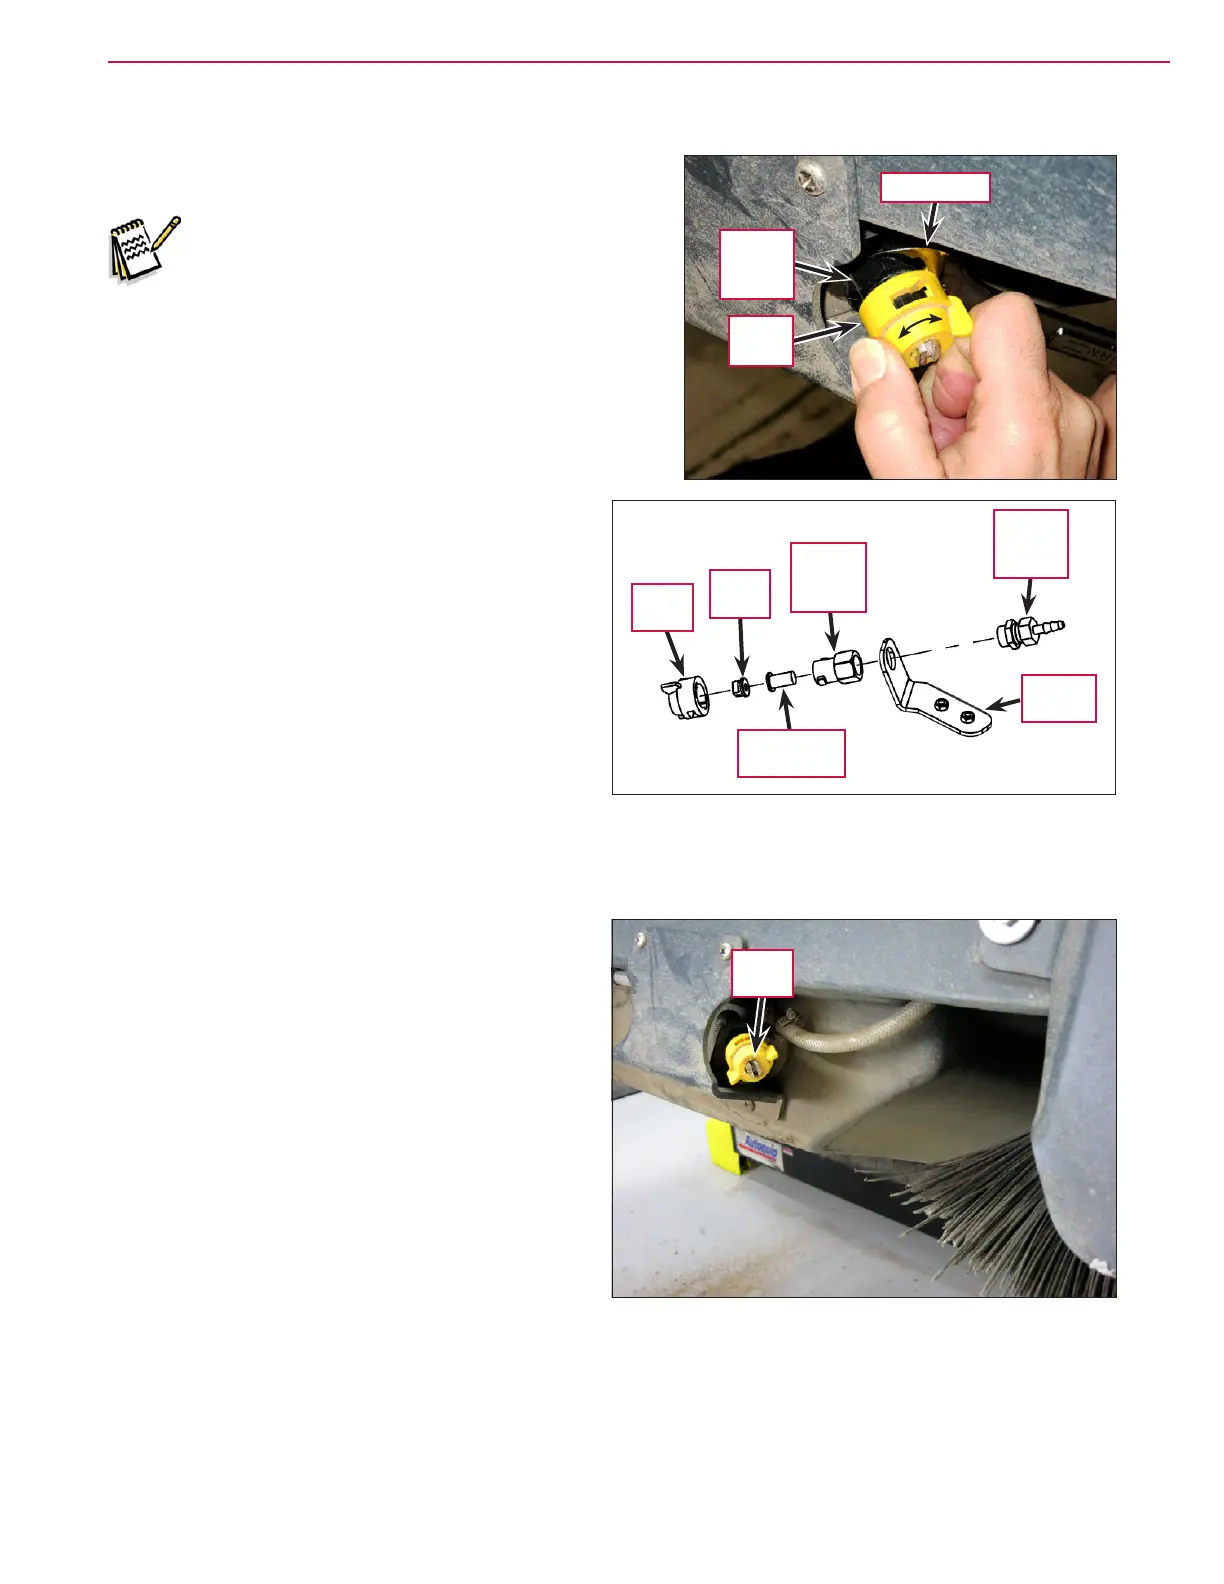
To Clean the DustGuard™ Spray Nozzles
1. Raise the hopper slightly if desired for easier access
to the DustGuard™ nozzles.
Note: Place a suitable container underneath the
nozzles to catch any water that may leak
from the hoses.
2. Hold the Plastic Nozzle Adapter with a 7/8” Wrench to
keep it from rotating in the Nozzle Bracket when you
remove the Nozzle Cap. This will maintain the correct
spray pattern orientation of the Spray Nozzle.
3. Rotate the Nozzle Cap one-quarter turn
counterclockwise (as viewed from the front of
the machine) to remove the Nozzle Cap, Spray
Nozzle
and Check Valve Strainer from the Plastic
Nozzle Adapter
.
4. Rinse the Nozzle Cap, Spray Nozzle and Check
Valve Strainer
in clean water to remove any
accumulated dirt or sediment. If necessary,
rinse or soak the components in vinegar or
other commercial cleaner to remove any
mineral deposits.
5. Reassemble the DustGuard™ nozzles by
following the above steps in reverse order.
To Adjust the DustGuard™ Spray Nozzles
The Spray Nozzles should be approximately 10
to 20 degrees from vertical as shown in order to
spray the water evenly top to bottom in front of
the side brooms. (Note that the hopper has been
raised slightly in the adjacent photo.) The spray
pattern should wet the oor across the whole
width of the side broom. If the spray pattern is not
correct:
1. Carefully rotate the Plastic Nozzle Adapter with
a 7/8” Wrench to orient the Spray Nozzle.
2. After you rotate the Plastic Nozzle Adapter,
make sure the Brass Nozzle Adapter is holding
Plastic Nozzle Adapter securely in the Nozzle
Bracket
. Tighten the Brass Nozzle Adapter to
the Plastic Nozzle Adapter as necessary.
Plastic
Nozzle
Adapter
7/8” Wrench
Nozzle
Cap
Nozzle
Cap
Check Valve
Strainer
Plastic
Nozzle
Adapter
Nozzle
Bracket
Brass
Nozzle
Adapter
Spray
Nozzle
Spray
Nozzle
 Loading...