Dust Control/DustGuard
™
Systems 96Service Manual – CS7000
Removal and Installation
Warning! Before removing or reinstalling any machine components, make sure the key switch
is off, the key is removed from the machine and the parking brake is engaged.
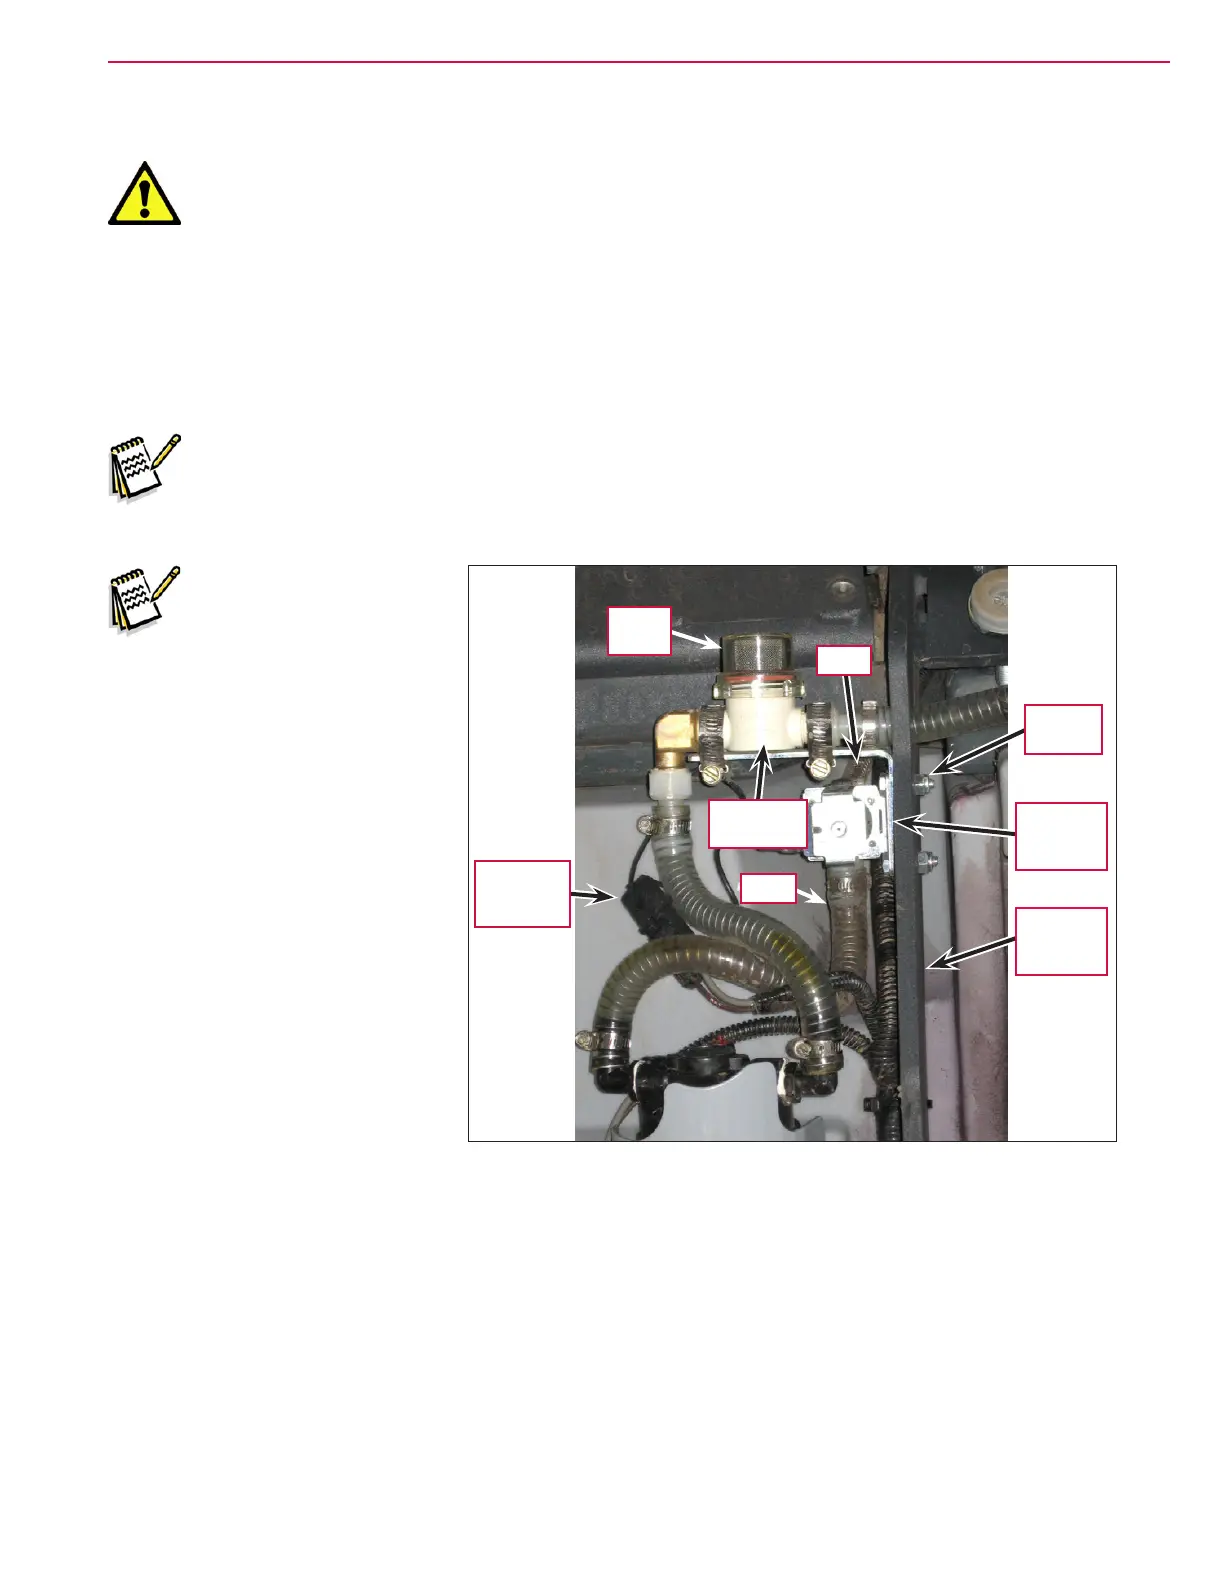
To Remove and Reinstall the DustGuard™ Solenoid Valve Assembly
1. Drain the water from the upper hopper. Note that you can do this one of several ways. The most
convenient way is to remove the Strainer Cover and screen and drain the upper hopper through the
DustGuard Strainer.
Note: Place a suitable container underneath the upper hopper to catch the water from the hopper
reservoir.
2. Turn the key switch on, raise the hopper and engage the prop rod, then turn off the key switch.
Note: Place a suitable
container underneath the
Solenoid Valve Assembly
to catch any water
that may leak from the
Solenoid Valve Assembly
and hoses.
3. Disconnect the Solenoid
Electrical Connector
.
4. Remove the two Nyloc™ Nuts
holding the Solenoid Valve
Assembly
to the Hopper Lift
Weldment
.
5. Disconnect the two Hoses and
remove the Solenoid Valve
Assembly
from the machine.
6. Reinstall the Solenoid Valve
Assembly
by following the
above steps in reverse order.
Solenoid
Electrical
Connector
Hose
Hose
Nyloc™
Nut (2)
Solenoid
Valve
Assembly
Hopper Lift
Weldment
Strainer
Cover
DustGuard
Strainer
 Loading...