Enable or disable USB
Introduction
When you want to use USB as a location you have to make settings for USB first. You can make
the settings in Océ Express WebTools.
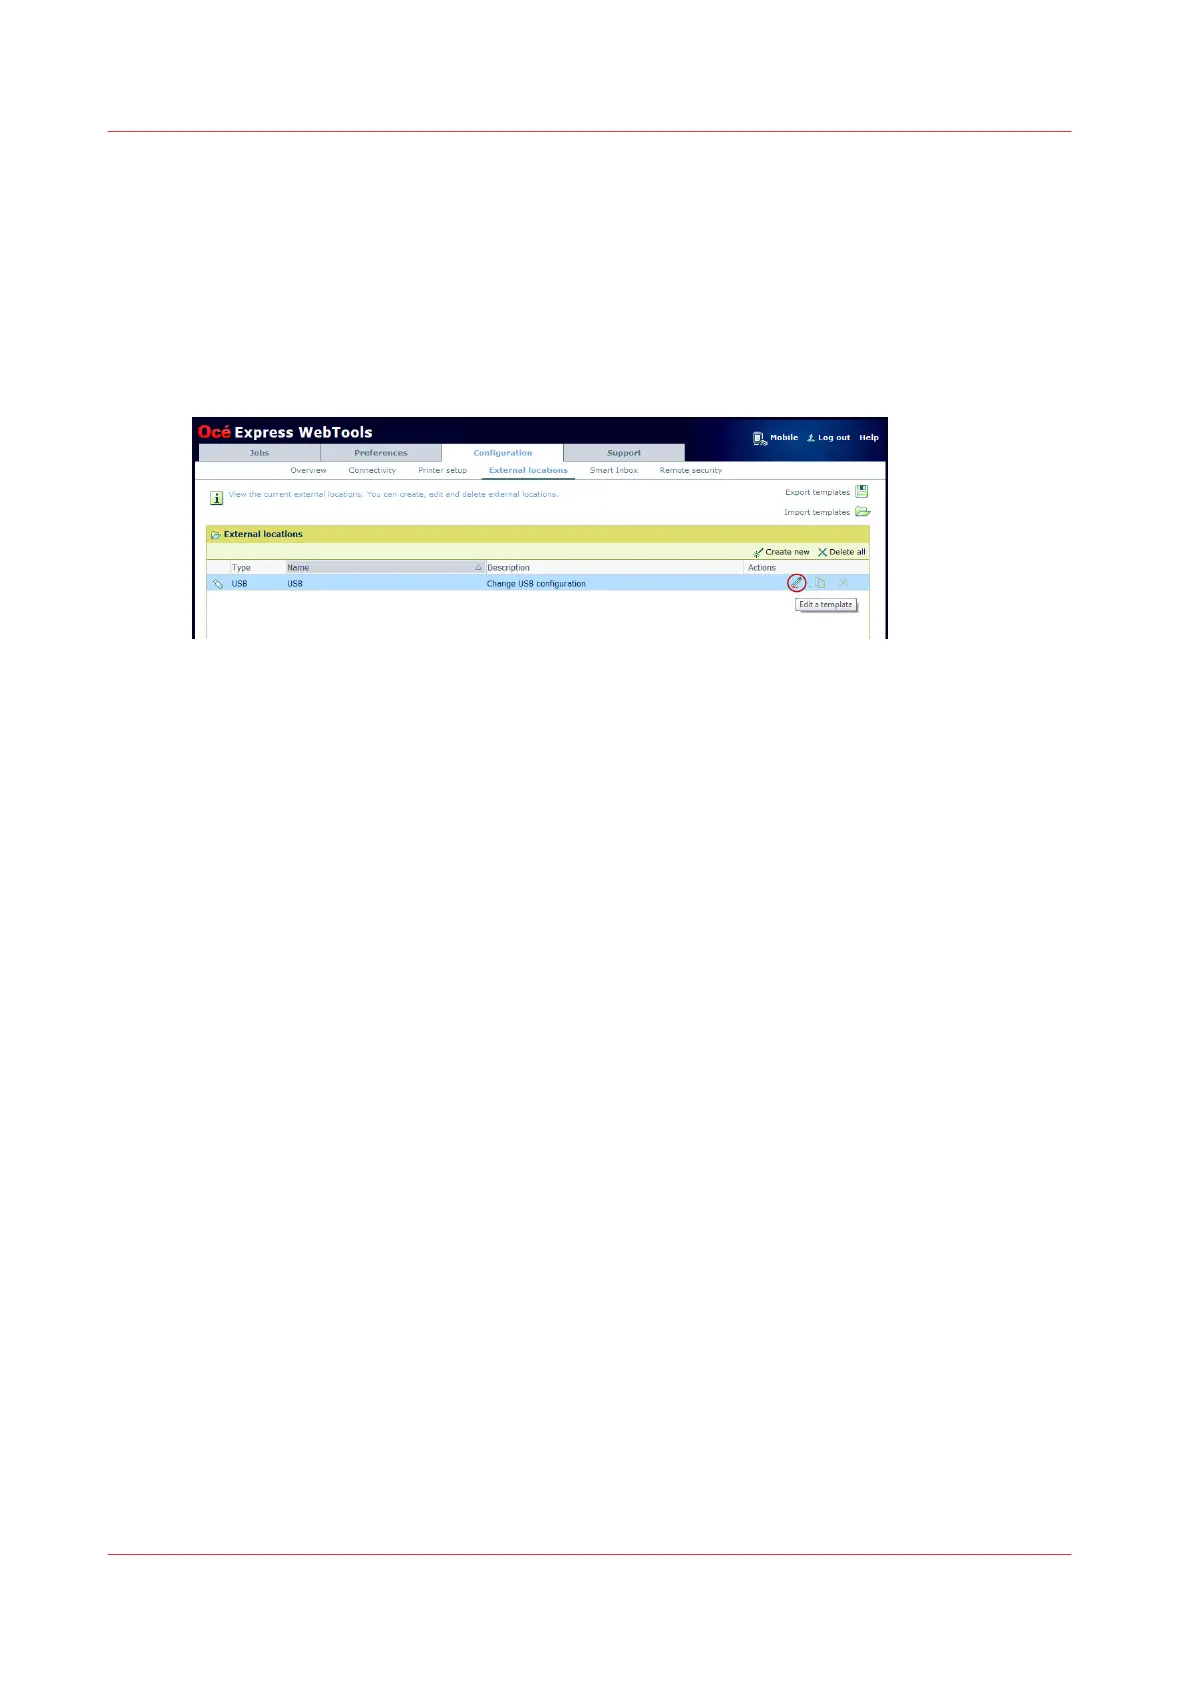
Illustration
Procedure
1.
Open the [Configuration] - [External locations] tab.
2.
Select [USB], and click on the [Edit] icon under [Actions]. A window opens.
3.
Enter the [Name] recognisable for the user. This name appears on the user panel.
4.
Enter the [Description] of USB as location.
5.
Under [Enabled functionalities] you can choose the functionalities you want to use for USB.
• Choose [Print from and scan to], when you want to enable print and scan from and to USB.
• Choose [Print from only], when you want to enable print from USB only.
• Choose [Scan to only], when you want to enable scan to USB only.
• Choose [None], when you want to disable the USB functionality.
6.
Enter the [File name]. When you enter a generic name, for example 'scan###', the file gets a
unique file name. An ascending number replaces the ###.
7.
Click [Ok] to save the settings for USB as an external location.
Result
When you enable USB and insert a USB on the user panel, the external USB location can be used
via the user panel and in Océ Express WebTools.
When you disable USB, USB cannot be used as an external location.
Enable or disable USB
134
Chapter 3 - Define your Workflow with Océ Express WebTools