Counter history
Introduction
Navigate to the [Support] - [Counter history] tab to get an overview of the consumables used per
printed job.
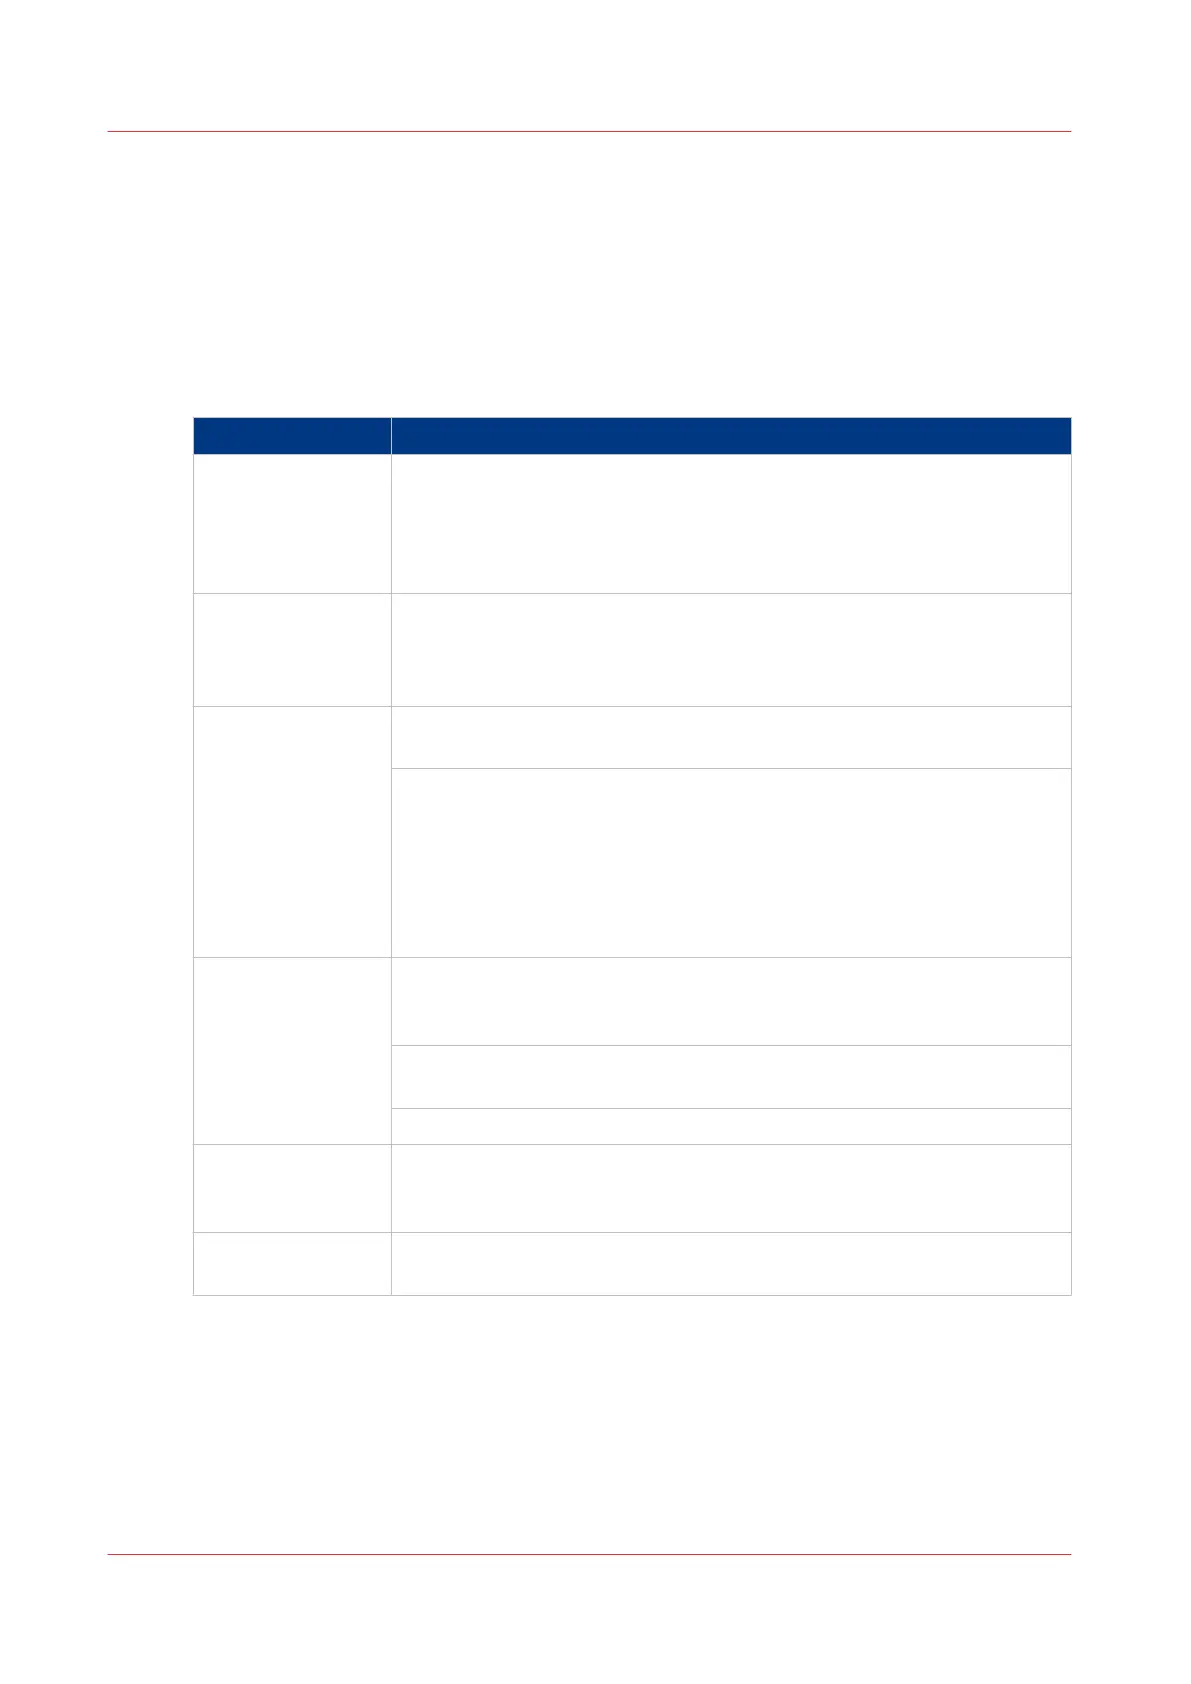
The table below gives an overview of the various functionalities you can access in the counter
history to sort, group, save, or print the information you need.
Functionality Description
[Counter history] In the header of the counter history list you can select a value from the
drop-down list, next to [Counter history] you can select a value between
[today] and [6 days], or between [1 week] and [12 weeks].
The counter history list will display the used consumables that are printed
during the selected period of time.
Sort on [Job name],
[Job owner], [Smart
Inbox ], or [Time
Printed]
When you want to sort the counter history list, you can click on the col-
umn headers of the counter history list: [Job name]; [Job owner]; [Smart
Inbox ]; [Time Printed]. This way you can sort the list according to your
needs.
[List view] or
[Group view]
Select [List view] at the bottom of the counter history list when you want
to display all printed jobs.
Select [Group view] at the bottom of the counter history list when you
want to display only the groups based on your sort criterion.
For example, when you sort your counter history list on the column [Job
owner] and you click on [Group view], the counter history list displays a
list with all Job owners that have sent print jobs to the printer in the se-
lected period. When you expand the [Job owner] group, the list displays
all jobs that were sent by the [Job owner] in the selected period.
[View total info] Select [View total info] in the upper right hand corner of the counter histo-
ry list, when you want to have a complete overview with job counter in-
formation.
Click on a group name to display counter information for all the jobs in
the group.
Click on a job name to display counter information for the selected job.
[Save all] Select [Save all] in the upper right hand corner of the counter history list,
when you want to save the counter history for all jobs in the list.
You can save the counter data as an [XML-file] or as a [CSV-file].
[Print all] Select [Print all] in the upper right hand corner of the counter history list,
when you want to print the counter history for all jobs in the list.
Counter history
300
Chapter 8 - Support
 Loading...