Make a scan and remove a strip
Introduction
When you have an original with a strip, you can remove the strip from your scanned file.
Use the option [Remove strip] on the user panel to scan an original with a strip and remove the
strip from the file. You can remove a strip from the top, the bottom, the left, or the right side of
the original.
Procedure
1.
Feed the original face up and centred on the original feeding table.
2.
Tap the scan tile on the user panel and select your preferred location in the scan Smart Access.
When you do not select a location the file is sent to the public Smart Inbox.
3.
Tap the scan tile again. A window with a list of presets opens.
4.
Tap [All settings]. A list with settings opens.
5.
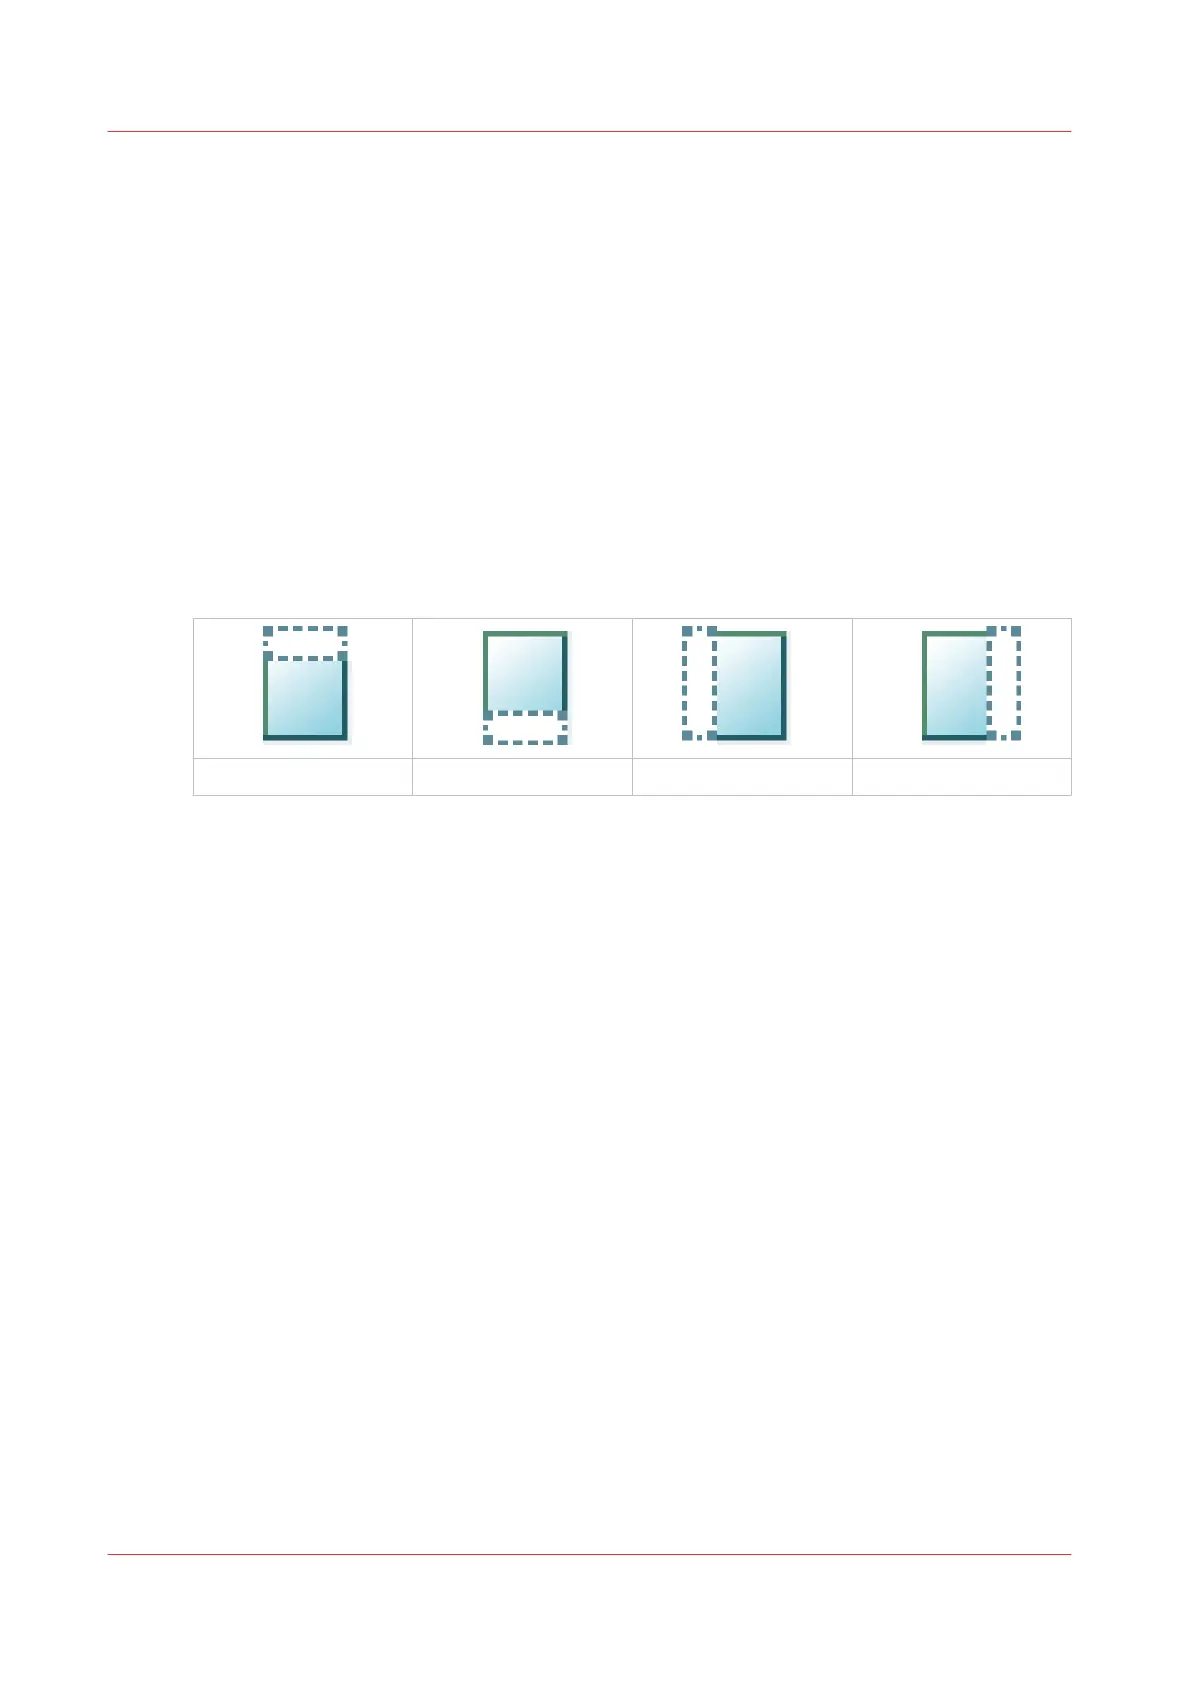
Tap [Remove strip] under the [Image] preset.
The [Top] strip
The [Bottom] strip The [Left] strip The [Right] strip
6.
Select [Top], [Bottom], [Left], or [Right] and define the values.
7.
Make your settings and tap [OK].
8.
Tap the green button.
Result
The printer scans the original to file without the defined strip. The file is sent to your preferred
location. Default you can find your file in the public Smart Inbox in Océ Express WebTools.
Make a scan and remove a strip
238
Chapter 4 - Use the Printing System