Reference Modification no.
- 0 -
Page
184
Date
1997 02 01
Main
914 F
01479
13.5) Turbo charger and exhaust system
Besides the specified maintenance checks, see chapter 12) and description of the
turbo charger and control system, chapter 9.5). Instructions for further maintenance
tasks are stated here.
13.5.1) Dismantling of the complete exhaust system inclusive turbo charger
and engine suspension frame
See Pic. 146 and 147.
■ ATTENTION: Perform tasks only on the cold engine ➍ danger of burning!
Exhaust manifold / muffler assembly:
Remove lock nuts M8 Q on exhaust bend flanges.
◆ NOTE: If one of the studs M8x23/20 W should become loose refit
stud again to 8 Nm (71 in.lb).
Longer threaded end (23 mm) to stay in cylinder head.
Withdraw exhaust bends E by slight pulling and swivel action.
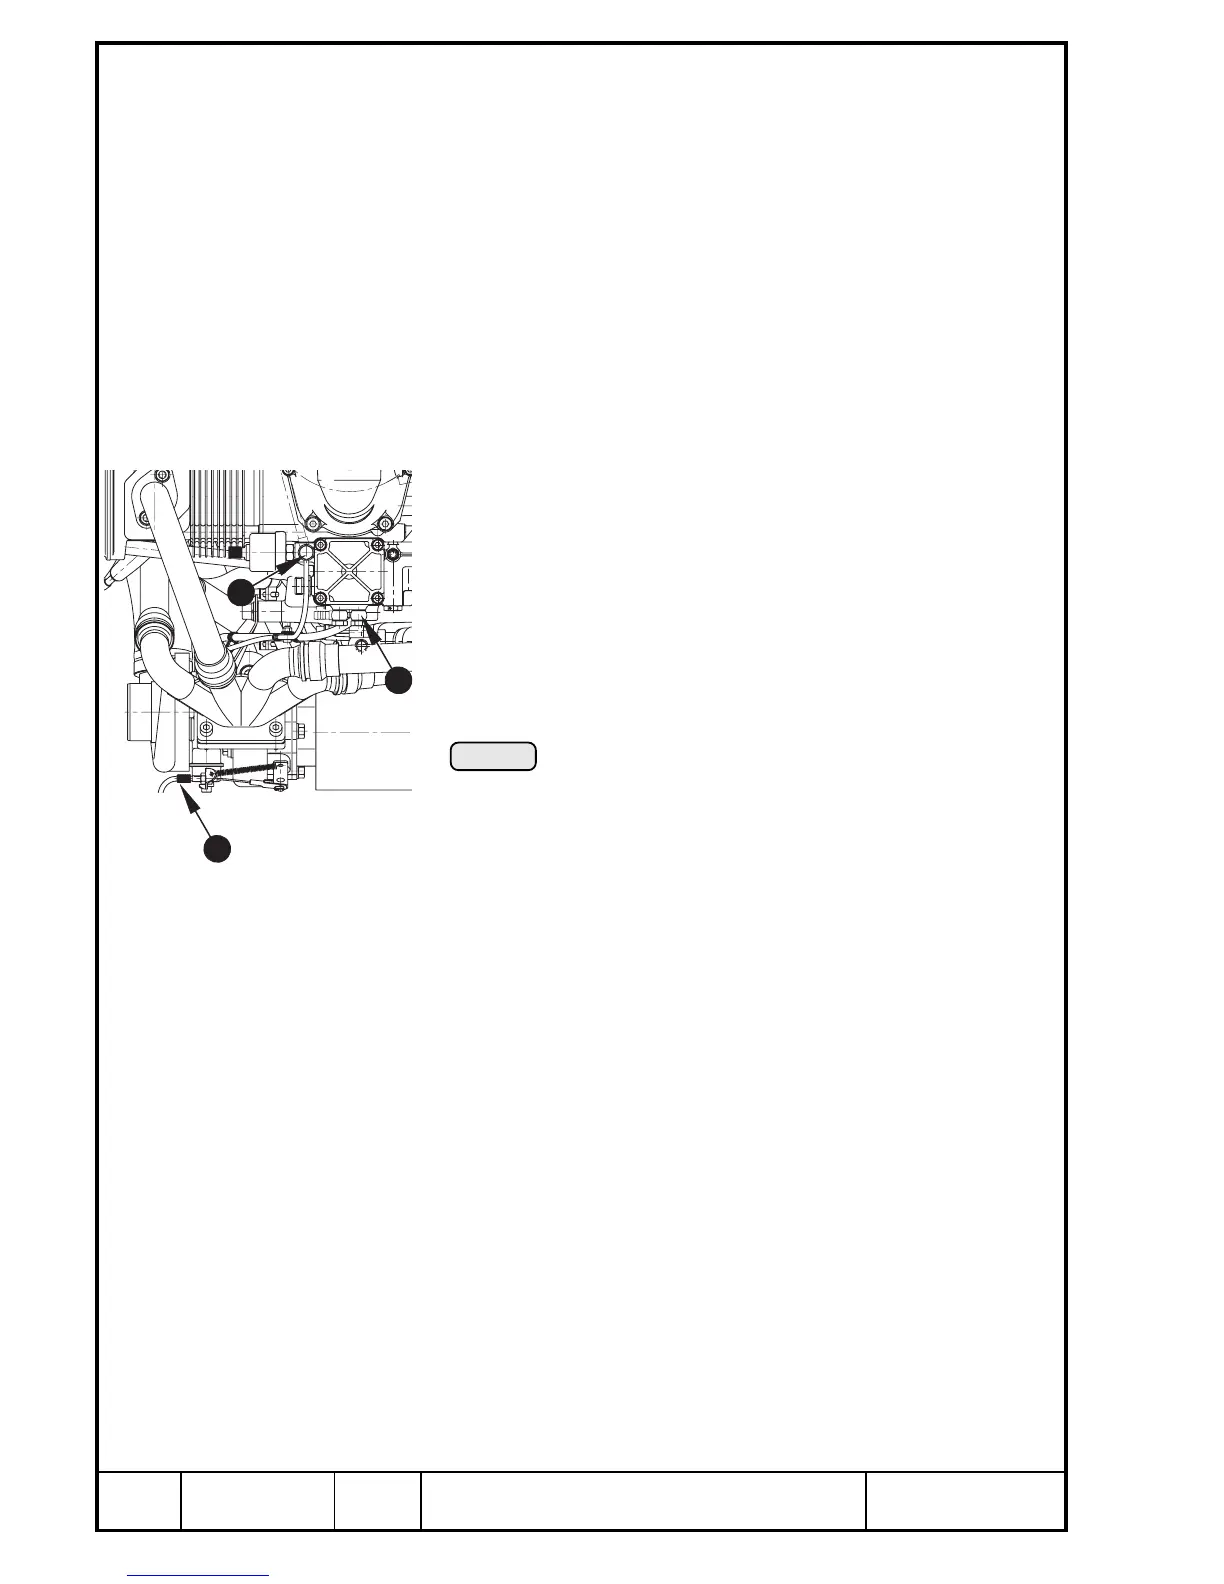
Detach oil lines for turbo lubrication from pressure side R and
suction side T of oil pump. See Pic. 146. For further details of
"Turbocharger oil circuit" refer to chapter 13.2.
Slacken clamp 120 Y but do not remove it, not even from the
exhaust bracket U.
Pic. 146
00160
4
5
Remove Allen screw M10x50 I (attaching turbo bracket) along with lock
washer and washer.
Further detach connection O turbo bracket - engine frame (not in the supply
volume of engine).
Support the complete unit of muffler - turbo charger - manifold, remove the
clamp 120 and take off the complete unit. Pull out spacer P 10,5/17/15 from
arm of engine frame.
◆ NOTE: If found necessary remove the servo cable { for waste gate
control, but normally this is not required. See chapter 13.5).
Muffler:
◆ NOTE: To take off the muffler does not need the removal of the unit
exhaust bends - manifold - turbo charger.
For removal of the muffler } remove hex. hd. screw q M8x16 and washer
followed by hex. hd. screw w M8x35 along with washer and support plate e.
After removal of the 4 nuts r and washers, the muffler can be taken off.
11

 Loading...


