ReferenceModification no.
- 0 -
Page
181
Date
1997 02 01
Main
914 F
01478
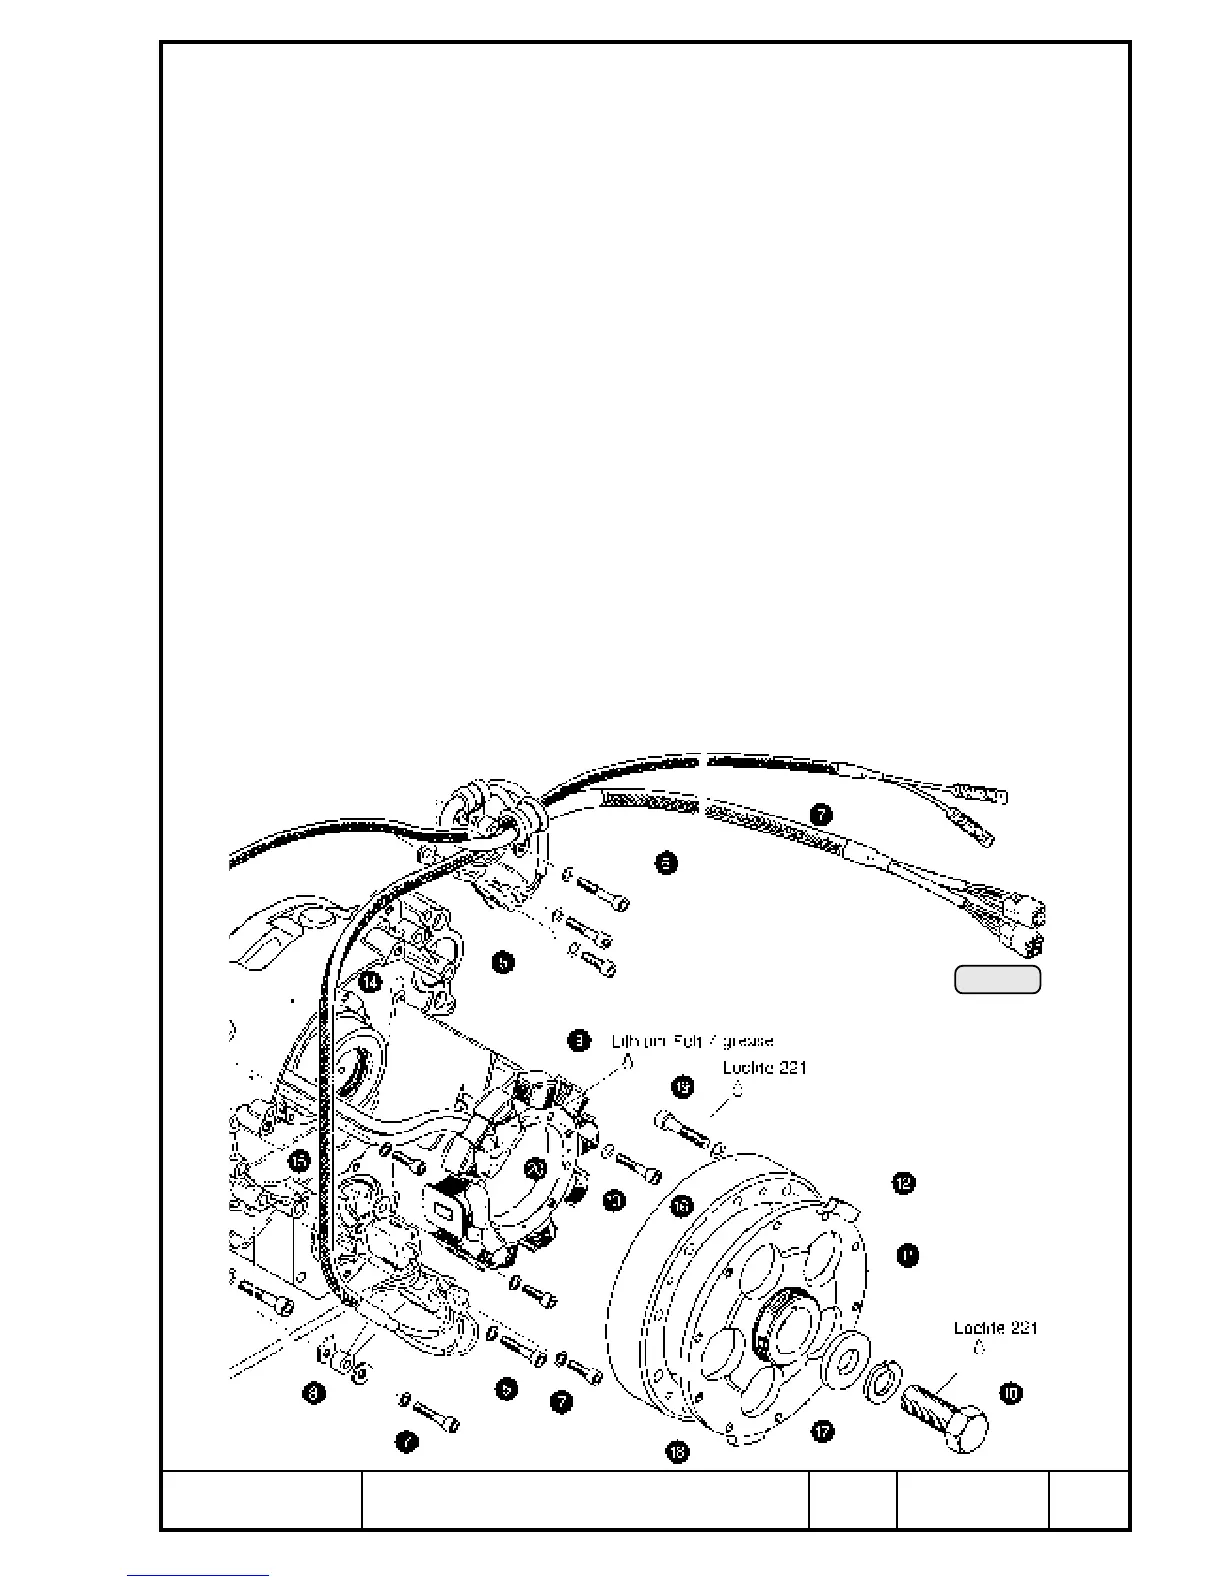
Pic. 145
00410
13.4.16)Stator removal and re-fitting
See Pic. 145.
Block crankshaft with crankshaft locking screw, part no. 240 880 (see Chapter
13.3).
Remove hex. screw P M16x1,5 together with lock washer and washers.
Place protection piece, part no. 877 410, on crankshaft, screw puller, part no.
877 375, fully onto thread { and press off magneto hub } together with
magneto flywheel with hex. screw. Lay magneto hub ass’ y aside so that no
particles can be attracted.
◆ NOTE: For removal of stator the ignition housing need not be
removed.
Remove four Allen screws q M5x25 and hose clamp. Remove stator ass’y
O from the centering w and make visual check. Check cable assembly for
damage. The contact faces e between stator and ignition housing must be
clean to assure good ground connection. Check of resistance values, see
Chapter 15).
Repair of the stator is not planned. At exchange of the stator take care for
correct routing of cable assembly. One each charging coil grounding cable is
screwed with the stator fixation. At assembly apply Lithium grease to the
contact faces i of the stator and the screw heads.

 Loading...


