Reference Modification no.
- 5 -
Page
162
Date
2003 03 01
Main
914 F
d03050
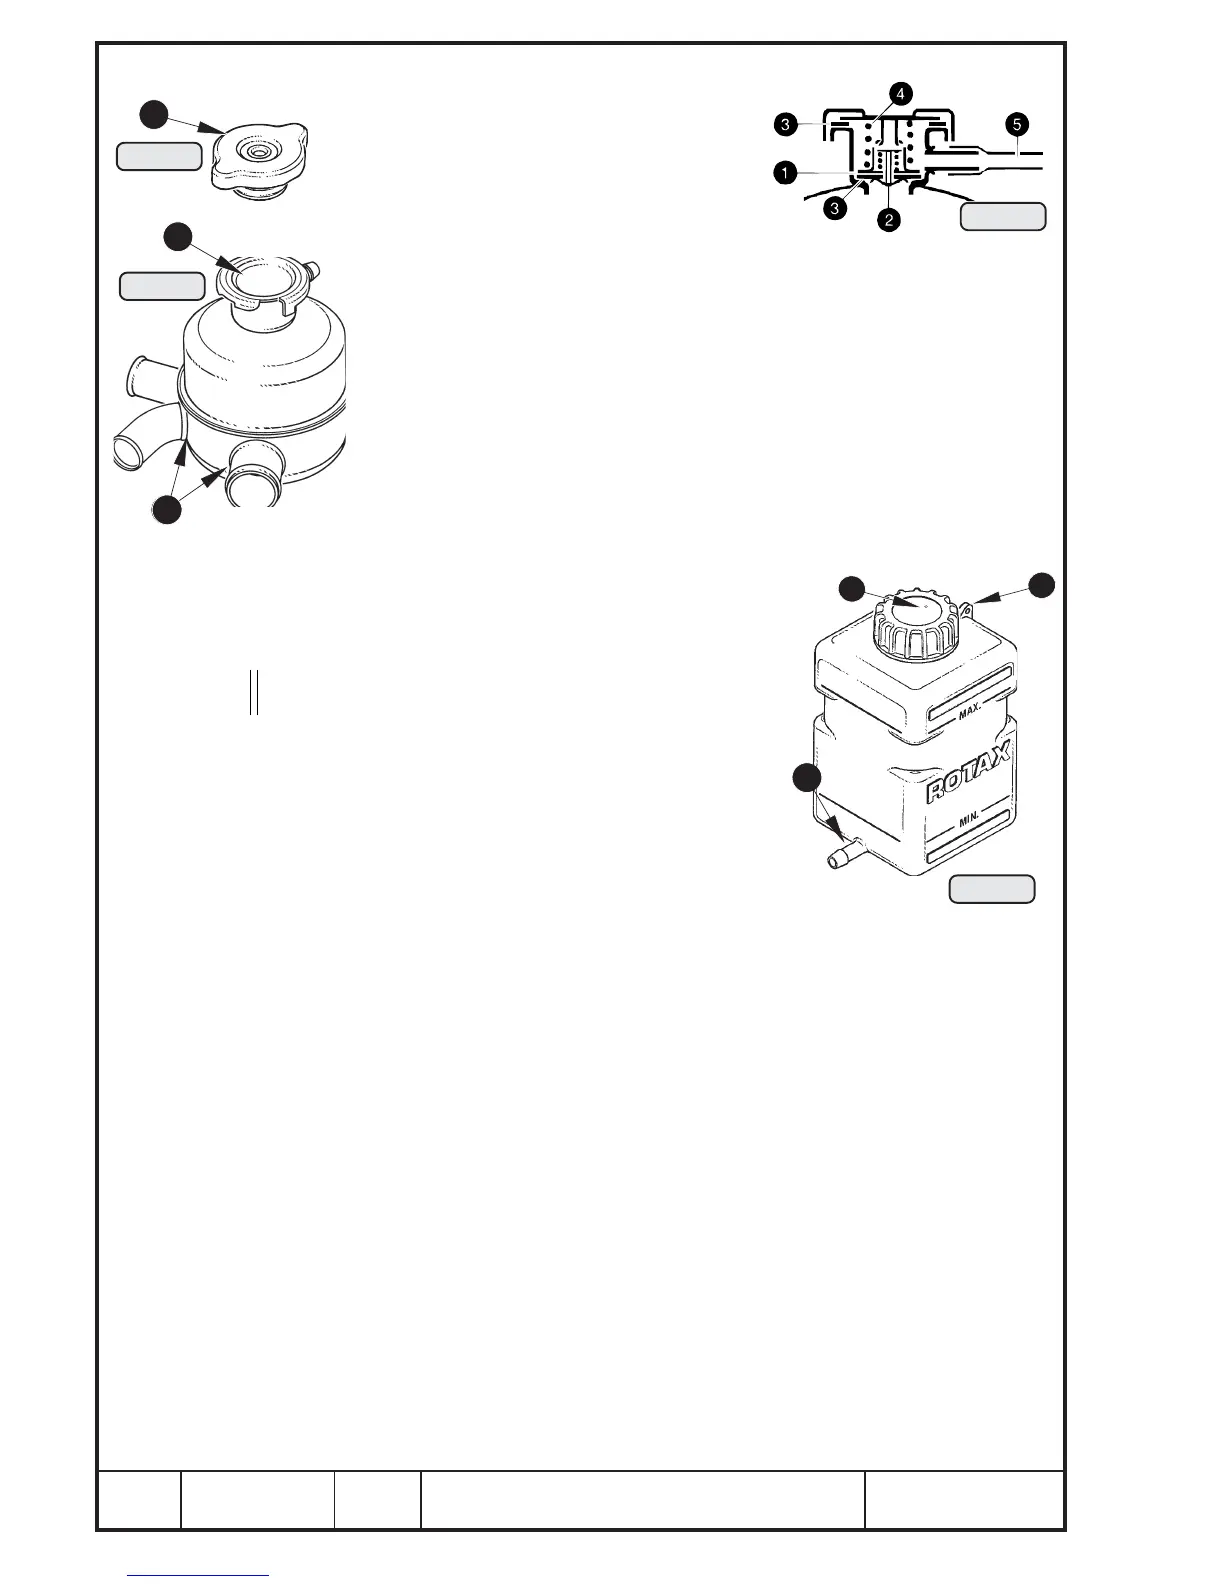
13.3.11) Expansion tank
See Pic. 125/126 and 127.
To allow pressure compensation in the cool-
ing system, an expansion tank is required.
When due to heating of the coolant the pres-
sure in the cooling system rises above 0,9 bar
(13 p.s.i.), the excess pressure valve Q opens and
the coolant can escape to the overflow bottle. When the liquid cools
down, the return valve W opens and the coolant is sucked back into the
expansion tank.
Check seal E, spring R and both valves of the radiator cap. If neces-
sary, replace radiator cap to assure 0,9 bar (13 p.s.i.) Y opening
pressure. T = connection to overflow bottle.
Check sealing surface U and hose connections I of the expansion
tank. Check for possible damages or chafing marks. A rubber plate is
glued to the bottom side of the expansion tank. Attach expansion tank
so that no scouring with neighbouring parts is possible.
13.3.12) Overflow bottle
See Pic. 128
Check for damages. Check venting bore Q in the
cover (see Service Bulletin SB-914-025, “Modi-
fications or the overflow bottle”, current issue).
Check bracket W for the safety wiring. Check
tube connection E.
13.3.13) Radiator
Clean radiator elements and check for damages,
straighten if necessary. Especially check the
hose connections and the fixations. Check for
tightness if leaks are suspected.
13.3.14) Radiator hoses
Visually check for damages, especially in the area of the hose clamps. If
chafing spots are detected, replace coolant hose.
■■
■■
■ CAUTION: Only use temperature- and pressure resistant hoses meet-
ing the aeronautical standards.
13.3.15) Hose clamps
Visually check. Do not tighten hose clamps excessively to avoid damage to
the coolant hose. Position the lugs as to avoid collision and friction with
neighbouring parts.
13.3.16) Cooling air baffle
The cylinders are ram-air cooled. The cooling air is pushed at flight and by the
propeller into the engine compartment and is distributed by the air baffle
equally to the single cylinders. Visually check for damages, cracks, chafing
marks, burnt spots etc. At noticeable damages replace the air baffle.
3
1
2
Pic. 127
7
Pic. 126
0
,
9
b
a
r
8
Pic. 125
6
Pic. 128
00395
00393
00396
00394

 Loading...


