ImpactArmAssembly(Figure310)(continued)
IMPORTANT
Allendplaymustberemovedfromspringshaftassemblytoallow
properoperationandensurelonglife.
4.Graspendofspringshaft.Pushinwardandpulloutwardonshaftto
determineifendplayexistsbetweenspringshaftassemblyandimpactarm
housingassembly.
5.Ifendplayinspringshaftassemblyexists,inserta3/4”socketontojamnut
(item21)onspringshaft.Accesstojamnutcanbeobtainedthroughthe
openendofimpactarmhousing.Loosenjamnutuntilallendplayinshaft
isremoved.
6.Whennoendplayexistsinspringshaftassembly,removetwo(2)capscrews
andnutssecuringhousingtoimpactarmhousingandremovespringshaft
assemblyfromhousing.
7.Threadsecondjamnut(item21)ontoendofspringshaft.Whileholdingrst
jamnutwithawrenchtopreventitfromturning,tightensecondjamnutfrom
184to223N·m(135to165ft−lb)tosecurespringadjustment.
8.Thoroughlypackspringwithgrease.Applyapproximately1.1kg(40oz)
ofgreasetoacleanspring.
9.Installspringshaftassemblyintoimpactarmhousingandsecurehousing
(item13)withfour(4)capscrewsandlocknuts.
g299091
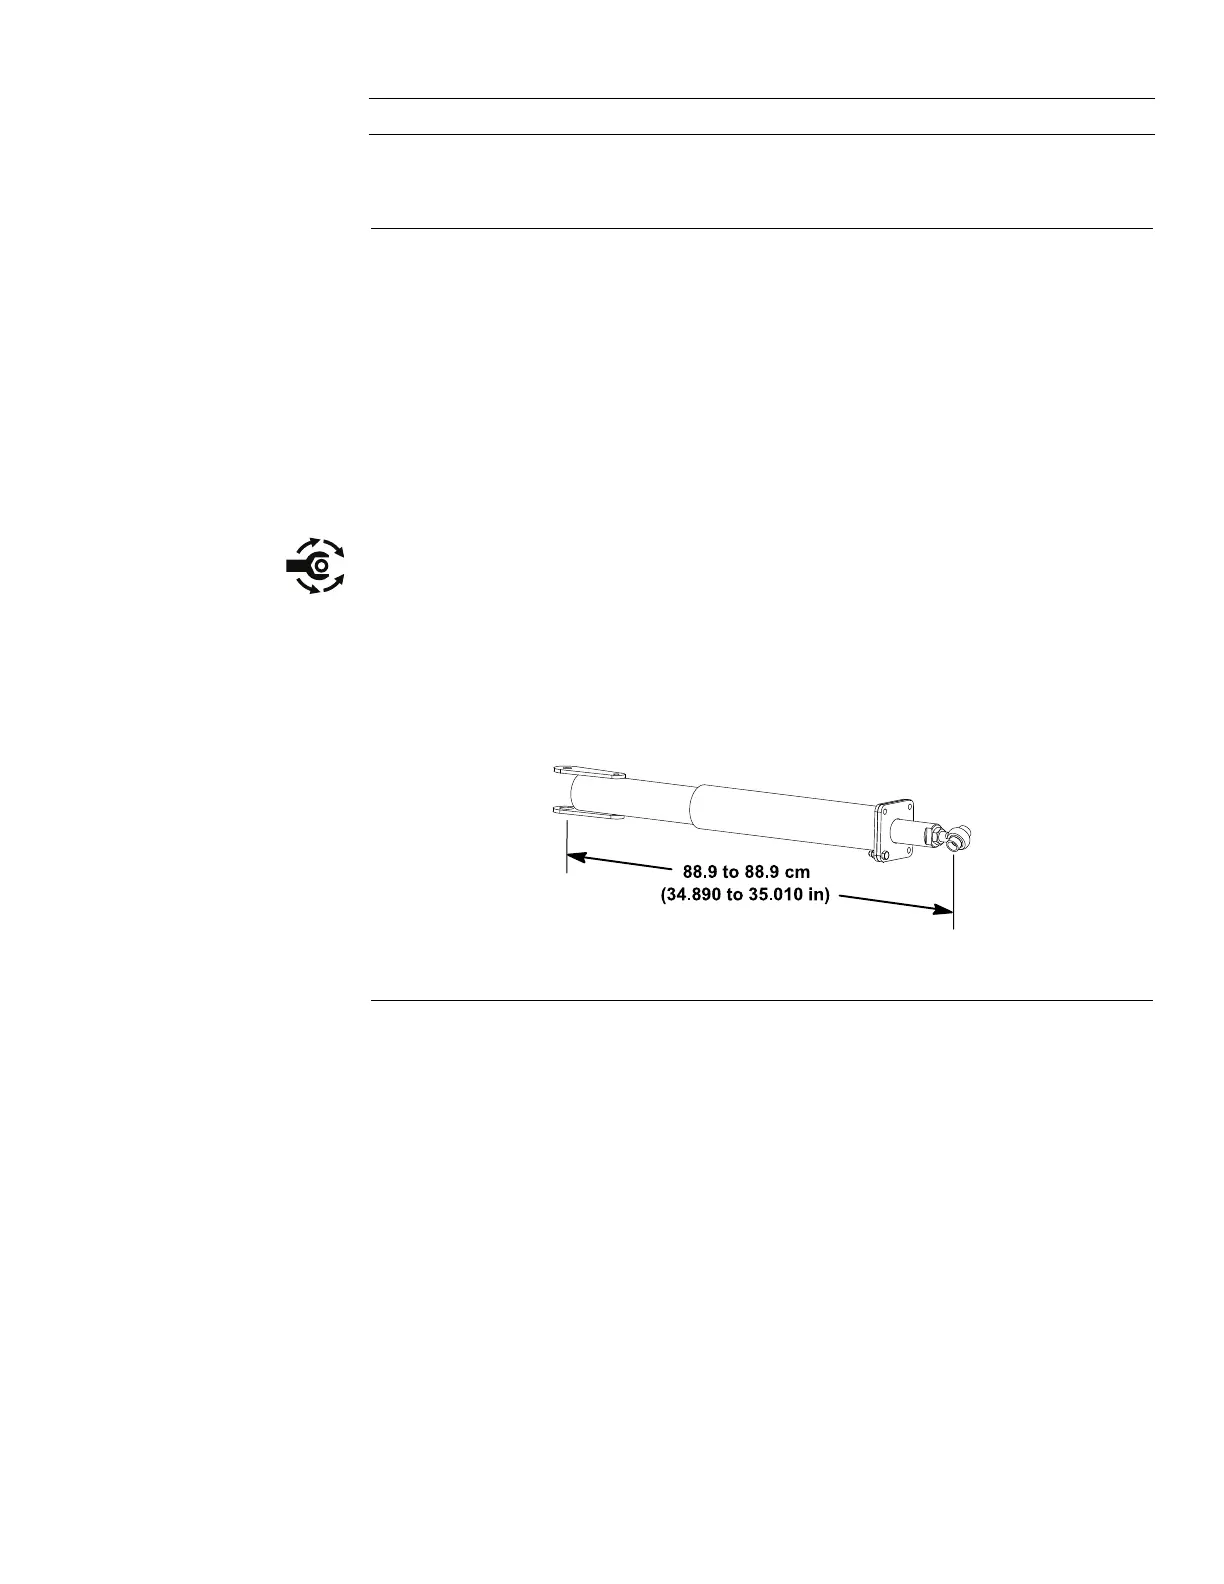
Figure312
10.Threadrodend(item22)withjamnutintoendofspringshaftsothatdistance
fromcenterofrodendtocenterofimpacthousingmountingholeisfrom
88.6to88.9cm(34.89to35.01in)(Figure312).Donottightenjamnut
untilimpactarmisinstalledtodeck.
ImpactArmInstallation(Figure310andFigure311)
1.Positionimpactarmassemblytocuttingdeckconnectionandframe.
2.Slidepivotshaft(item4)throughimpactarmhousingandhub.Securepivot
shaftwithatwasherandlocknut.
3.Positionaspaceroneachsideofimpactarmrodend.Securerodendto
deckconnectionwithcapscrew(item26)andlocknut.
4.Tightenrodendjamnut(item24).
5.Lubricateimpactarmpivothubgreasetting.
6.Afterinstallationiscompleted,raiseandlowerthecuttingdecktoverifythat
hydraulichosesandttingsdonotcontactanythingthroughouttheentire
rangeofmovement.
Groundsmaster
®
5900&5910
Page7–33
Chassis:ServiceandRepairs
16227SLRevB
 Loading...


