Chapter 4 Maintenance
HA-8190V 4-38
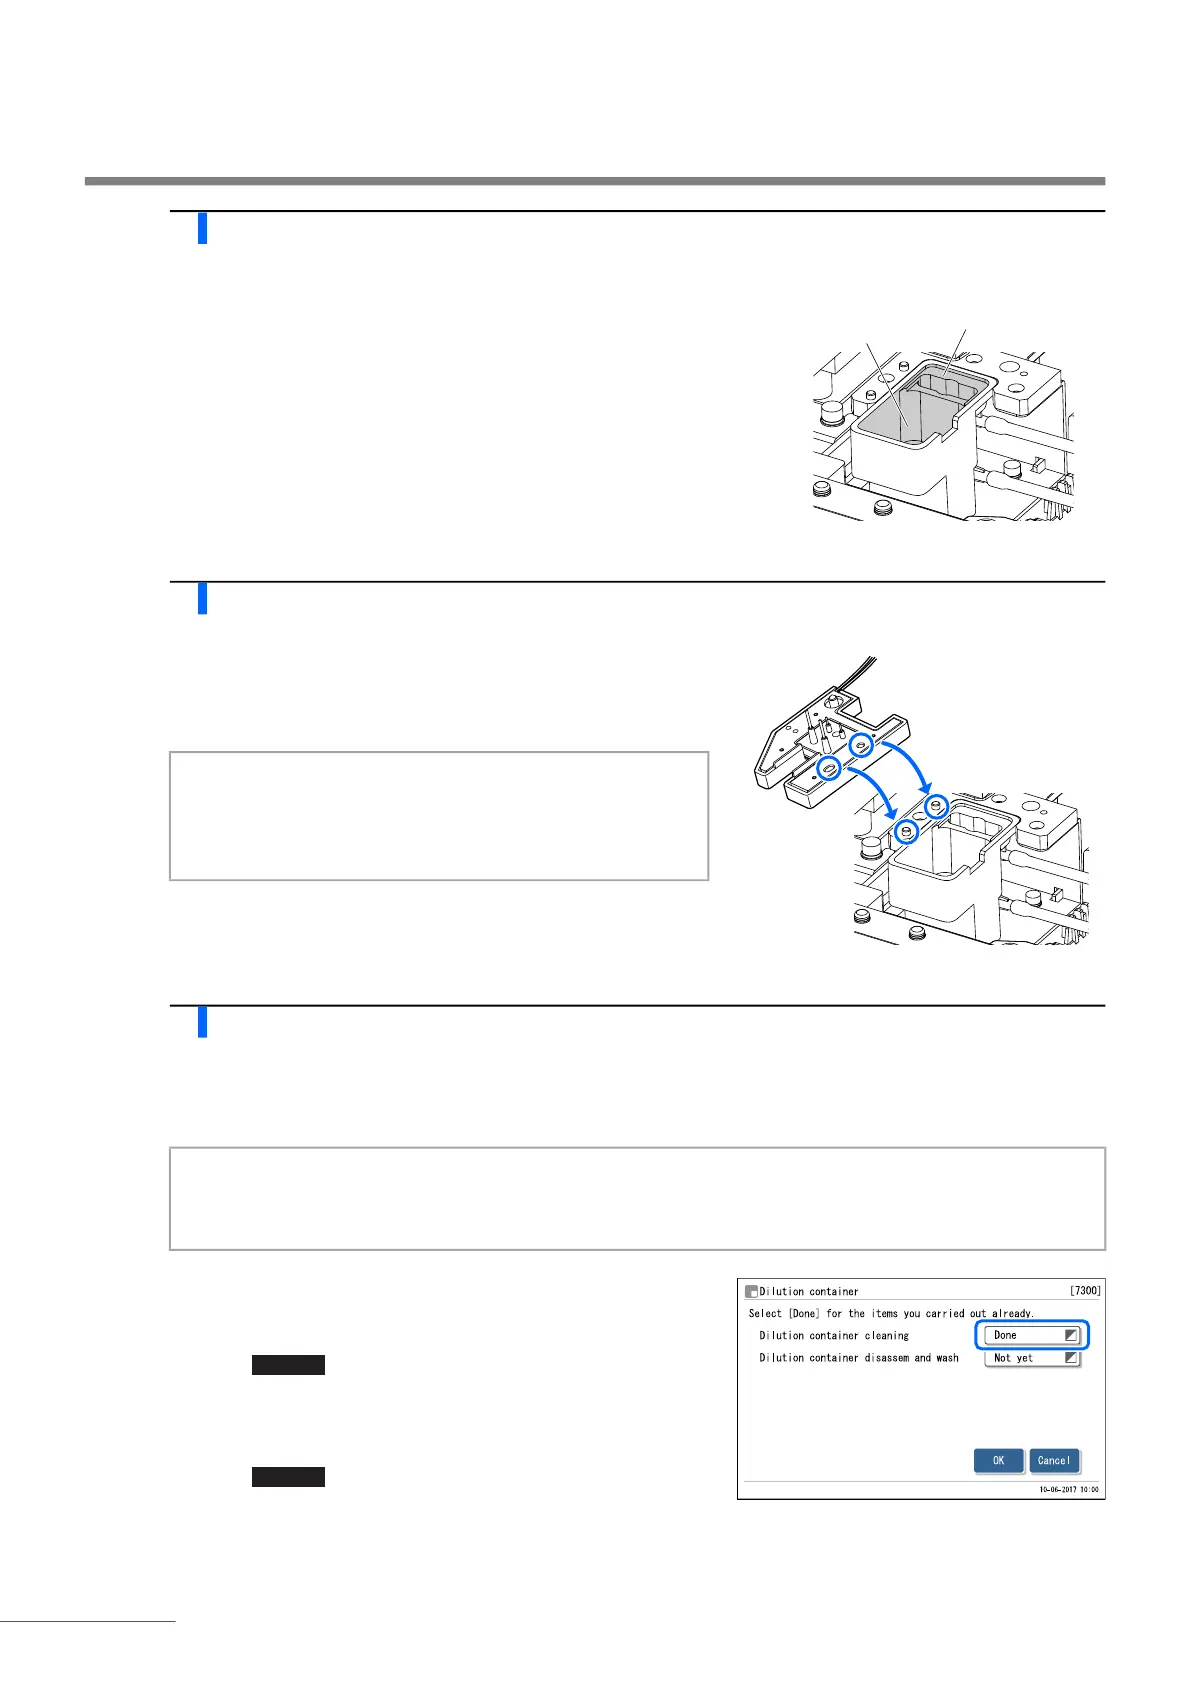
4 Clean the dilution container.
a Blot up any liquid inside the dilution container and leak
container, and wipe off dirt and remnants of the rubber cap.
• Use cotton swabs or gauze moistened with purified water.
5 Attach the dilution container cover.
a Attach the dilution container cover so that the two pins on the left
side of the dilution container unit fit into the two holes on the
back of the dilution container cover.
b Tighten the knurled screw by hand.
6 Complete maintenance.
a Close the maintenance cover, then the front cover.
• The mechanical sections will power on and initialize.
b Select <Done> for <Dilution container cleaning>.
• Touch <Not yet> to change to <Done>.
c Touch .
• The instrument will record the maintenance date.
• The [Maintenance menu] screen will appear again.
d Touch to return to the standby screen.
Dilution container
Leak container
(in front of the
dilution container)
NOTE:
Check that the dilution container cover is level as seen from
the front. If rising or tilted, the cover may touch other parts
and may be damaged during operation.
NOTE:
Close the cover to initialize the mechanical sections even if you are not going to perform measurements or
other operation right away.
OK