HA-8190V 1-21
1.4 Installation
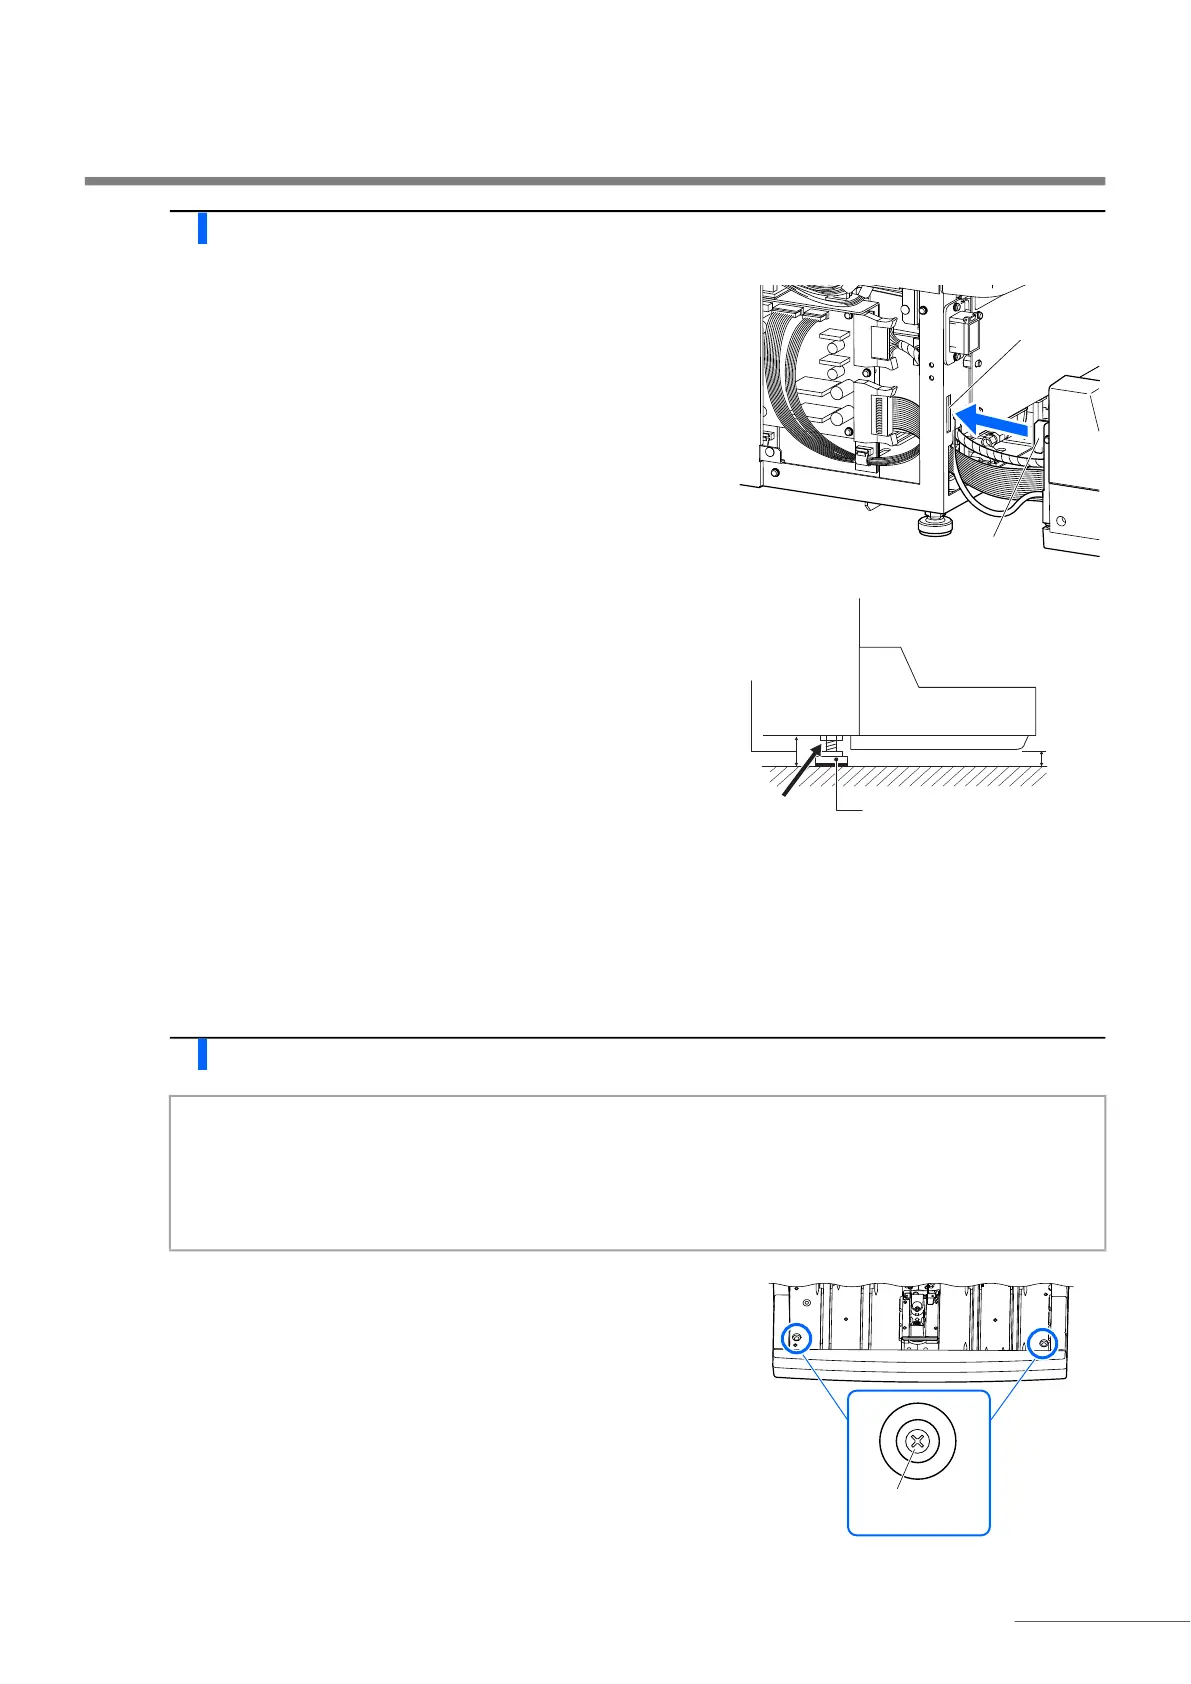
3 Attach the sampler.
a Fit the hooks on both sides of the sampler into the holes on the
main body.
• Be careful not to pinch the cables.
b Loosen the locking nuts on the legs of the main body with the
wrench.
• There is one locking nut on each side of the bottom panel.
c Turn the adjuster feet by hand until the sampler rises an even
5 mm off the countertop.
• Check that the instrument has a clearance of about 2 cm from the
countertop.
d Tighten the locking nuts to lock the adjuster feet in place.
e Neatly arrange the cables inside the instrument.
f Attach the wiring box cover.
4 Adjust the auxiliary legs of the sampler.
a Remove the two black rubber caps from the top of the sampler.
• You can see the screw heads of the auxiliary legs.
Main body
About
2 cm
Sampler
5 mm
Turn here to adjust height.
Loosen
this nut.
NOTE:
Lower the auxiliary legs of the sampler until they touch the countertop. Unless the sampler is stable, it can
deform under its own weight and the piercing nozzle may become damaged.
The sampler has one auxiliary leg on the right and left sides of the bottom panel and another one below the
STAT port. Lower all three legs to the countertop. The sampler is unstable on only one or two auxiliary legs.
Screw head of
the auxiliary legs