7. Advanced
Uploading a Beta plane file
Beta planes must be uploaded in the following projector directory (accessible via FTP) :
/D/display/Softedge
The file must be named as follows :
beta.tiff
The free storage capacity on the D-drive is about 8 MB. it is needed to store the image files, geometry files, factory backup, Alpha
planes and Beta planes. Practically, about 6MBwill be available for the Alpha + Beta plane.
The Beta plane will only be applied if it has been activated in the Black level... menu’s dialog box (see proce-
dure below)
How to activate a beta plane ?
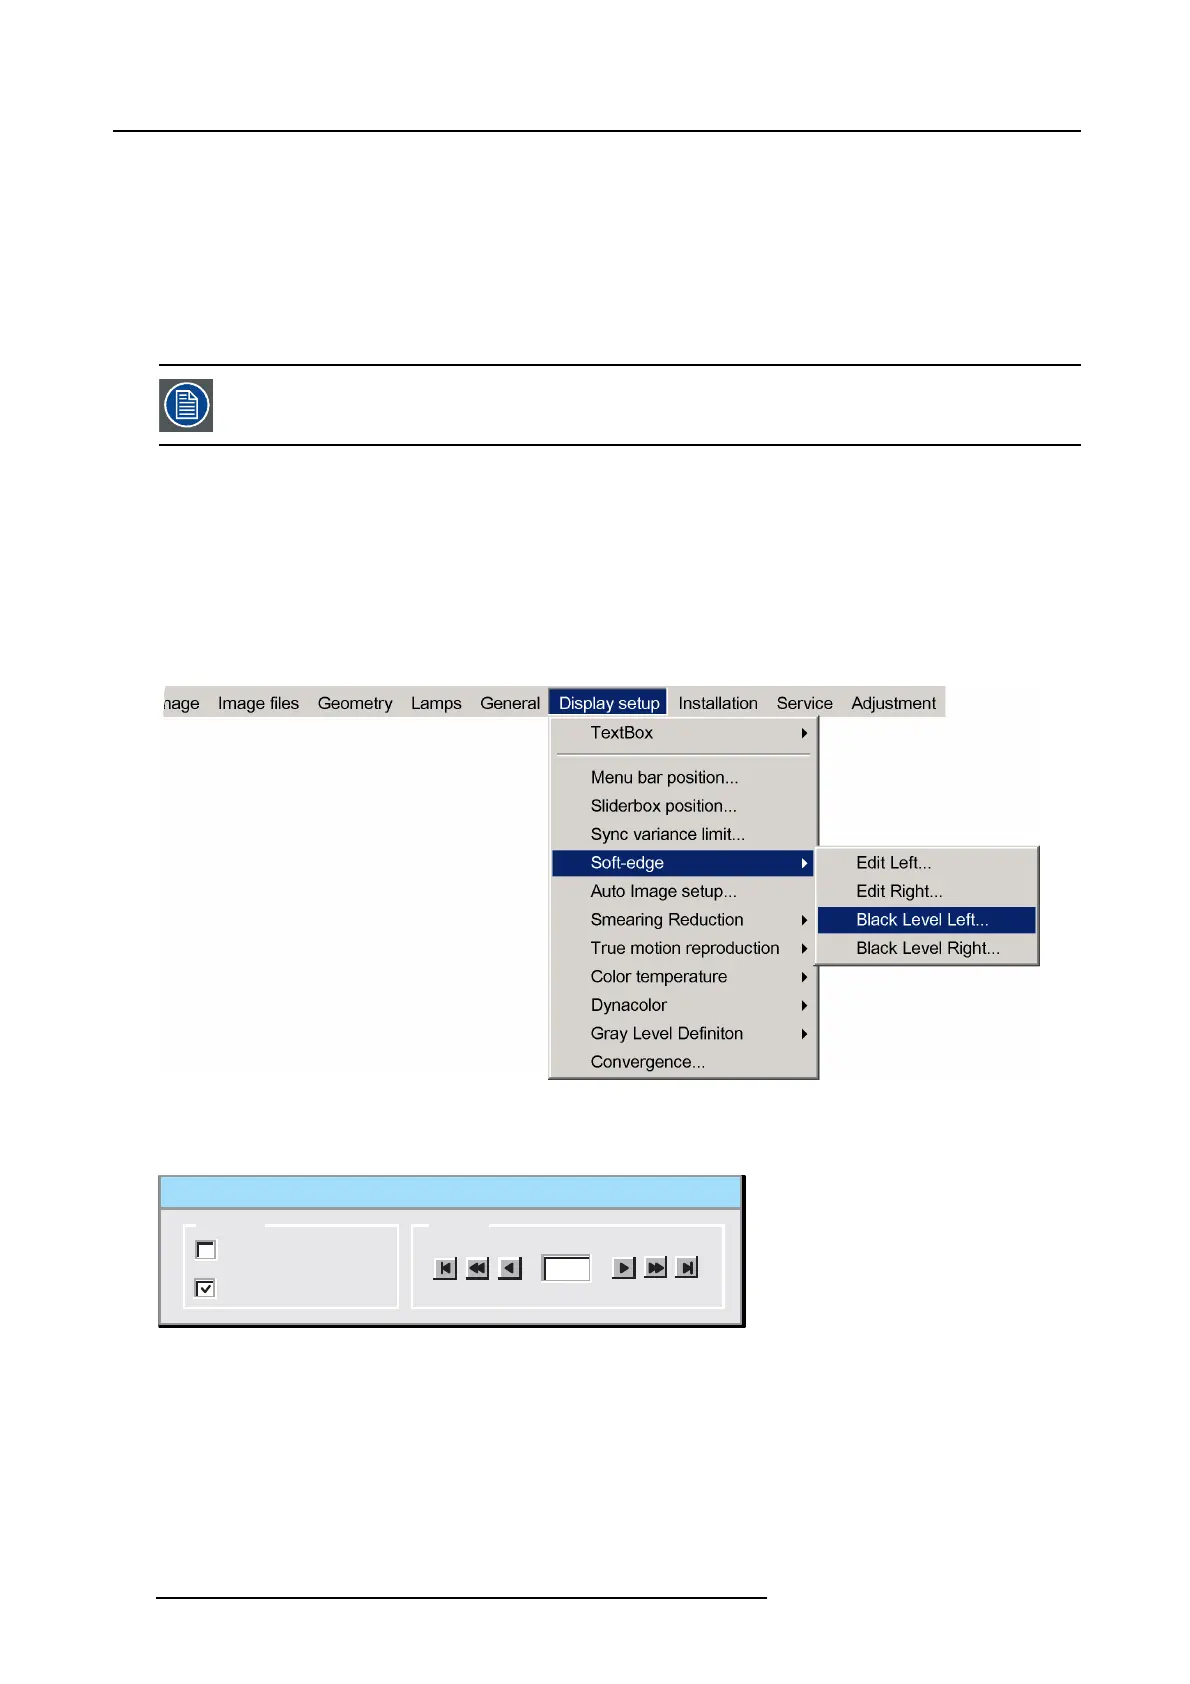
1. Press the MENU key to activate the Tool bar.
2. Push the cursor key ← or → to highlight Display setup
3. Push the ↓ key to pull down the menu.
4. Push ↓or ↑ to select Soft edge
5. Push the → key to pull down the menu.
6. Push the cursor key ← or → to highlight Black level...
Image 7-114
7. Press ENTER
A dialog box will be displayed.
Black Level
Internal
Beta planes
Planes
Level
0
Image 7-115
8. Use the arrows to select the Beta planes check box and press ENTER
Note: It will take a certain time for the beta pla
ne to be applied
7.8.5.5 Blanking
What can be done?
Blanking or hard edging affects only the edges of the image and is used to frame the projected image on the screen and to hide
unwanted image information (or noise) or to put two images next to each other without overlap (soft edge).
114
R59770198 BARCO SIM 7D 13/02/2013