4. Installation
How to connect the lens ?
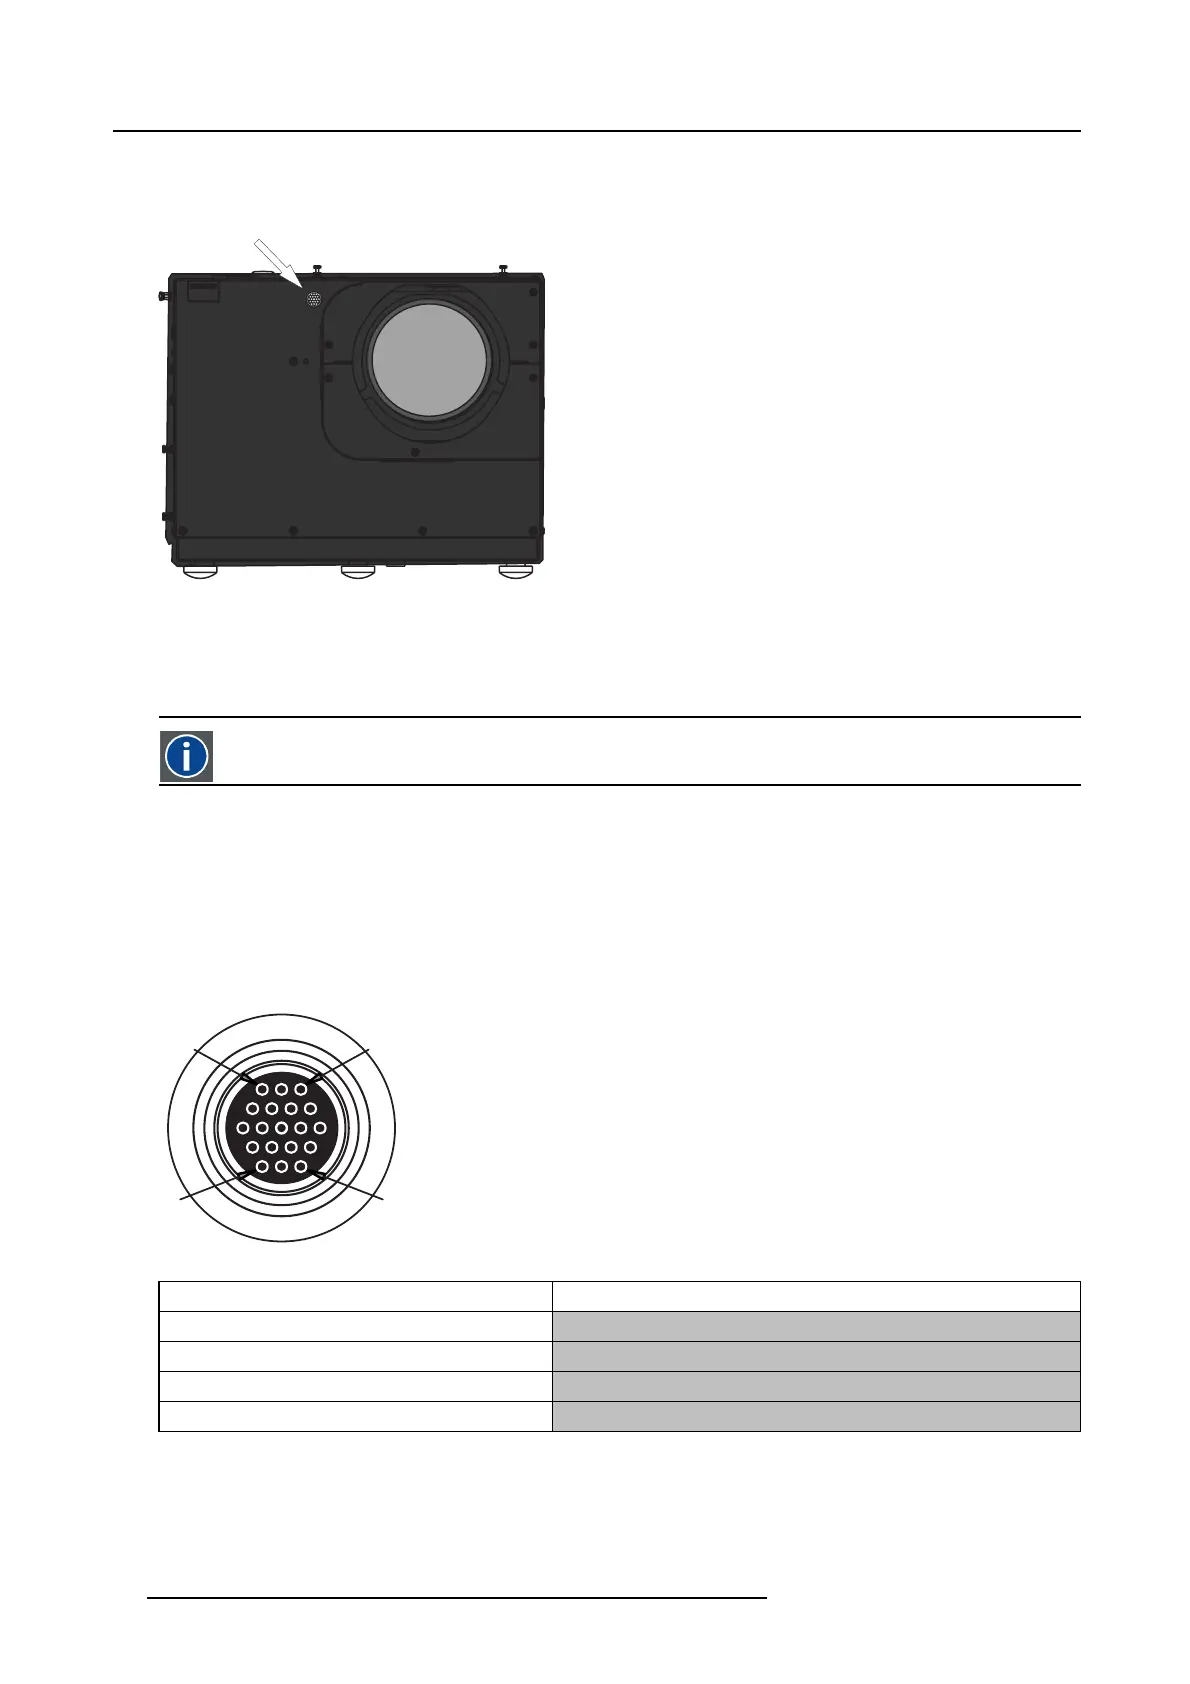
1. Connect the male connector attached to the lens to the female connector located on the front of the projector
Tip: The side labeled TOP on the male connector must be oriented upwards .
Image 4-24
Projector lens connection
2. Secure the connection by turning and fastening the locking ring
4.5.6 Lens Data
ECR
Extended Contrast ratio allows to increase the contrast of the image while the light output decreases.
ECR (Extended Contrast Ratio )
The lenses used in the projector are fitted with a non volatile memory holding the lens serial number and dynamic aperture look up
tables. These look up tables allow to determine the exact opening position in function of the desired light output (determined for
example by the Time of Day setting ).
To make this possible the lens is connected to the front of the projector chassis through a 16-wire cable.
Connection
The connection to the projector transmits signals for the lens aperture data and the zoom and focus motor control (power).
1
17
19
3
Image 4-25
Lens connector pinout
Pin number Pin description
13,14,15,16 D1,D2,D3,D4
17 ++5V
18 Sens
19 GND
Tabl e 4 -3
Pinout overview table
24 R59770198 BARCO SIM 7D 13/02/2013