4. Installation
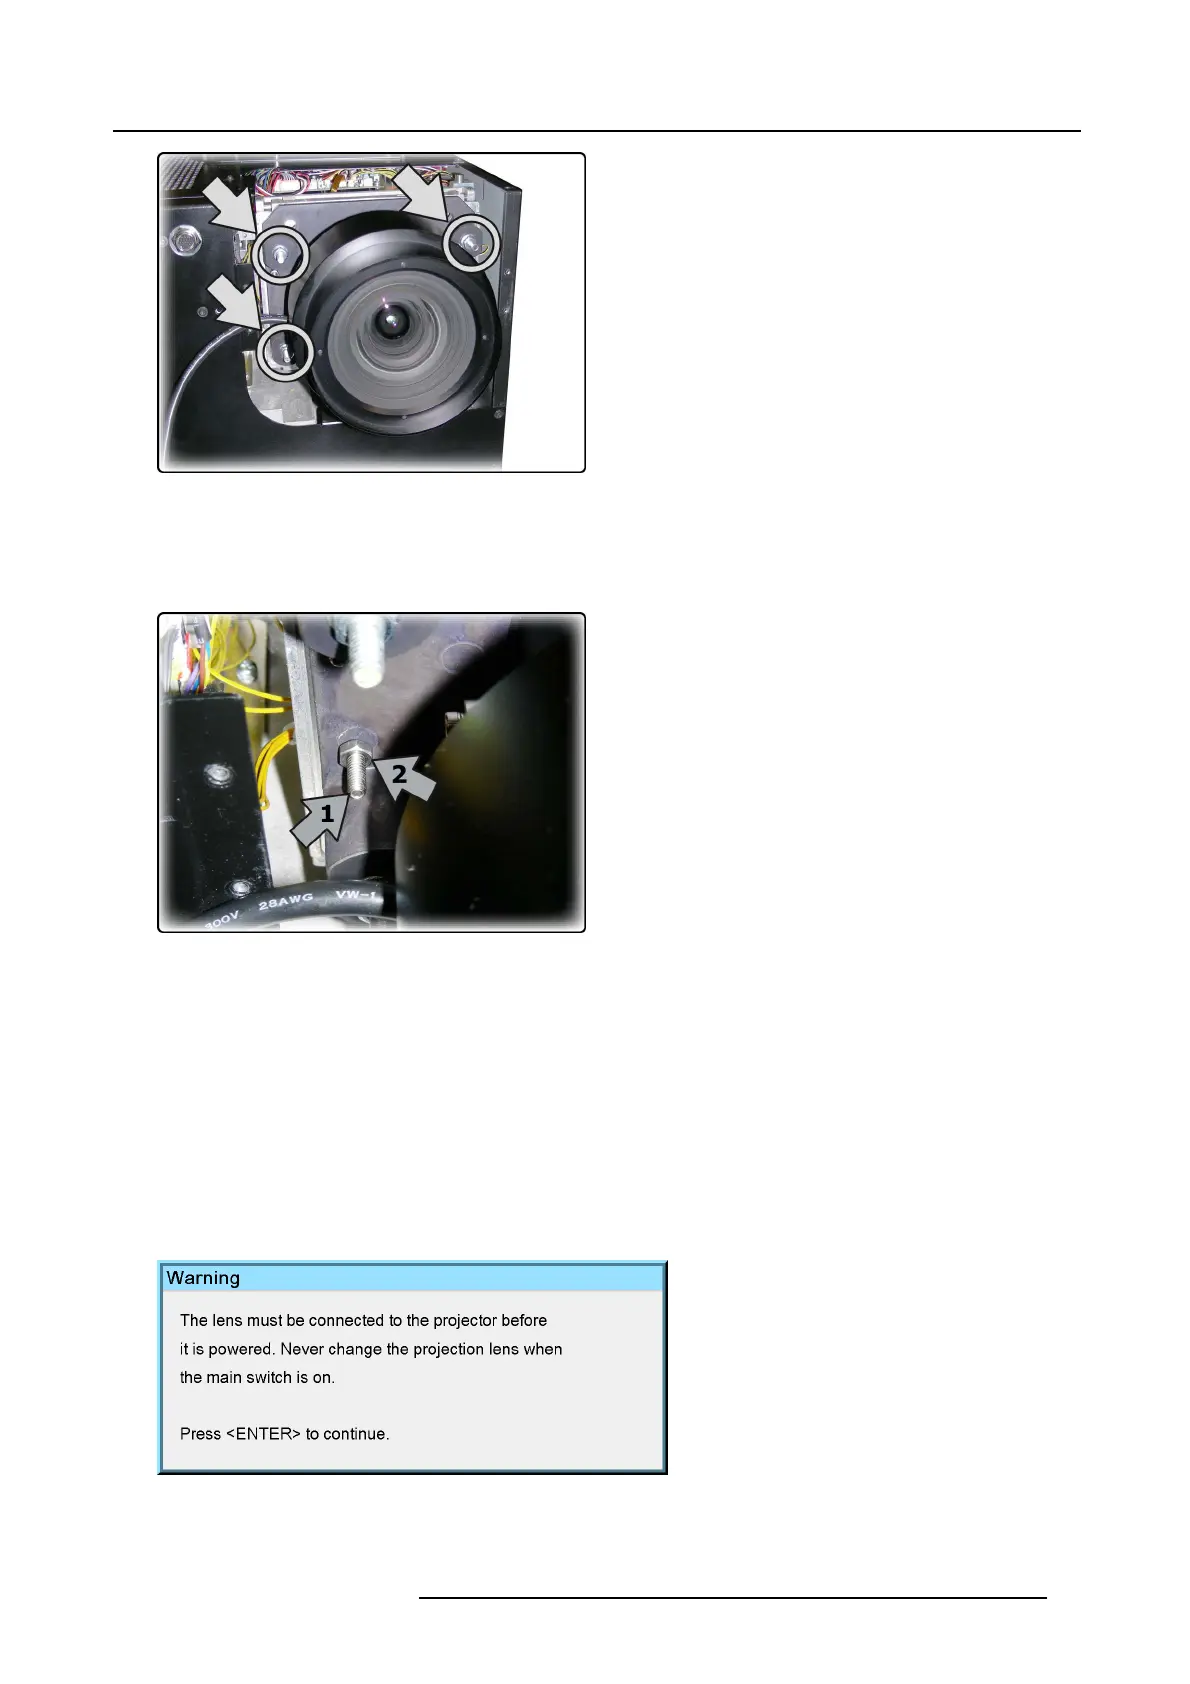
Image 4-21
Lens fixation nuts
6. Fix the lock nuts until the lens flange touches the lens holder plate at the 3 fi xation points (nominal position).
7. Unscrew each lock nut 1 revolution and start adjusting the Scheimpflug by tightening or loosening these lock nuts
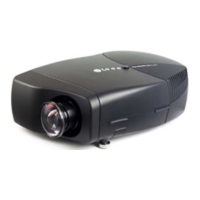
8. If the adjustment is done, screw in the smaller Allen bolts M4 (see “1” on image 4-22) until they are hand-tight
Image 4-22
Lens: Scheimpflug securing bolts and nuts
9. Secure the smaller Allen bolts M4 by tightening the nuts (see “2” on image 4-22) to the lens flange.
10.Install the bottom lens cover
11. Install the top lens cover
4.5.5 Connecting the lens
What must be done ?
The lens must be connected to the projector to allow the control of the Zoom and Focus and to allow data communication for the
aperture control.
Connecting or disconnecting the lens whil
e the projector is powered can cause damage to the lens aperture and may never be done.
Therefore a warning is displayed if the lens is not connected and the projector is activated.
Image 4-23
R59770198 BARCO SIM 7D 13/02/2013 23