5. Setup
5.6 Setting up the orientation
What must be done ?
Depending on the mechanical orientation of the projector (see Projector configuration in the Installation section), the projector’s
internal settings have to be adapted.
The projector is shipped (default) with a table/front orientation.
How to set the orientation ?
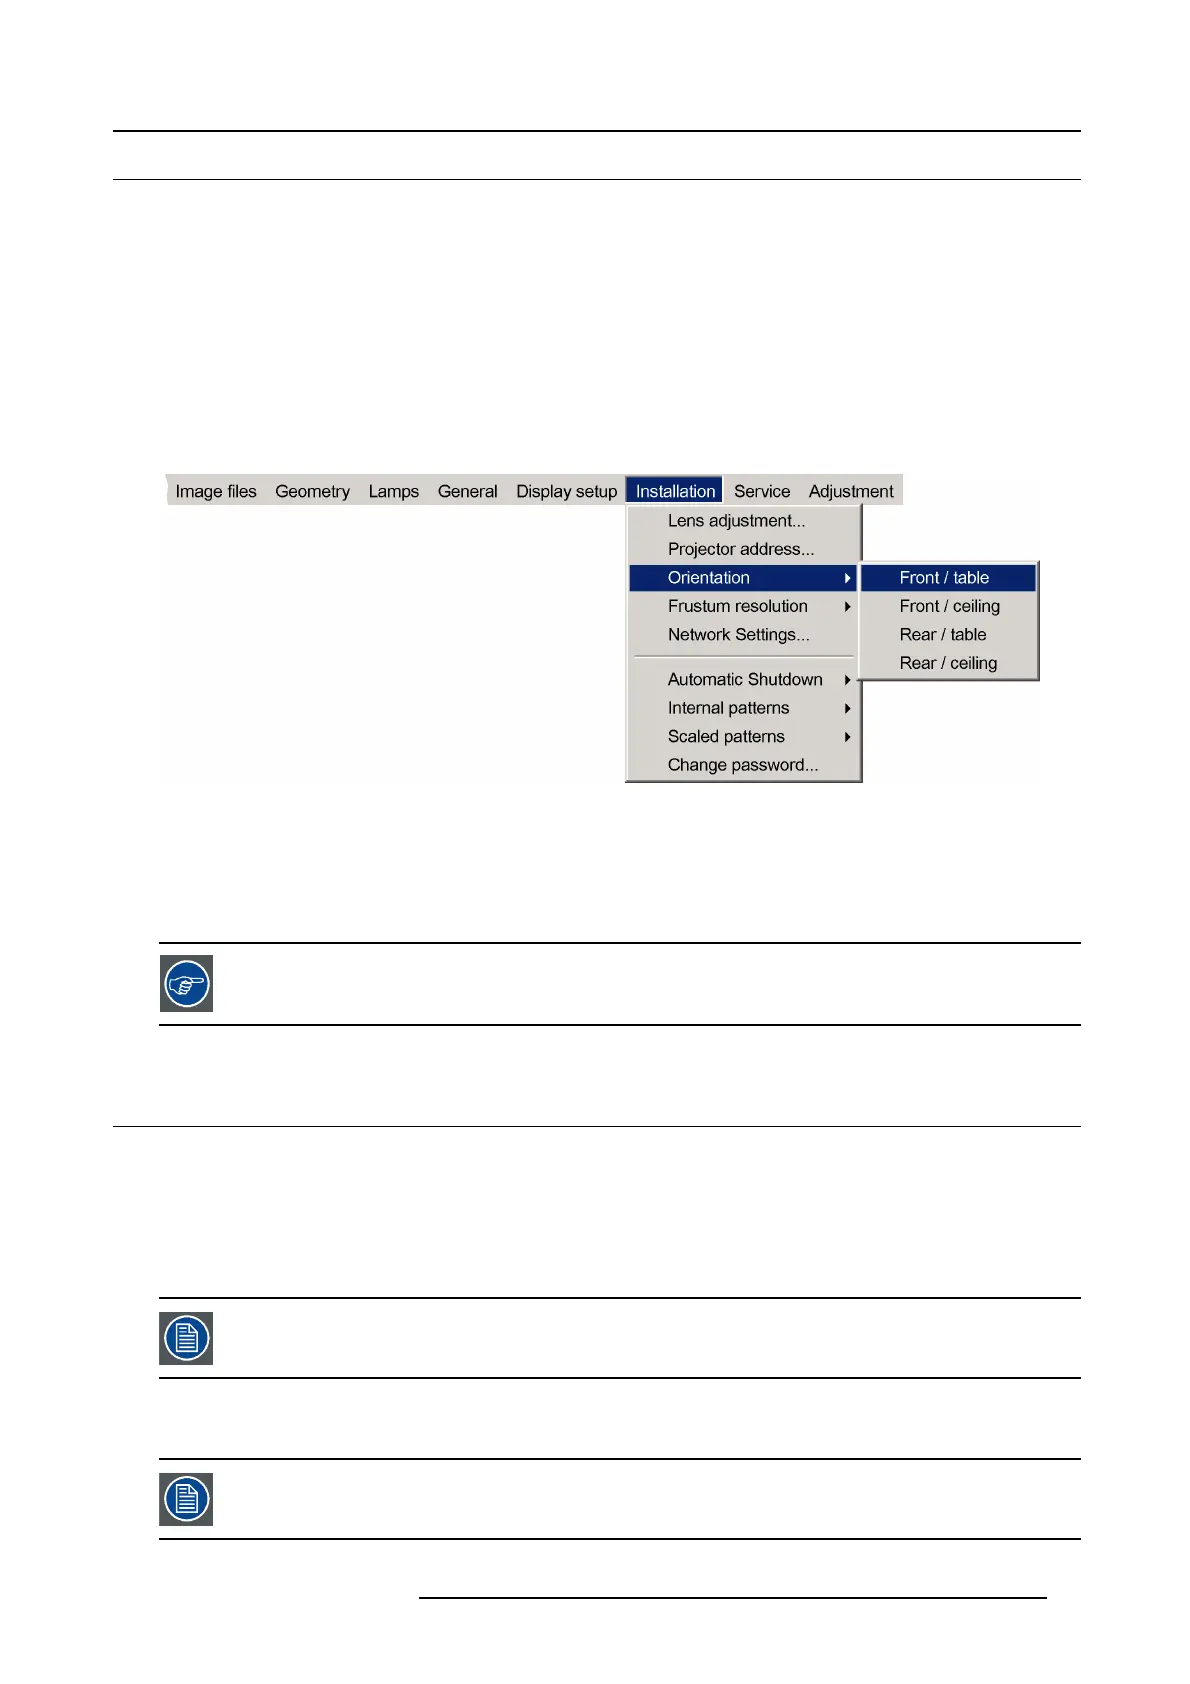
1. Press MENU to activate the Tool bar
2. Press → to select the Installation item
3. Press ↓ to Pull down the Installatio n menu
4. Use ↑ or ↓ to select Orientation
Image 5-8
5. Press → to pull down the menu
6. Use ↓ or ↑ to select the desired orientation
7. Press ENTER
The projection is adapted and a bullet shows the active configuration.
When changing the orientation from table to ceiling or vice versa, the Smearing reduction must also be set
accordingly (scan direction) in the remote user interface. See the dedicated System manual for more infor-
mation.
5.7 Lens adjustments
Overview
• Locking the lens holder (rugged option)
• Locking / unlocking the zoom ring and the focus ring of the lens
• Back focal length adjustment
• Adjusting the lens
If the lens locking option (= rugged option) is installed on the projector, a warning will be displayed before the
execution of any lens shift adjustment.
5.7.1 Locking the lens holder (rugged option)
The lens locking system is an option (rugged option) and is not available on standard projectors.
R59770198 BARCO SIM 7D 13/02/2013 41