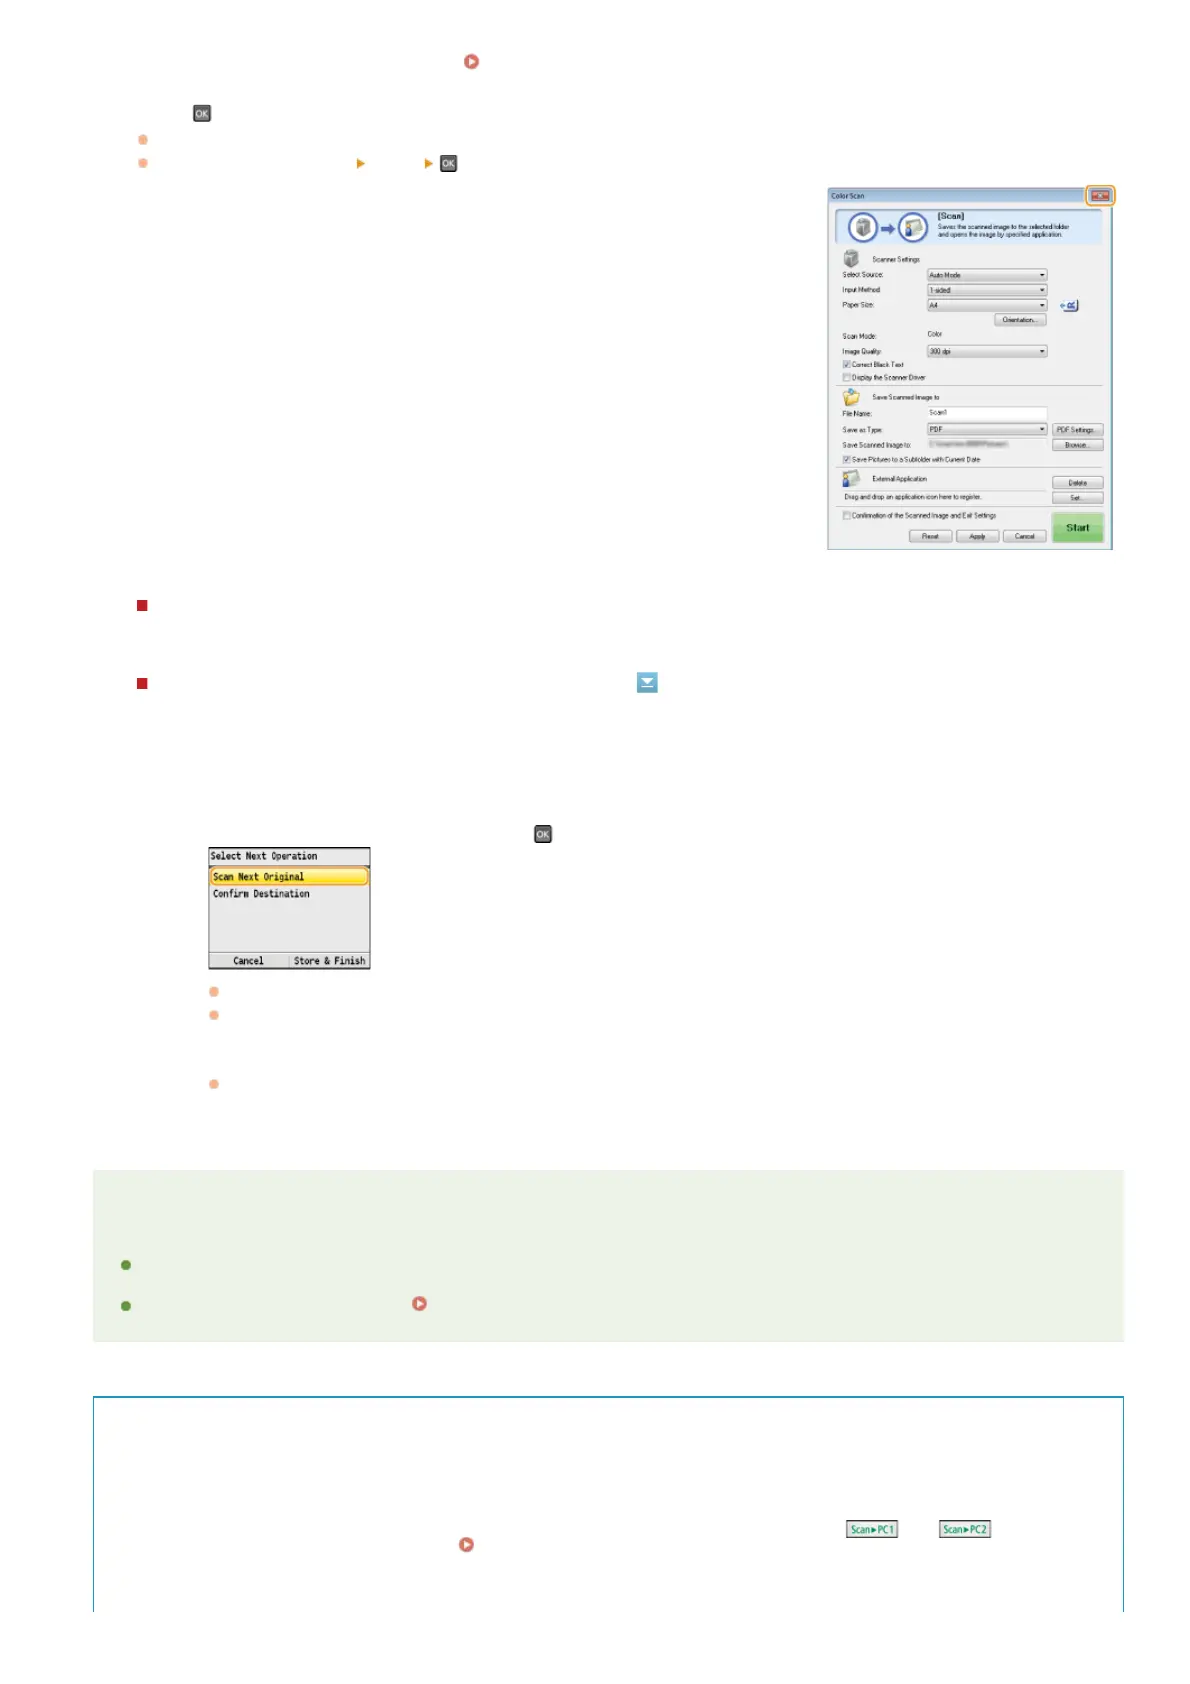
You can change settings from MF Toolbox. Configuring Scan Settings in MF Toolbox
Press .
Scanning starts.
To cancel, press <Cancel>
<Yes> .
IMPORTANT:
You cannot scan while the MF Toolbox setup screen is displayed. Close the screen
before scanning.
When placing documents in the feeder in step 1
When scanning is complete, the save destination folder is displayed on the computer.
When placing documents on the platen glass in step 1
NOTE
About the save destination folder
By default, the scanned data is saved to the [Pictures] or [My Pictures] folder. A subfolder named with the scanning date is
created, and the data is saved to that folder.
To change the save destination, see
Configuring Storing Settings.
TIPS
Scan from the machine more easily
If you have regularly used preferences, such as scanning in color or black and white, or a pre-determined computer where
scanned documents will be saved, specifying these settings each time you scan can be troublesome. Register these settings in a
[Scan > PC] key so that you can scan with one press of a key. There are two [Scan > PC] keys:
and . You can
register your settings in either of these keys.
Scanning Using the [Scan > PC] Key
Other useful scanning functions
When scanning is complete, follow the procedure below.
1
If there are additional pages of documents to be scanned, place the next document on the platen glass,
select <Scan Next Original>, and press
.
Repeat this step until you finish scanning all of the pages.
When there is only one page to be scanned, proceed to the next step.
2
Press <Store & Finish>.
The save destination folder is displayed on the computer.
6
㻞㻡㻞㻌㻛㻌㻢㻣㻢