Step Illustration Instruction
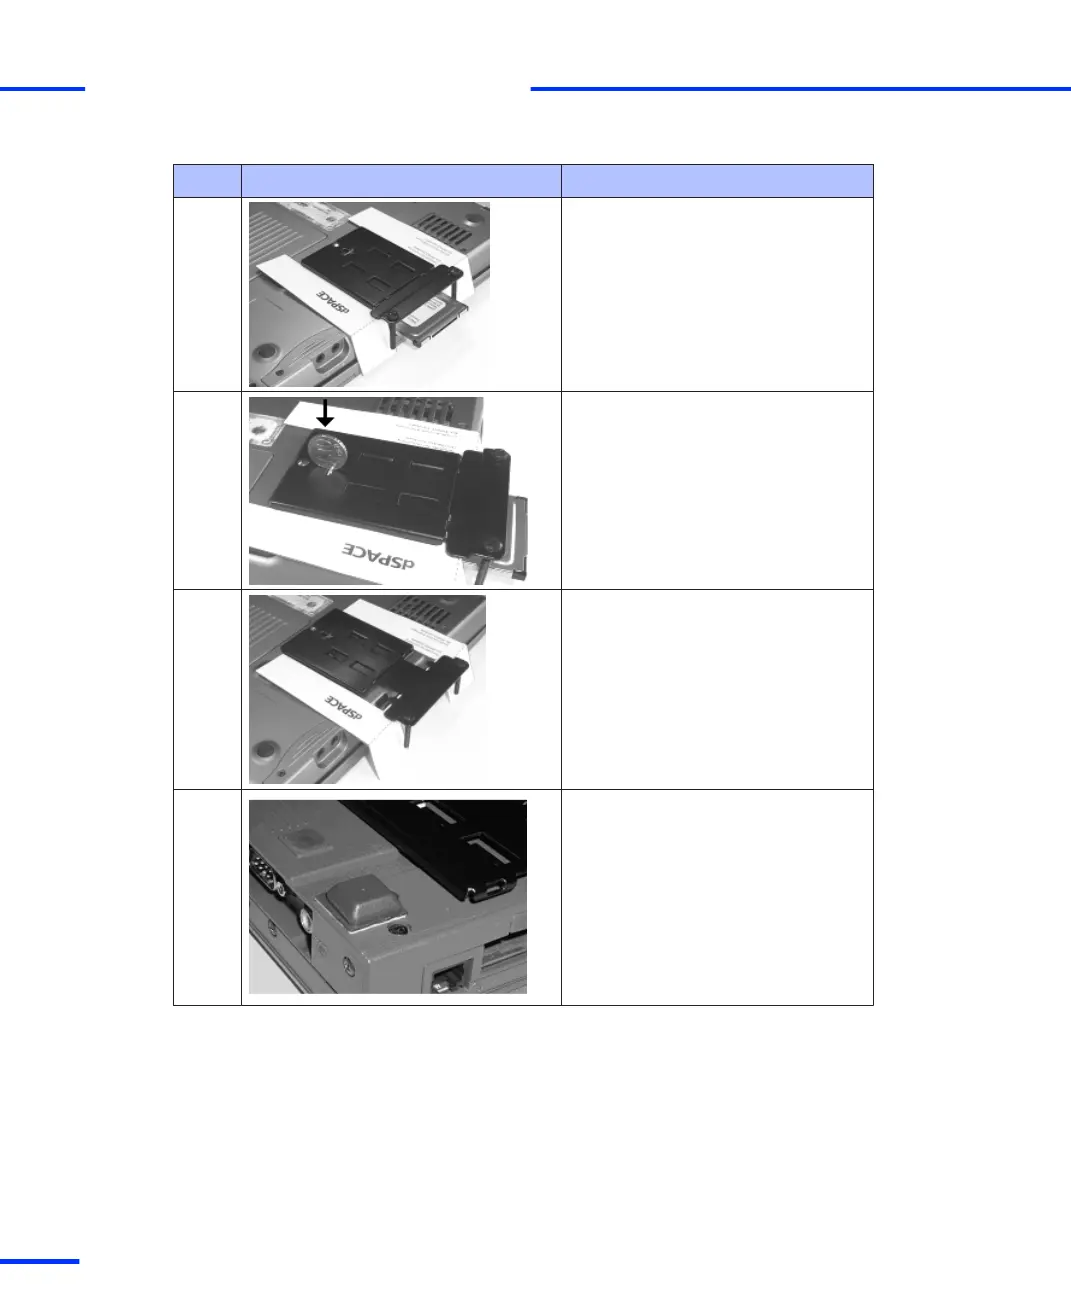
5
Press the complete CardSafe (as
delivered) to the underside of the
notebook in the opening of the
template.
The procedure is the same for each
card fixture type and for all the spacers
and screws that can be mounted.
6
Push a small coin on the spring of the
base plate to release the card fixture.
To avoid injury, do not use your
fingernail to unlock the connector
fixture.
7
While pressing the spring, unplug the
card fixture. The base plate stays in
position.
After this remove the template.
8
Fix the four rubber feet to the
underside of the notebook.
This is to compensate the height of
the CardSafe and ensure the stability
of the notebook.
s
Connecting an Expansion Box to the Host PC
t
70
s
DS1103 Hardware Installation and Configuration November 2014