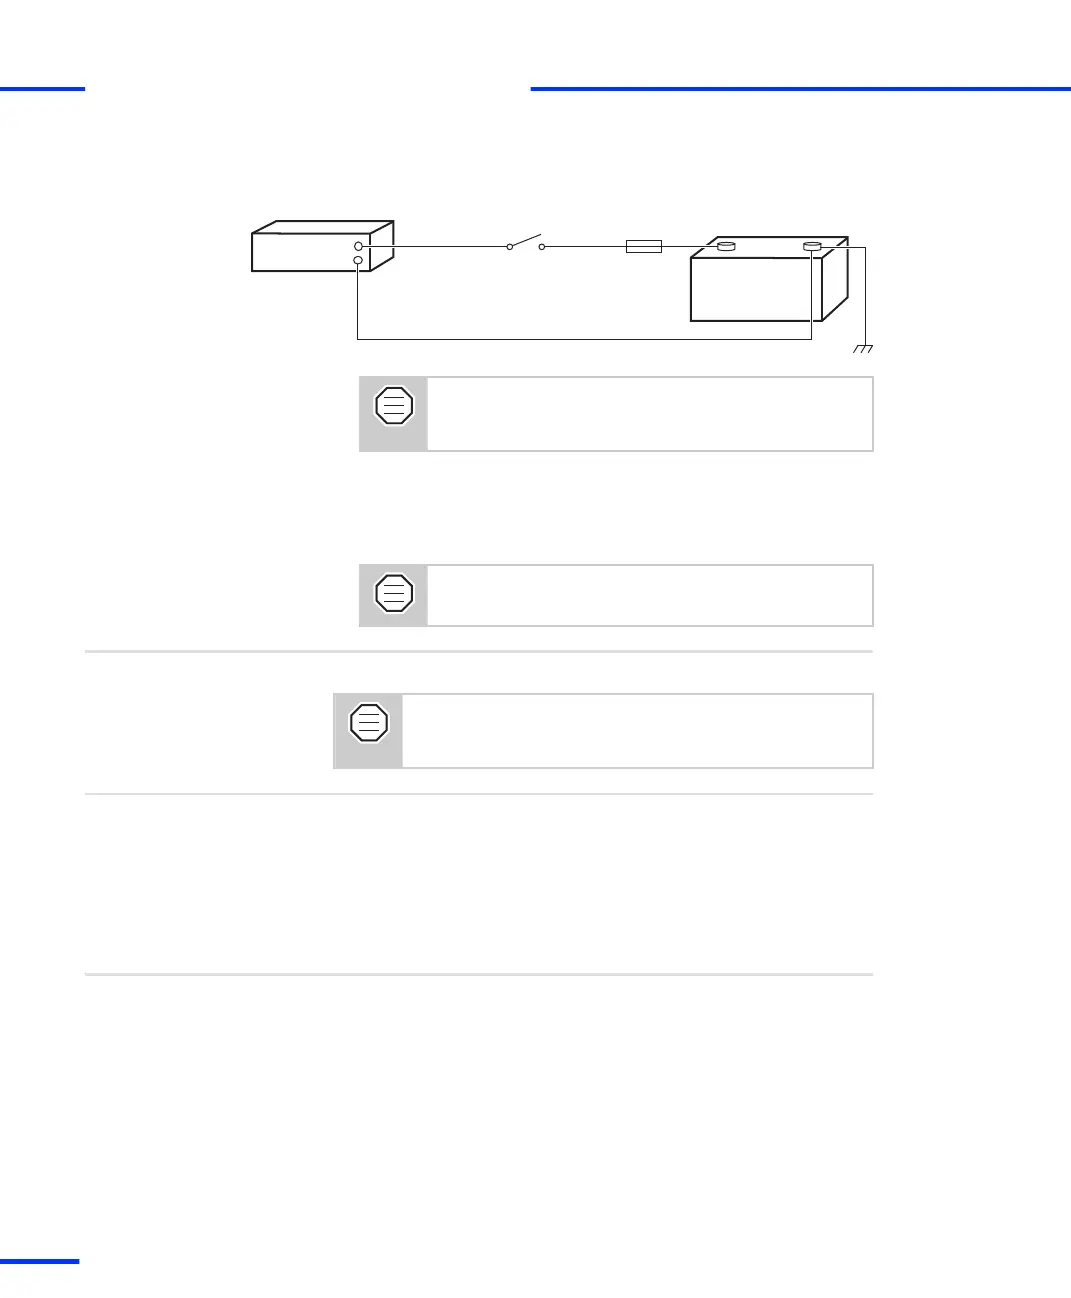
The illustration below shows how to supply power to the DS830 if
installed in a vehicle.
DS830/x
Car battery
(12 V)
Red wire
Black wire
5 A fuse
+
–
(close to battery)
It is highly recommended to insert a fuse into the
main power supply wire. The fuse should be
installed close to the battery.
If you connect the red wire to the car battery directly, the DS830
will always be turned on, and the car battery will soon run down if
the engine does not operate. Thus, a switch is highly
recommended.
Use only a switch and wires that are designed for
at least 5 A.
After the boxes are connected, you can switch on the system.
To avoid unpredictable errors, you should always turn on
the dSPACE boxes (expansion box or MicroAutoBox) before
the DS830 MultiLink Panel (if used) and the host PC.
Further steps
Basics
• DS830: Identifying the Connection Status on page 78
Related topics
DS830: Identifying the Connection Status
The front of the DS830 panel has several LEDs, which indicate the
current status of the connection to the host PC and the connected
dSPACE boxes (expansion boxes or MicroAutoBoxes), as well as the
status of the panel’s power supply.
Objective
s
Connecting an Expansion Box to the Host PC
t
78
s
DS1103 Hardware Installation and Configuration November 2014