Needle bar
50 Service Instructions 755 A/756 A - 00.0 - 02/2019
Fig. 44: Assembling the needle bar linkage (4)
14. Turn the handwheel until the screw (14) can be accessed through the
arm shaft crank.
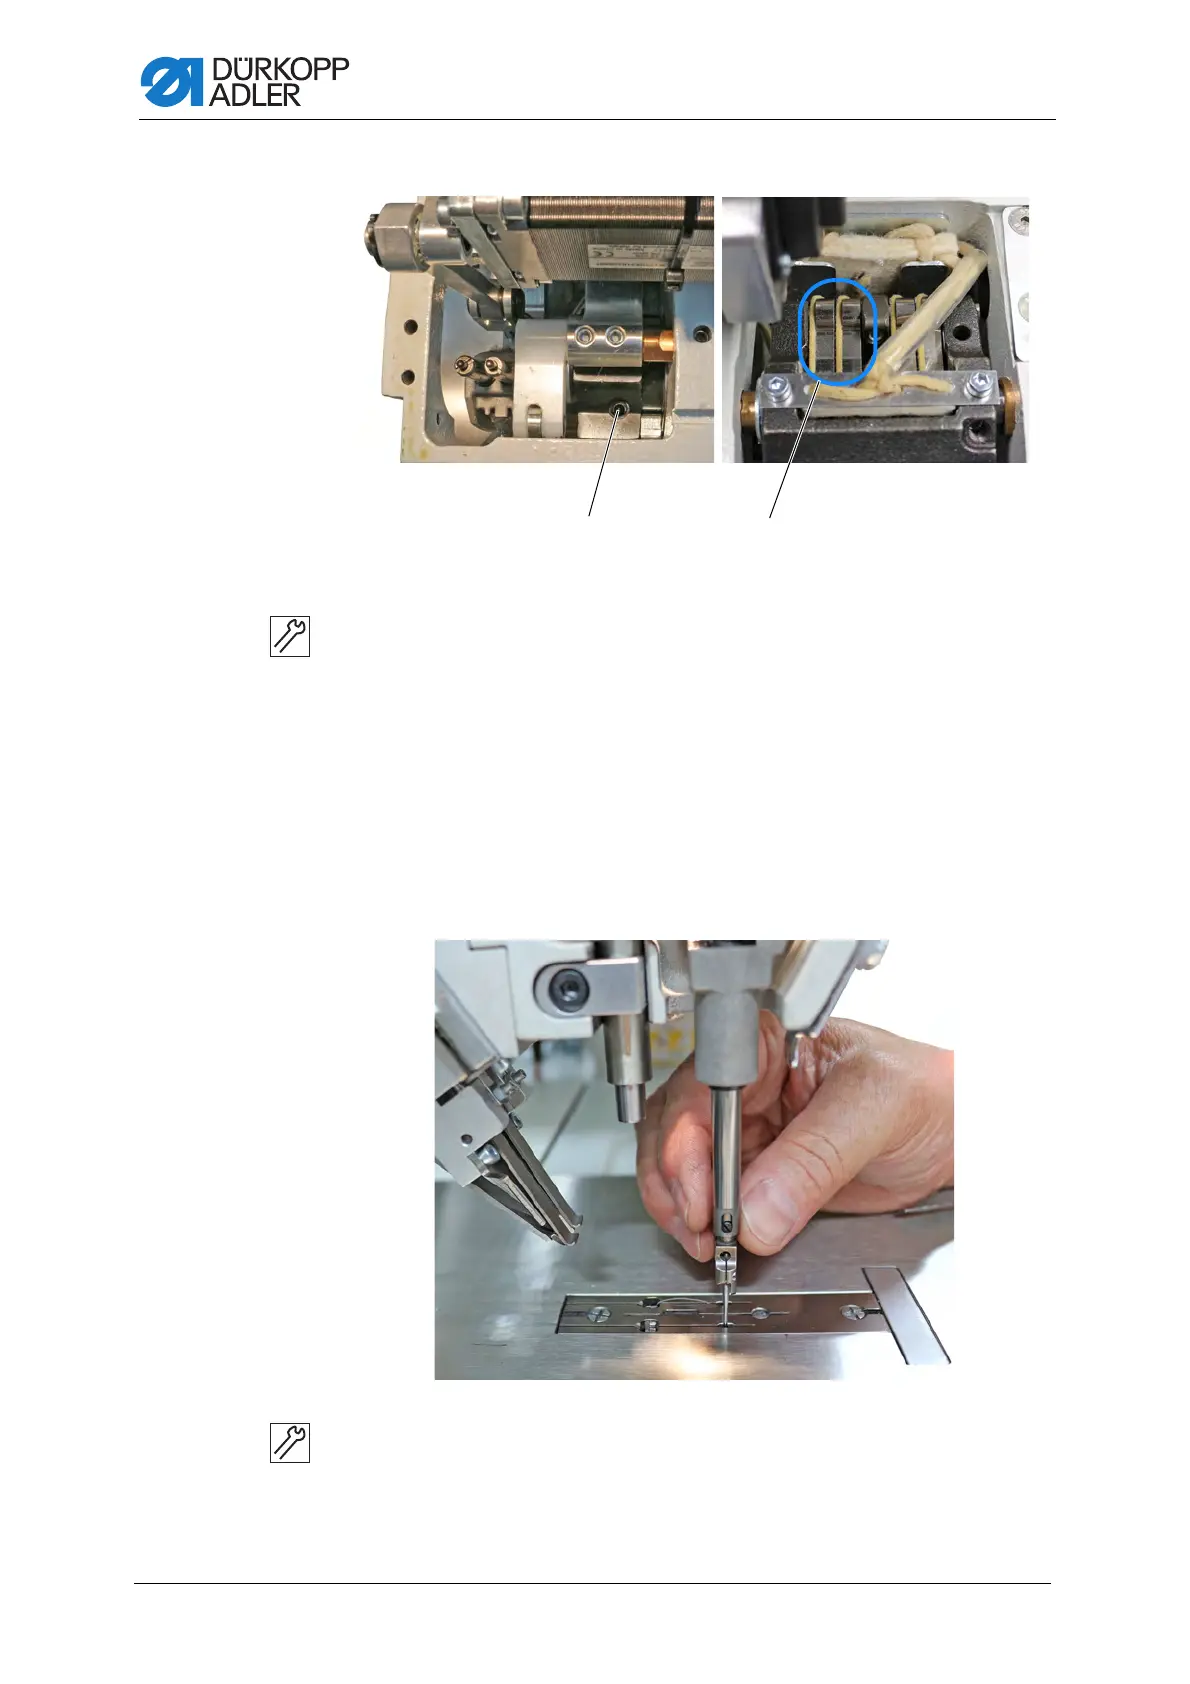
15. Check whether the gear tongues (15) are parallel to one another.
16. If they are not, move the gear tongues (15) by hand until they are
parallel to one another.
17. Slightly loosen the screw (14).
The needle bar linkage can move freely.
18. Turn the handwheel until the needle bar is at the top dead center.
19. Insert the needles.
Fig. 45: Assembling the needle bar linkage (5)
20. Keep turning the handwheel until the needle bar is at bottom dead
center.
21. Set the needle bar linkage by hand until the needles plunge exactly
into the center of the needle holes.
(14) - Screw (15) - Gear tongues

 Loading...


