3GS Technical Manual
Issue 4.5 August 2005
Programming Menus 8-7
digit will prompt entry, like this:
You can enter a number using two methods:
• Enter the number directly. For example, press 2, press
0, then #. If you make a mistake (before pressing #)
press * to move backward, and YES to move forward,
then re-enter the correct digits followed by #.
• Scroll through numbers. Use the two keys denoted as +
(UNSET) and - (PART) on the overlay. The plus key will
increment the number, while the minus key will
decrement it.
Portable ACE RKD Node
The Europlex 3GS Portable ACE RKD consists of universal
proximity read head assembly incorporated seamlessly within
a standard 3GS RKD node.
The 3GS RKD responds to proximity cards/devices when
programmed to do so in an identical way to the programmed
user entering his access code. In this way, user rights
programmed as a standard 3GS feature are maintained as is
the identification of the user in the 3GS database and system
log.
The 3GS Portable ACE RKD is only compatible with the latest
EN50131-1 3GS software versions released from March 2004
onwards.
The 3GS Portable ACE RKD is also compatible with this
release. To ensure full DD243 compliance, a new DISABLE
KEYPAD variable has been created which disables the RKD
keys of all system RKD nodes when the Portable ACE is used
as an entry method for DD243:2002 compliance. See 3GS
Application Guides for more information.
Functions
The following functions are ascribed automatically to a
Portable ACE cardholder:
Programming the Portable ACE User
Before programming can commence, the new Portable ACE
RKD node must be installed on the 3GS ringnet correctly and
the keys tested for correct operation.
On the Portable ACE keypad enter USER CODE + SHIFT +
SHIFT + AREA SET. The display will show:
Press UNSET key to select ASSIGN. N/A indicates features not
currently available. The display will show:
Enter the Portable ACE RKD Node number and press ENTER
to accept.
The display will show:
Scroll down the user list using UNSET and up the list using
PART until the correct user number is displayed and press
ENTER to select.
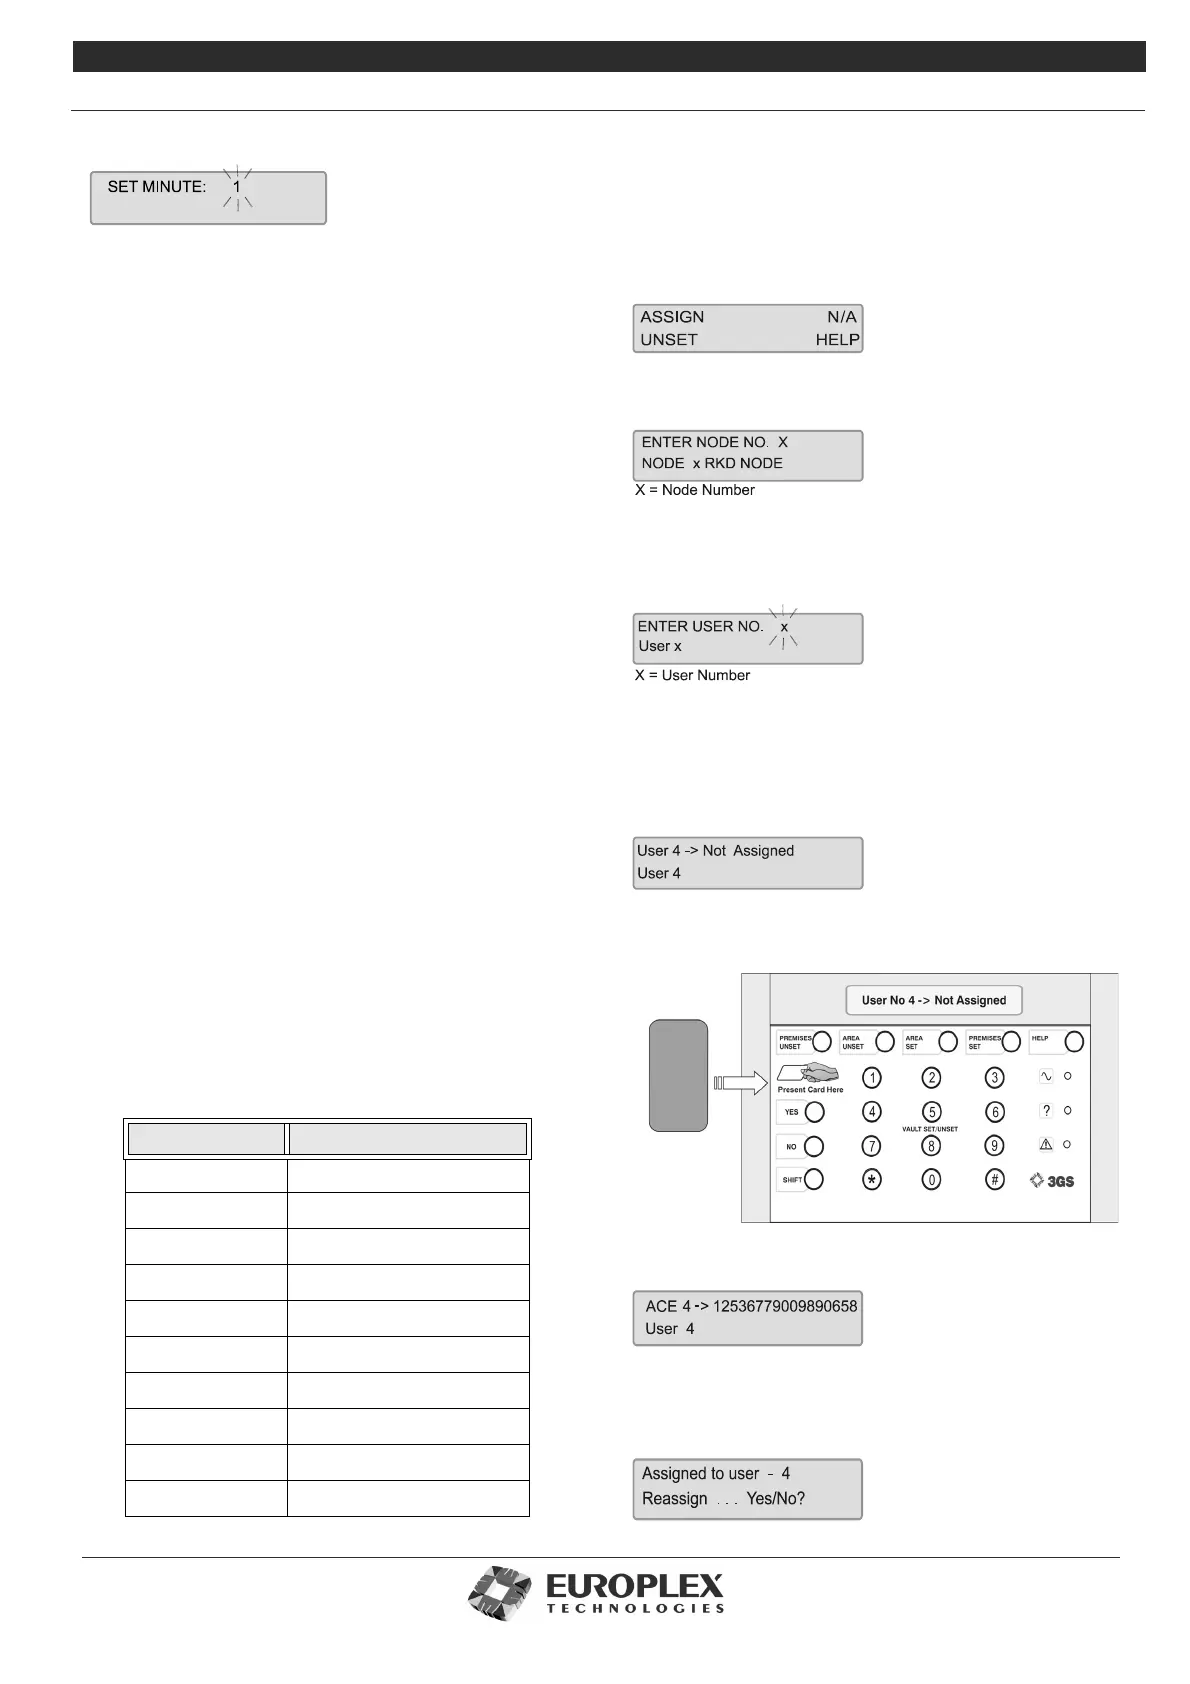
Using user number 4 as an example, the display will show
User 4 -> Not Assigned
Present the card/token for that user to the left hand side of
the RKD as shown below:
Once assigned the display will show
The number displayed is the card reference number.
If, when assigning a Portable ACE user, a card already
assigned is presented, the display will show
Function No Description
1UNSET
2 PART SET/AREAUNSET
3 HALF SET/AREA SET
4FULL SET
5SPARE
6 BELL OUTPUT ON
7 BELL OUTPUT OFF
8SPARE
9SPARE
10 SPARE