17 - 8
Creating New Accounts
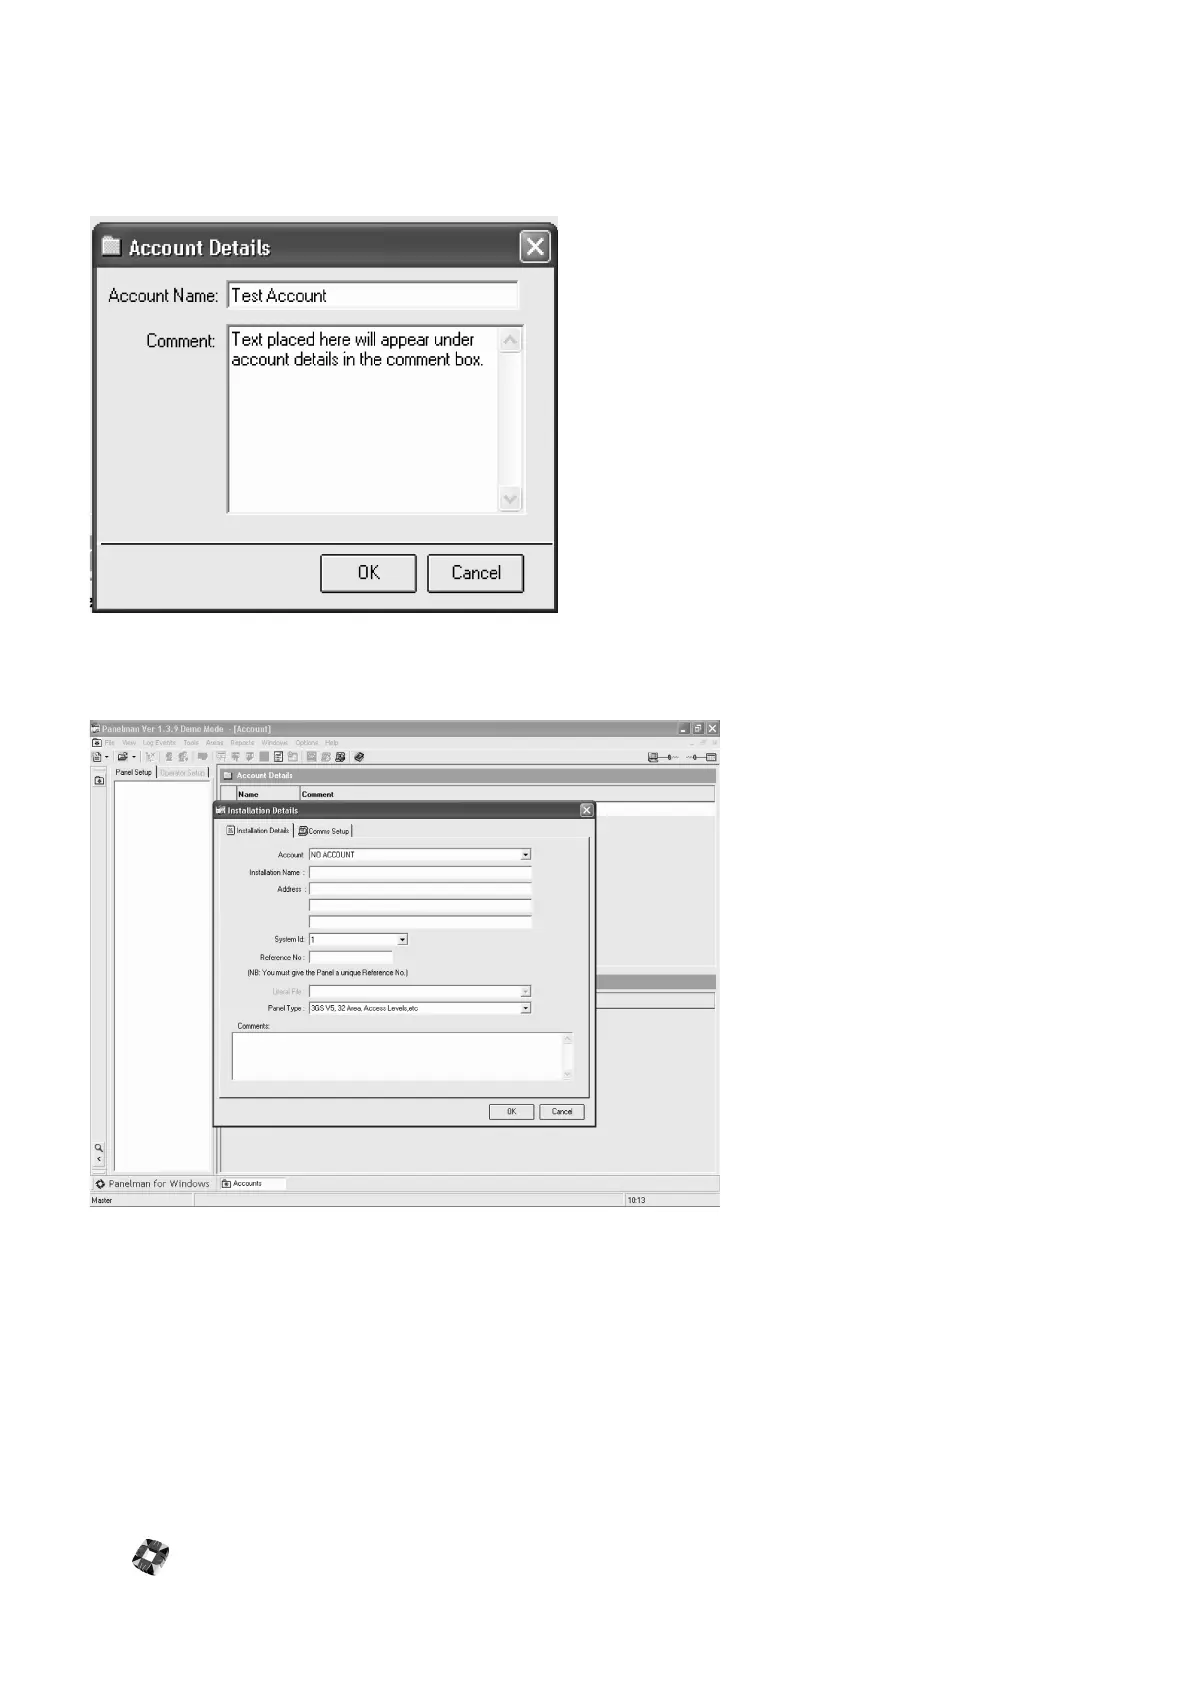
New accounts can be created by clicking on File on the
Menu Bar across the top of the screen, choosing New from
the drop down menu and then choosing Account.
Alternatively clicking on the down arrow on the New
Account/Installation icon on the Toolbar, then choosing New
Account will display the Account details window:
Fill in Account Name and any Comments and click OK to
proceed.
Creating New Installations
New installations can be created by
choosing File – New – Installation from
the File Menu, or alternatively clicking
on the down arrow on the New
Account/Installation icon on the Toolbar
then choosing New Installation. The
window shown opposite will be
displayed:
Note: When creating a New Installation,
select the Account in which the
installation is to be placed from the
Account Drop-down list.
Descriptions of items:
Account – After Setting up Accounts,
choose the relevant Account to place the
Installation into by clicking the down-
arrow button. If you wish to have an
individual installation (not part of a
group) choose the default Account "No
Account".
Installation Name – This is the name of the installation you are creating.
Address – This is the address of the building in which the installation is found.
System ID – This is used for distinguishing between panels during polling, when multiple units are connected to a single
serial line. Valid values for a System ID are from 1 to 127 inclusive. The System ID shown here needs to match the one
on the panel, if the panel is to be communicated with.
Reference No – This is recognised by communications software as a unique account number for the installation. It may
be set as any number between 0-9999. This number does not have to match any number in the Panel.
Literal file – This is initially blank if panel has not been worked with. If the panel has been worked with you must ensure
that the literal displayed matches the one in the panel. (See Assign Literals on P. 15)
Panel Type – Select a type from the drop-down list