FARO Edge
September 2012
63
Chapter 4: Probes
the FARO Laser Line Probe compensation. If not, repeat the compensation
moving the FARO Laser Line Probe slower in each step.
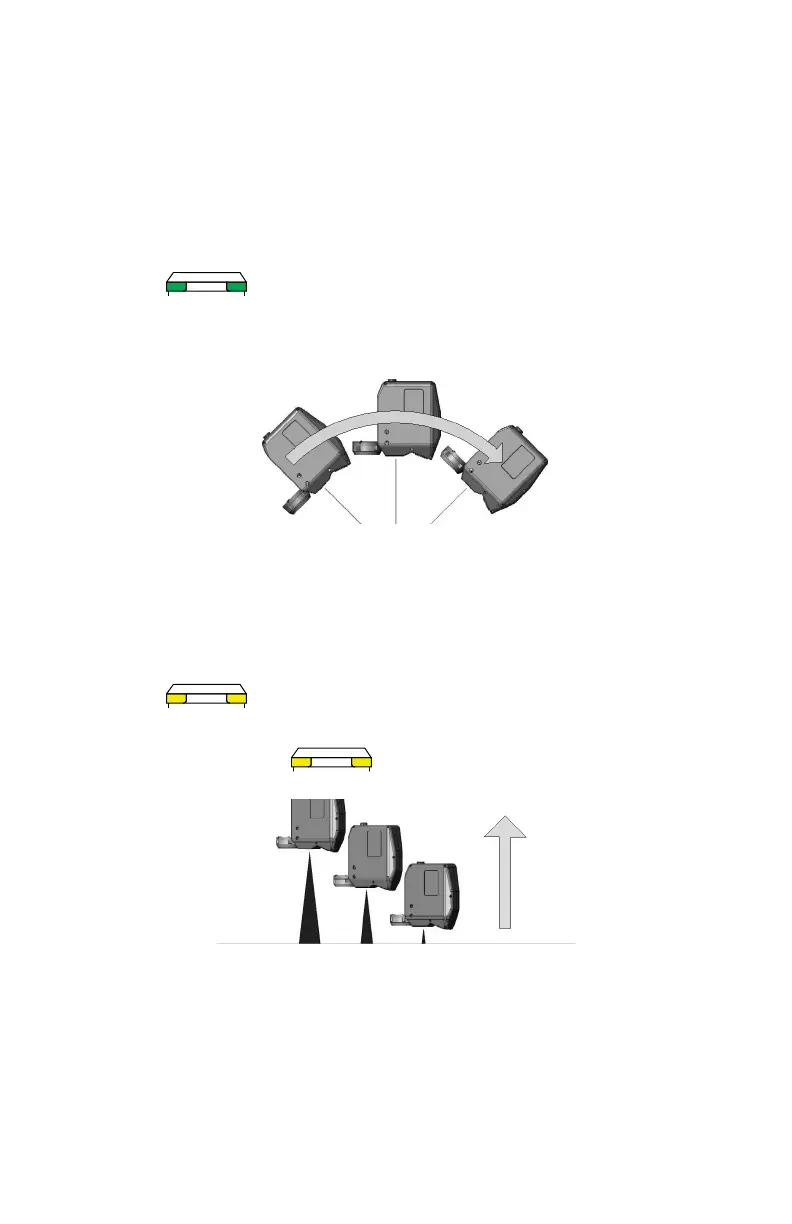
• Rotate the FARO Laser Line Probe 90°.
• Aim the laser line at the middle of the white surface.
• Move the FARO Laser Line Probe until the laser is in the Center
Range. .
• Press the FRONT button and move the FARO Laser Line Probe while
pointing to the center of the white surface. Rotate the FARO Laser Line
Probe as much as possible - at least 90 degrees.
• Press the BACK button.
4 Digitize the White area of the FARO Compensation Plate with the FARO Laser
Line Probe.
• Aim the laser line at the middle of the white surface.
• Move the FARO Laser Line Probe until the laser is closer than the Near
Range. .
• Press the FRONT button and slowly move the FARO Laser Line Probe
beyond the Far Range while pointing to the center of the white
surface.
• Press the BACK button.
The digitized compensation points then calculate and the C
OMPENSATION
S
TATUS updates. If the probe passes, the current date and time is added to the
probe information. You can view the details for all probe compensations by
clicking the VIEW LOG button. See “View Log” on page 189.
08M52E00_FaroArm_Edge.book Page 63 Thursday, October 4, 2012 9:31 AM