FARO Edge
September 2012
66
Chapter 4: Probes
Line Probe Settings
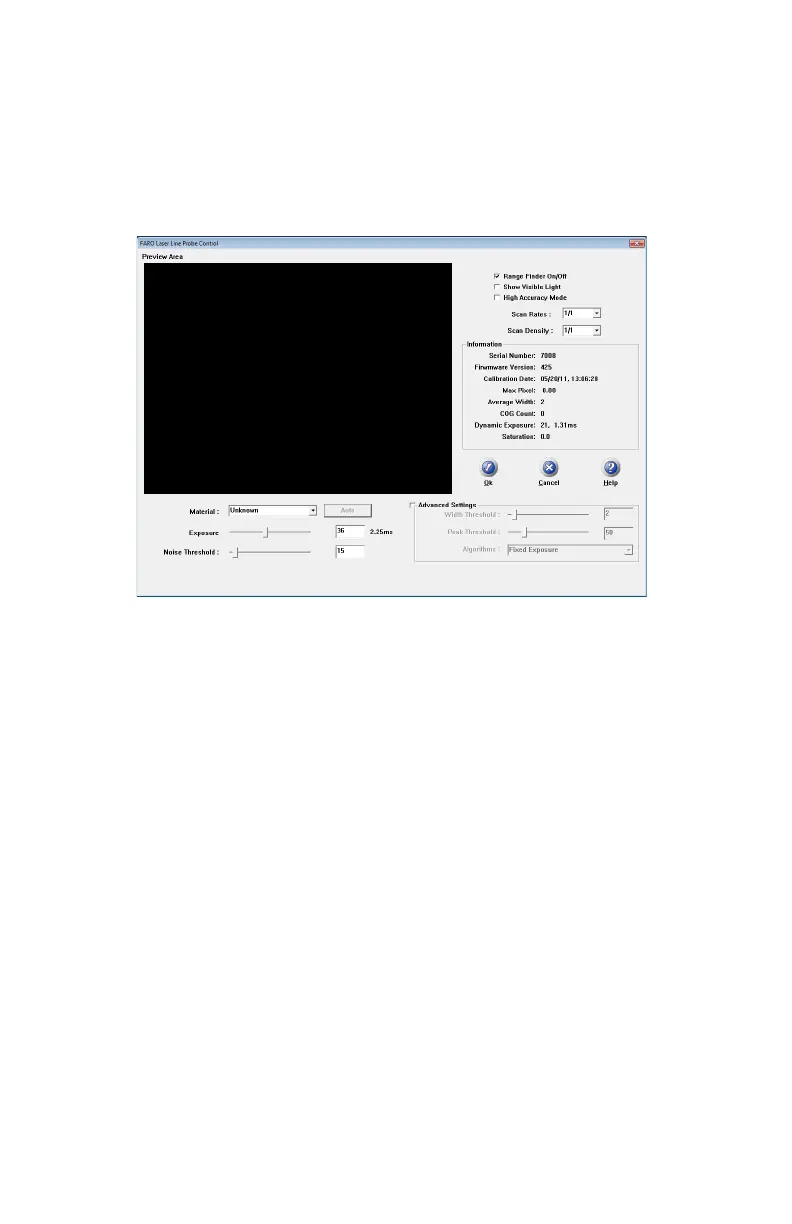
Choose the LASER PROBE SETTINGS button to show the FARO L
ASER LINE
P
ROBE CONTROL dialog box. When the FARO Laser Line Probe is within the
operating range, you will see the line in the P
REVIEW AREA of the dialog box.
• Disable the R
ANGE FINDER dialog box by clearing the Range Finder On/Off
check box.
• Select the S
HOW VISIBLE LIGHT check box to add all visible light to the
Preview window.
N
OTE: Adding all visible light to the preview window will decrease the
number of frames per second sent to the computer and should only be used
when diagnosing problems with the FARO Laser Line Probe.
• Select the H
IGH ACCURACY MODE check box to operate the FARO Laser Line
Probe in the High Accuracy mode. High Accuracy mode can improve the
performance of the FARO Laser Line Probe by up to 30%, but reduces your
field of view by ½ and shortens your effective maximum scan line width to ⅔
of the normal width.
N
OTE: Always clear this check box when compensating the FARO Laser Line
Probe. See “Compensation” on page 60.
Scan Rate and Density
Use the Scan Rate Density settings for data reduction. Reducing the number of
points the FARO Laser Line Probe collects can improve system performance,
increase scanning speed and potentially reduce unwanted noisy data.
Figure 4-13 FARO Laser Line Probe Control dialog box
08M52E00_FaroArm_Edge.book Page 66 Thursday, October 4, 2012 9:31 AM