142
Program description - Control switches
Resetting a control switch back to “free”
To reset a control switch back to “free”, make sure the
display is as below …
SEL
0%
0%
0%
C1
C2
C3
–––
C4
Control switch
Gb1
Gb1
0%
STO
–––
–––
–––
SEL
Move desired
control adj.
… then, with a brief simultaneous tap on the or
keys of the right four-way button (CLEAR), the
entry for a control will be erased.
Dening the switching point
Using the selection key of the left or right four-way
button to move the marker frame into the column
labelled STO (store).
Move the selected transmitter control to the position
at which the switching point, i. e. the switch between
OFF/ON, should trigger and briefly tap the centre SET
key of the right four-way button. The current position is
displayed, for example “+85 %”:
SEL
0%
0%
0%
C1
C2
C3
–––
C4
Control switch
Lv2
Gb1
+85%
STO
–––
–––
–––
SEL
The switching point can be altered at any time with
another tap on the centre SET key of the right four-way
button.
Note:
Do not, however, set a switching point at a
transmitter control’s travel end-point, since
this makes reliable switching impossible. If a
2-way or 3-way switch is used to operate a control
switch, the switch point should be programmed in
advance with one of the transmitter’s proportional
controls.
First, assign the corresponding proportional control
in the 2nd column and set the switching point in such
a way that will ensure the subsequent conguration
for the 2-way or 3-way switch will reliably exceed
this value. If you do not, the switching function will
be unreliable, since the control switch triggers only
if a value unambiguously fails to meet or exceeds
the value set! To complete the procedure, cancel the
transmitter control assignment then assign the 2-way
or 3-way switch.
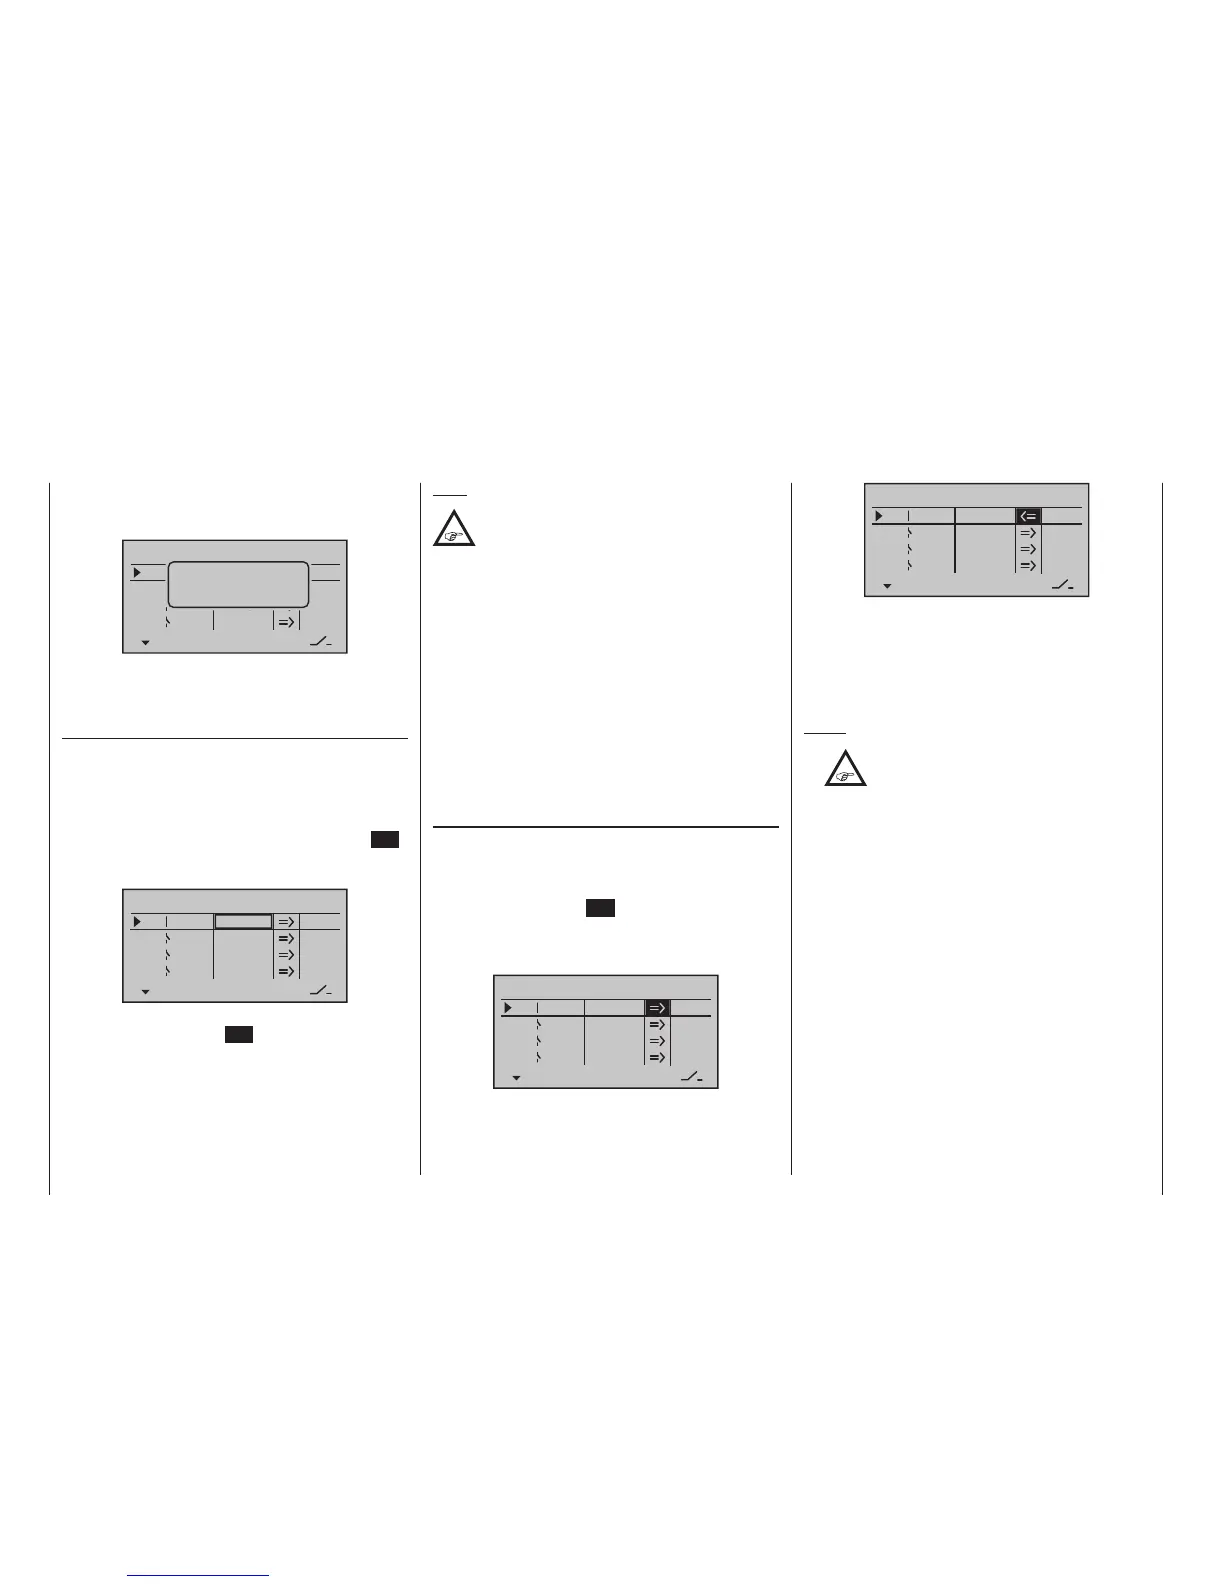
Setting the switching direction
The switching direction of the control switch is changed
as required in the 4th column. Use the selection key
of the left or right four-way button to move the marker
frame into the column labelled SEL (select). Following
a brief tap on the centre SET key of the right four-way
button, the switch direction can by changed back-and-
forth between “normal” and “reversed” with the selec-
tion keys of the left or right four-way button:
SEL
0%
0%
0%
C1
C2
C3
–––
C4
Control switch
Lv2
Gb1
+85%
STO
–––
–––
–––
SEL
SEL
0%
0%
0%
C1
C2
C3
–––
C4
Control switch
Lv2
Gb1
+85%
STO
–––
–––
–––
SEL
A simultaneous tap on the or keys of the right
four-way button (CLEAR) will reset the switch direction
back to “=>”.
The current switch position of the control switch is dis-
played in the leftmost column by the switch icon next
to the number of the control switch.
Notes:
•
In this example control switch ”C1” is open
as long as transmitter control “Lever 2”
(the throttle limiter for a helicopter) is less
than +85 % of control tra vel. It closes once the
switching point is excee ded, i. e. by a value over
+85 % and up to the upper limit.
• In the above example with the switching direction
reversed, control switch “C1” remains closed while
the transmitter control is at less than +85 % of full
travel. As soon as the switching point is exceeded,
in this example a value between +85 % and the
upper travel end-point, “C3” will open.
• If a control switch – e. g. “C1” – has multiple assign-
ments, you should bear in mind that the switching
direction set here applies to all C3 switches.
• The switch state can also be inverted by reversing
the control in the »Control adjust« menu.

 Loading...


