116 H-S81-HS Installation & Operation Manual — P/N LS10114-000HI-E:A 2/24/2015
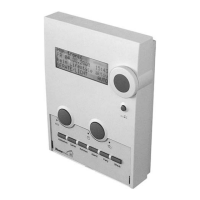
Start-Up and Fault Management Management of Faults
3. Firmly remove the module from the rack using the handle on the front panel.
4. Set the two dip-switches on the new module in exactly the same way as those on the faulty one.
5. Insert the new module in the rack and tighten the 4 fixing screws on the front panel.
6. Use a voltmeter to measure the Vbat output voltage and check that it is 27VDC approximately.
7. Activate the disconnect switch S1 that connects the batteries to the power supply set.
To replace one PU-A0008-1 power supply module operate as follows:
1. Press the shutdown button on the front panel with a screwdriver.
2. Unscrew the four screws on the front panel.
3. Firmly remove the module from the rack using the handle on the front panel.
4. Insert the new module in the rack and tighten the 4 fixing screws on the front panel.
4.2.6 Battery Replacement
To replace lead batteries operate as follows:
1. Open the disconnect switch S1 that connects the batteries to the power supply set.
2. Disconnect +B and -B cables from battery terminals.
3. Replace the batteries with two identical batteries of the same model.
4. Connect +B and -B cables to battery terminals, paying attention not to reverse the polarity.
5. Close the S1 disconnect switch.
4.2.7 Replacement of the CPU
The replacement of one of the CPUs can be made during operation and does not require system
shutdown. To replace the S81-U1002-1 central unit operate as follows:
1. Fully unscrew the two screws on the front panel making sure that they are completely free.
2. Firmly remove the faulty module using the handle on the front panel.
3. Remove the new module from the package taking care not to touch the electronic components.
4. Insert the new module firmly and tighten the two fixing screws on the front panel.
5. Wait for some seconds (time depending on the configuration file dimensions) until the fault
indication disappears from the display.
4.2.8 I/O Module Replacement
The replacement of I/O modules can be made during operation and does not require system shut-
down. To replace one I/O module operate as follows:
1. Fully unscrew the two screws on the front panel making sure that they are completely free.
2. Firmly remove the faulty module using the handle on module front panel.
3. Remove the new module from the package taking care not to touch the electronic components.
4. Insert the new module firmly and tighten the two fixing screws on the front panel.
5. Wait for some seconds until the fault indication disappears from the display.
NOTE: Avoid any contact with the tracks and internal parts of the removed module since the
energy stored in electrolytic capacitors can cause serious injury to people.
NOTE: During the synchronization of the new module, all new events will be blocked and no
action will be carried out by the control panel until the fault resets.
 Loading...