A single handle with two screws holds both the fan tray and air filter on the back of the
services gateway.
NOTE: You can replace the air filter while the services gateway is running.
To remove just the air filter:
1. Attach an electrostatic discharge (ESD) grounding strap to your bare wrist and connect
the strap to one of the ESD points on the chassis. For more information about ESD,
see “Preventing Electrostatic Discharge Damage to the SRX650 Services Gateway”
on page 168.
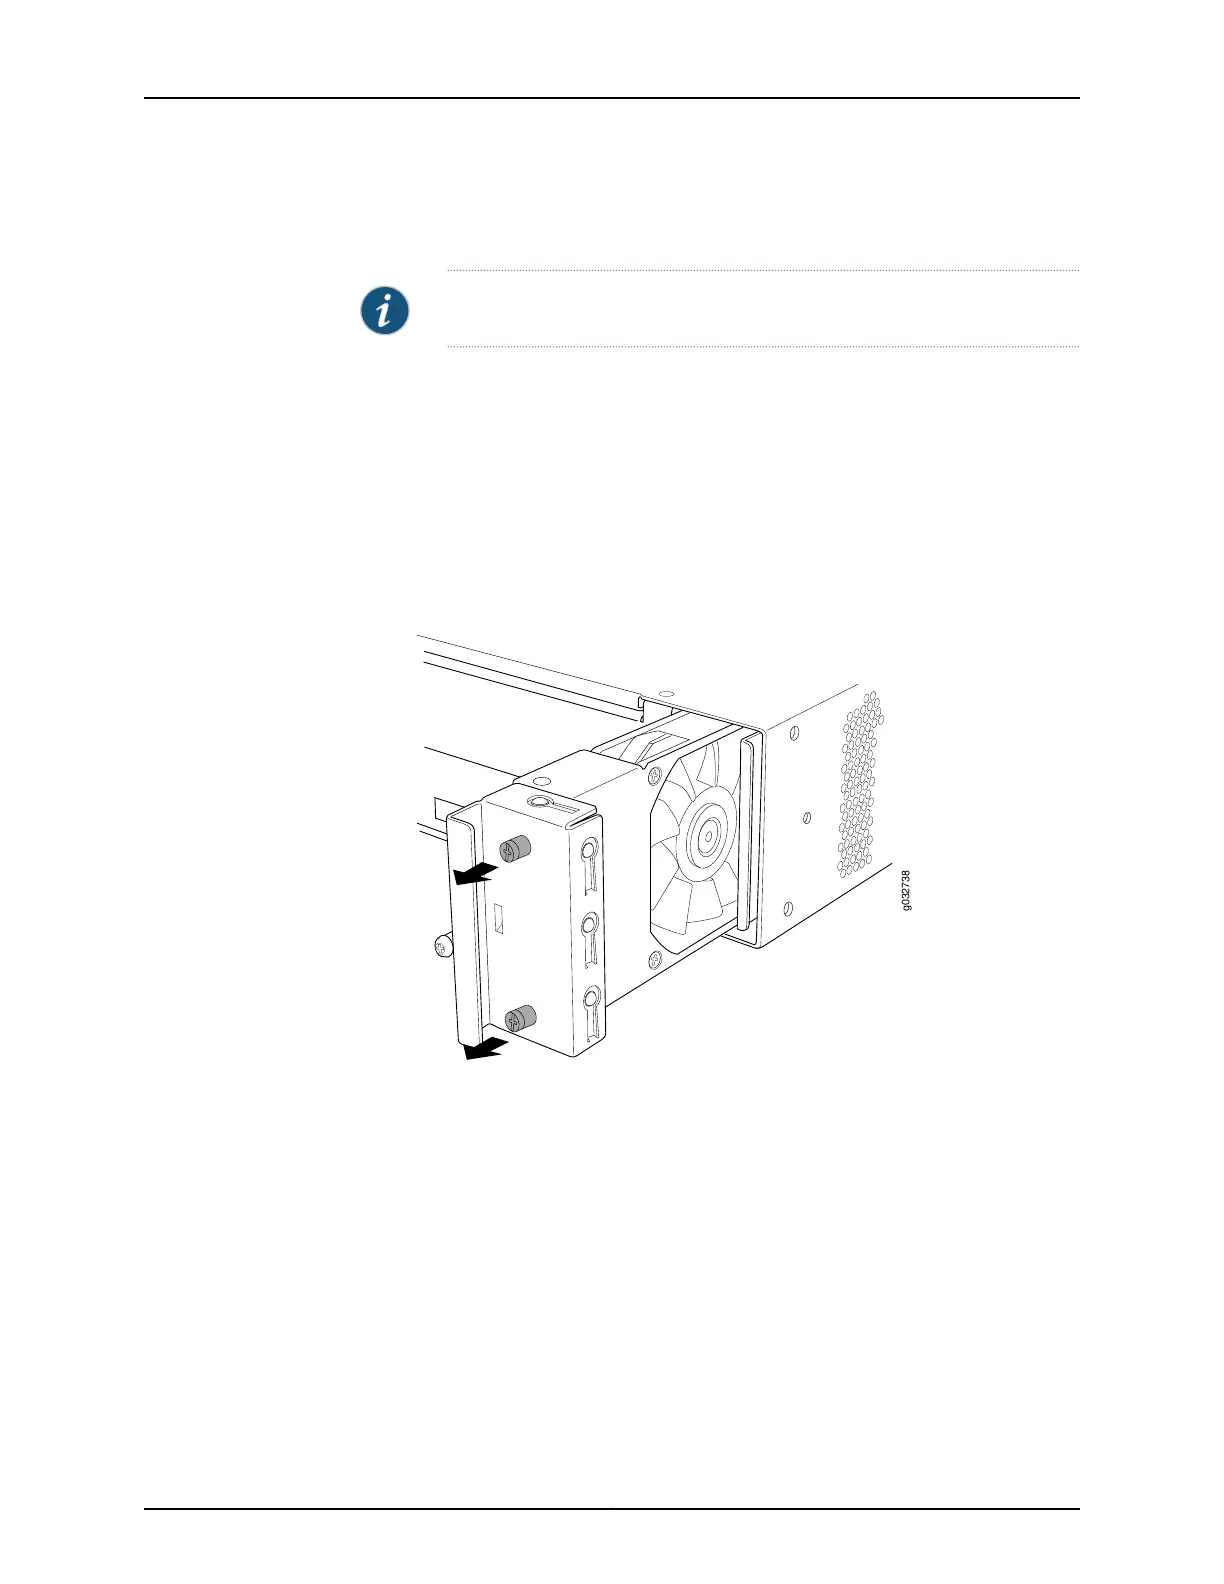
2. Use a number 1 Phillips screwdriver to loosen both captive screws on the handle (see
Figure 27 on page 153).
Figure 27: Loosening Captive Screws
3. Carefully slide out the fan tray.
4. Remove just the air filter.
153Copyright © 2018, Juniper Networks, Inc.
Chapter 25: Replacing Cooling System Components