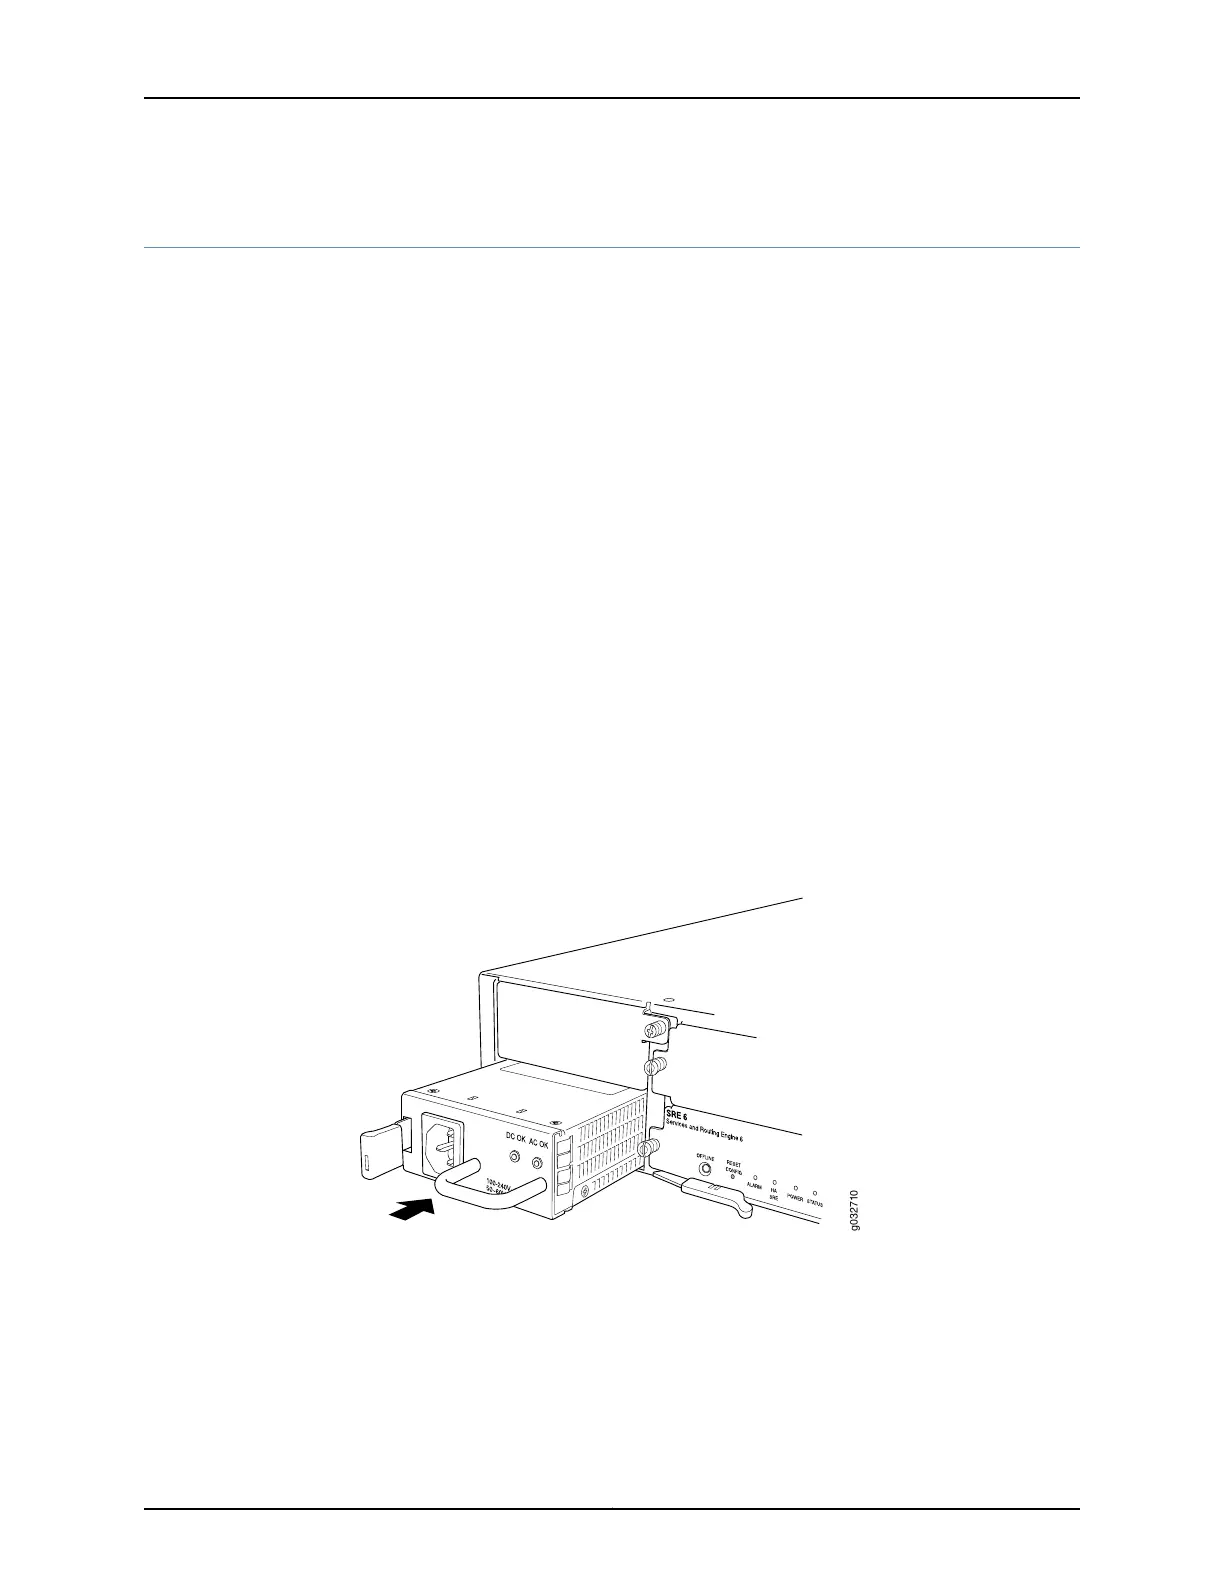
Installing an AC Power Supply on the SRX650 Services Gateway
To install an AC power supply:
1. Attach an electrostatic discharge (ESD) grounding strap to your bare wrist and connect
the strap to one of the ESD points on the chassis. For more information about ESD,
see “Preventing Electrostatic Discharge Damage to the SRX650 Services Gateway”
on page 168.
2. Using both hands, slide the power supply straight into the chassis until the power
supply is fully seated in the chassis slot. The power supply faceplate should be flush
with any adjacent power supply faceplate (see Figure 17 on page 77).
3. Attach the power cord to the power supply.
4. Route the power cord along the cable restraint toward the left or right corner of the
chassis. If they are needed to hold the power cord in place, thread plastic cable ties,
which you must provide, through the openings on the cable restraint.
5. Attach the power cord to the AC power source, and switch on the dedicated facility
circuit breaker for the power supply. Follow the ESD and connection instructions for
your site. If the power supply is correctly installed and functioning normally, the POWER
LED lights steadily.
Figure 17: Installing an AC Power Supply on the SRX650 Services Gateway
Related
Documentation
Removing an AC Power Supply from the SRX650 Services Gateway on page 145•
• Connecting an AC Power Cord to the SRX650 Services Gateway on page 92
• Required Tools and Parts for Replacing Hardware Components on the SRX650 Services
Gateway on page 141
77Copyright © 2018, Juniper Networks, Inc.
Chapter 15: Installing the Services Gateway