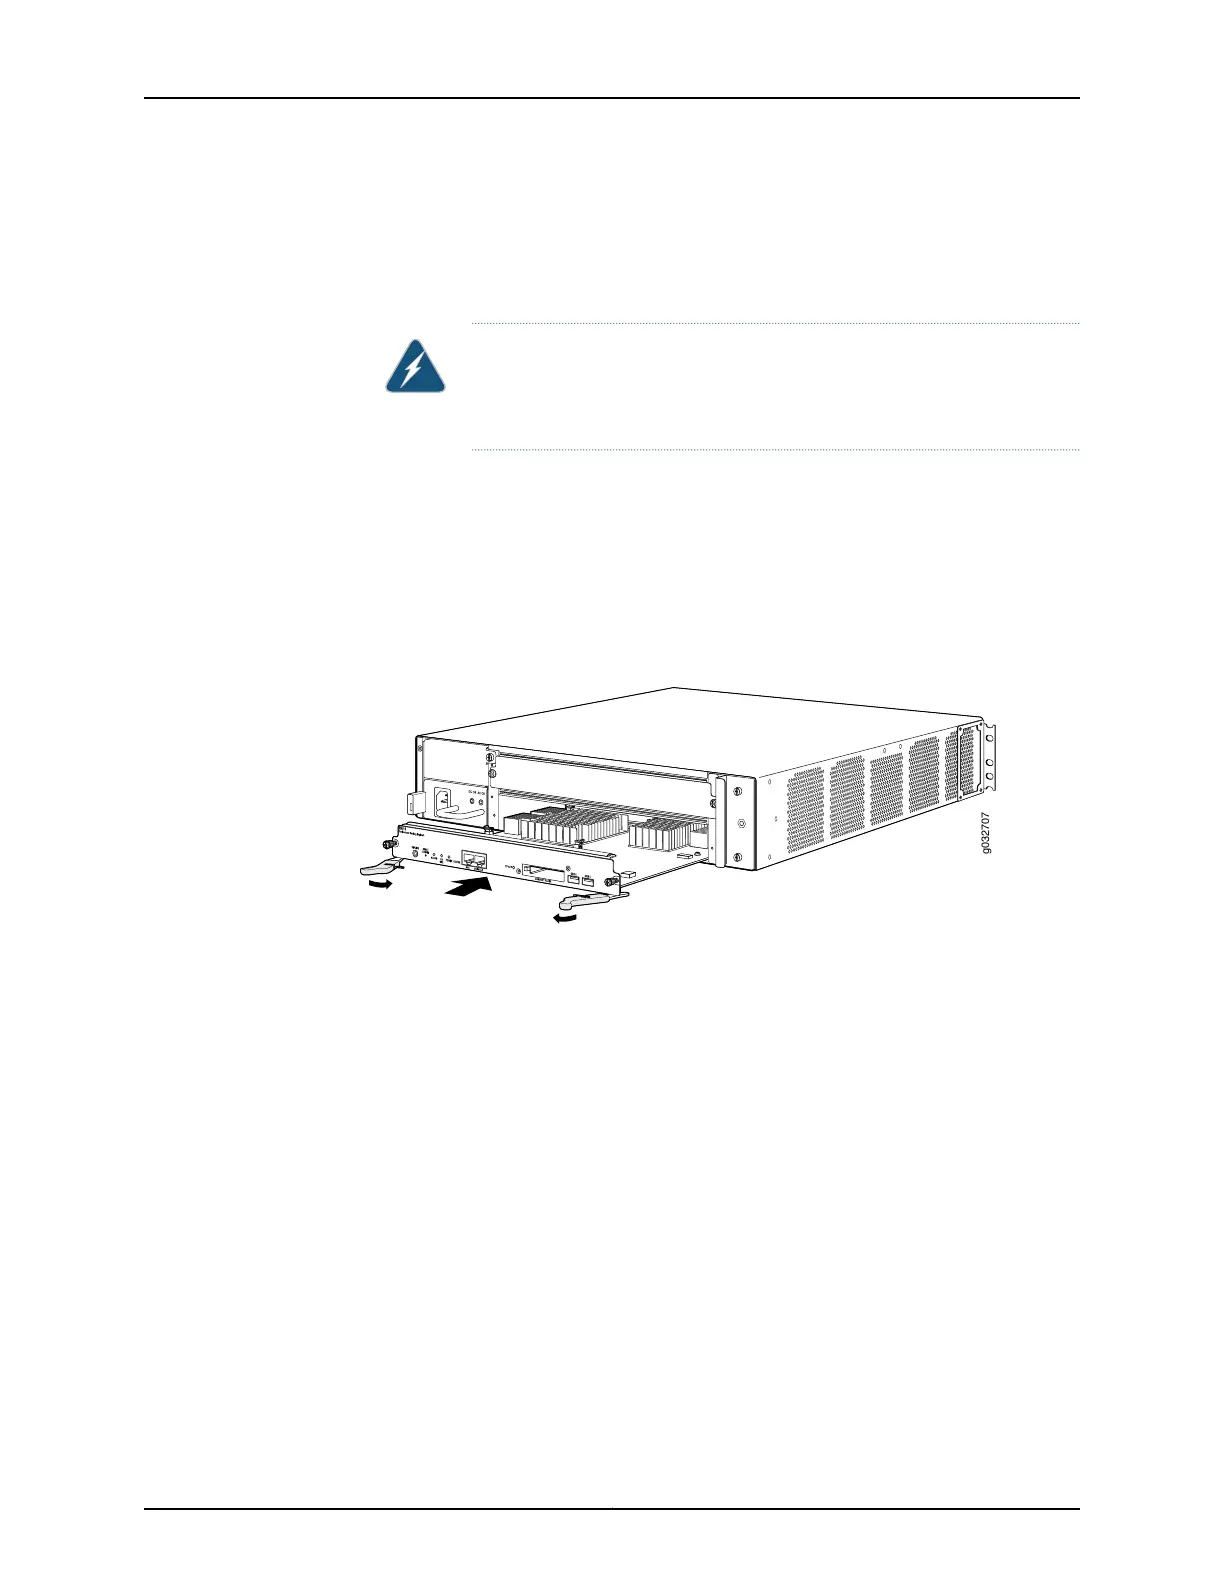
5. Slide the SRE into the chassis until you feel resistance, carefully ensuring that it is
correctly aligned (see Figure 16 on page 76).
6. With your thumbs, push the locking levers into place to fully lock the SRE into the slot.
WARNING: If the locking levers are not aligned properly with the edge of
the SRE slot, the SRE will not be properly seated into the SRE backplane
receptacle.
7. Use a number 2 Phillips screwdriver to tighten the captive screws on each side of the
locking levers.
8. Power on the services gateway and verify that the SRE LED indicators on the chassis
and the SRE LED are green.
Figure 16: Installing the Services and Routing Engine (SRE)
Related
Documentation
SRX650 Services Gateway Back Panel on page 24•
• Removing the SRE from the SRX650 Services Gateway on page 143
• SRX650 Services Gateway Services and Routing Engine 6 on page 11
• Powering On the SRX650 Services Gateway on page 94
Copyright © 2018, Juniper Networks, Inc.76
SRX650 Services Gateway Hardware Guide