Keysight N9038A MXE Service Guide 189
RF Preselector Section
RF Preselector Section Troubleshooting
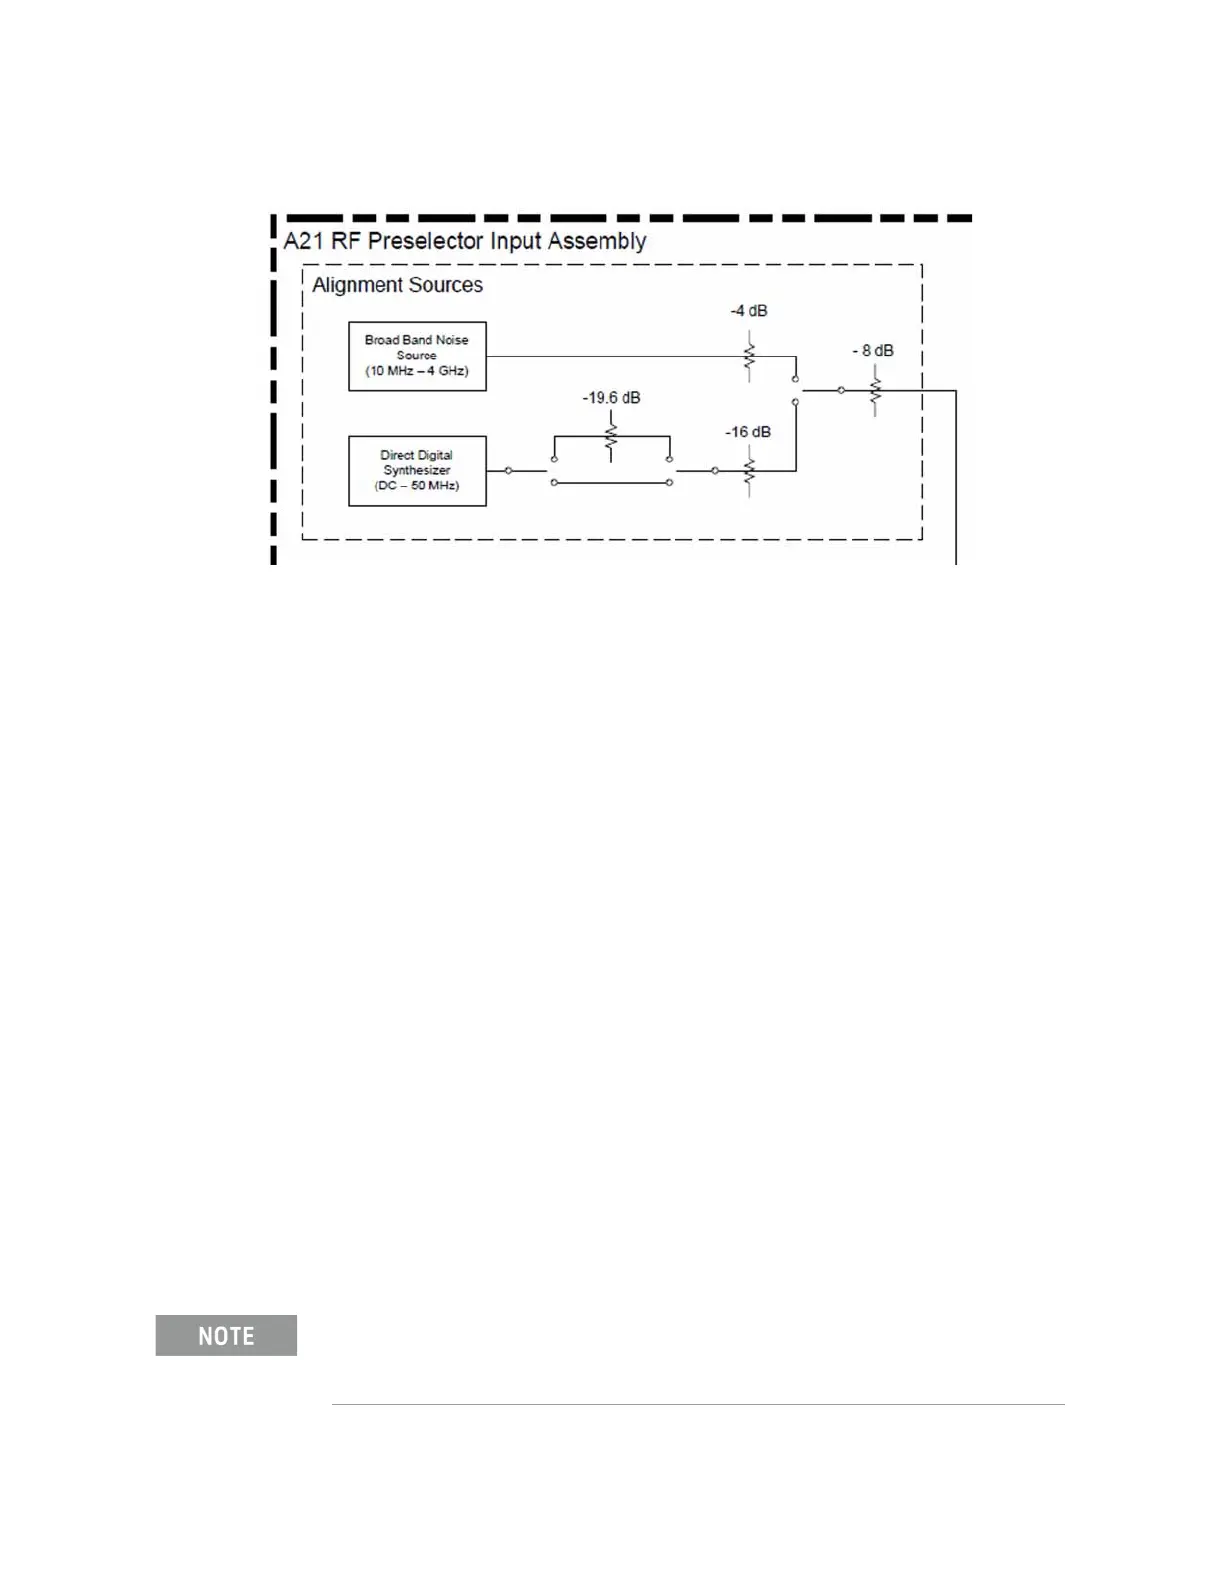
Figure 5-16 A21 RF Preselector Input Assembly - Alignment Signals
Verifying Alignment Signal Generation
1. Remove the instrument dress cover (MP24) and the top brace (MP10).
Refer to Chapter 18, “Assembly Replacement Procedures” for instructions
on removing these covers.
2. Referring to Figure 5-4, remove W32 and W34 from the A21 RF
Preselector Input assembly.
3. Turn the instrument on and allow it to complete its boot up process,
ignoring any error messages.
4. Turn the instrument self-alignment routine off by pressing System,
Alignments, Auto Align, Off.
Direct Digital Synthesizer Verification - Conducted Band
5. Connect a spectrum analyzer to the A21 RF Preselector Input assembly
Conducted Band Pre-Filtered Output (J103), as shown in Figure 5-4.
6. Tune the spectrum analyzer to a start frequency of 10 MHz and a stop
frequency of 65 MHz.
7. Tune the instrument to a frequency of 10 MHz with a span of 0 Hz by
pressing FREQ, 10 MHz, and SPAN, Zero Span.
8. Turn the Direct Digital Synthesizer on and tune it to 5 MHz by entering the
Service menu and pressing More, RF Preselector, Calibrator, DDS Freq,
5 MHz.
For information on how to access the instrument's Service menu see Chapter 16, “Service
and Diagnostics Menus.”.

 Loading...


