Repair information 4-23
5026
Registration (black)
Top Margin
1. Reconnect the power cord to the electrical outlet, but do not turn on the printer yet.
2. Enter Diagnostic mode (press and hold buttons 3 and 6, turn on the printer, and release the buttons when
the clock graphic displays).
3. Touch REGISTRATION.
4. Touch Quick Test or use the last Quick Test you used to adjust skew.
5. Touch Top Margin.
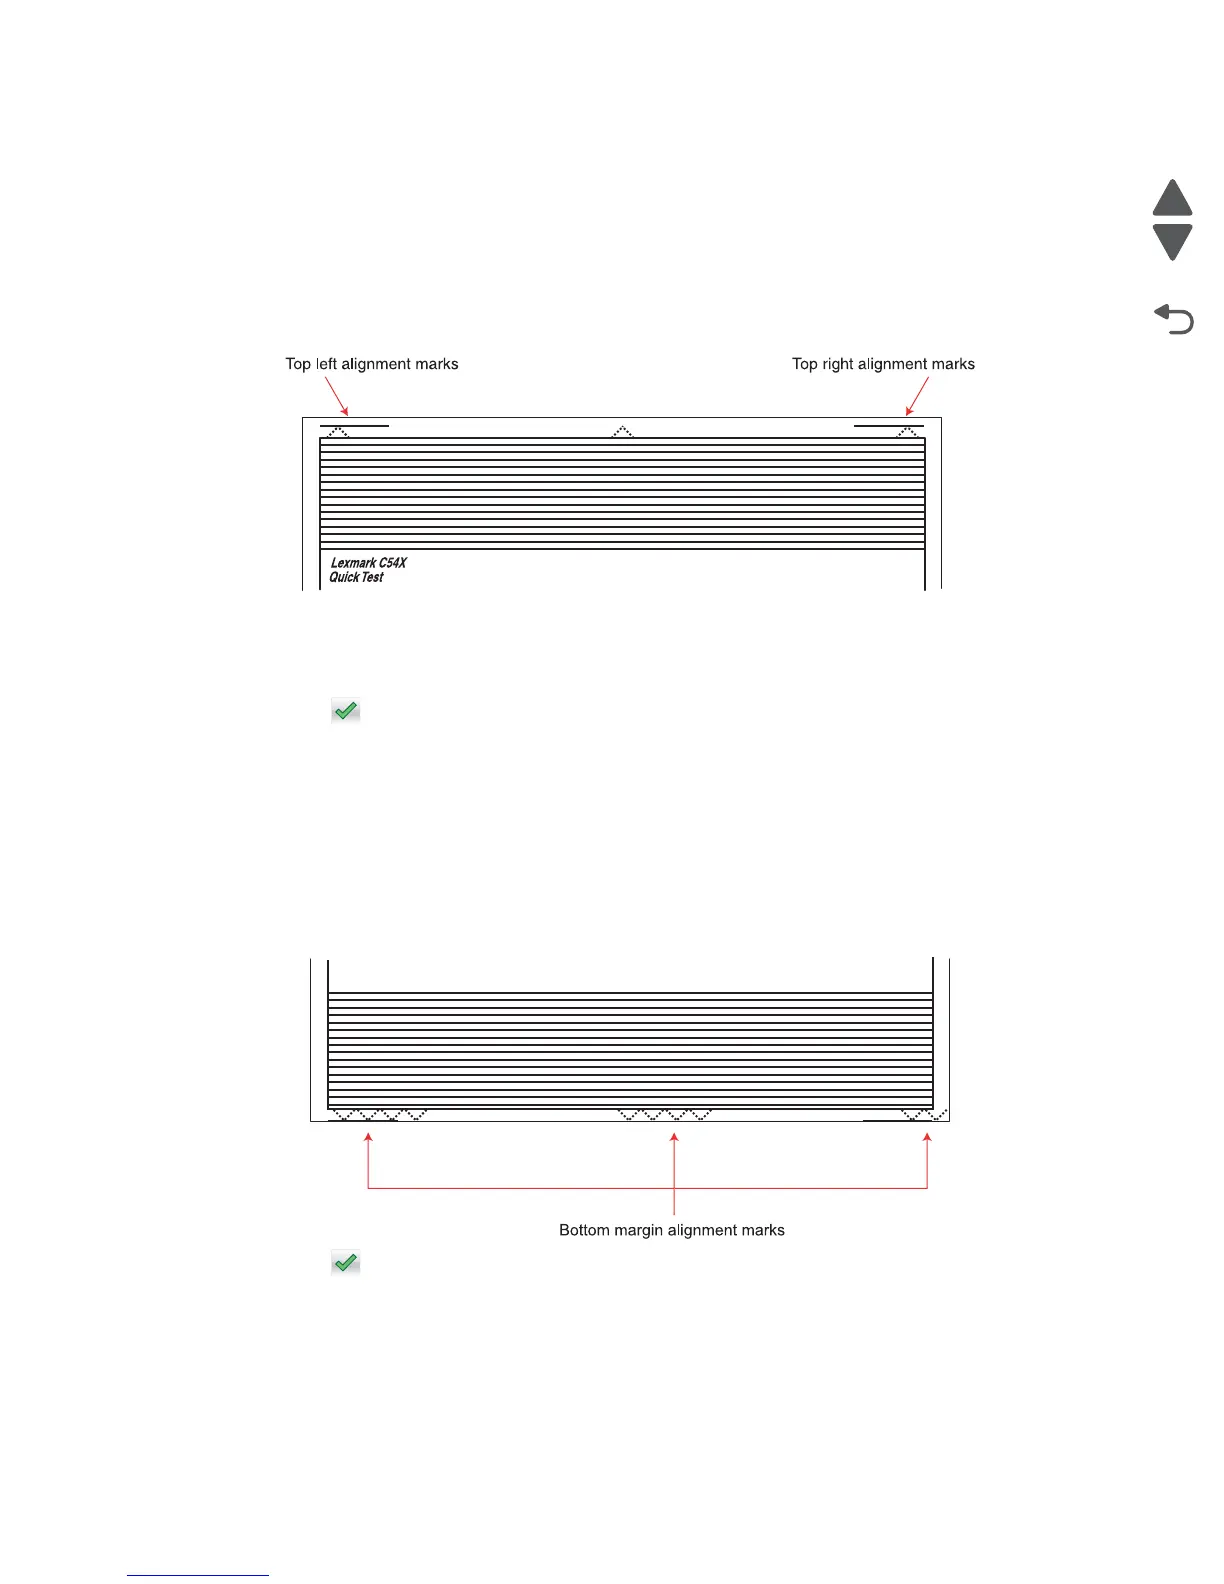
6. Adjust the values until both top alignment marks are on the top edge of the print.
• Increasing the value (+) moves the top alignment marks down on the page.
• Decreasing the value (-) moves the top alignment marks up on the page.
7. Touch to save the value.
8. Print the Quick Test page, and check the top alignment marks. Repeat adjustment of the top margin and
printing of the Quick Test page until top margin is set.
Bottom Margin
1. Touch Bottom Margin.
2. Adjust the bottom margin until the points of the bottom margin alignment marks are visible and touching
the edge of the paper.
• Increasing the value (+) moves the bottom alignment marks up on the page.
• Decreasing the value (-) moves the bottom alignment marks down on the page.
3. Touch to save the value.
4. Print the Quick Test page, and repeat this process until the bottom margin is adjusted.
 Loading...