Section 04 FUEL SYSTEM
Subsection 02 (FUEL TANK AND FUEL PUMP)
When the ECM receives a signal to shut down
the engine (START/STOP switch, engine cut-off
switch, or T.O.P.S. switch) it removes the fuel
pump g round signal.
Fuel Level Indication
An electric float type fuel level sensor is mounted
on the side of the fuel pump reservoir. As the float
moves with changing fuel levels, it varies a resis-
tance that changes the voltage signal coming from
the information center (multifunction gauge). This
signal is representative o f the fuel level.
The information center interprets the fuel level
voltage signal that comes back from the fuel level
sensor. It then displays the proper fuel level in
the information center and a low fuel warning
message when required.
The information center will also trigger the beeper
which produces the appropriate beep signal to
warn the driver of a low fuel condition.
The fuel level sensor resistance is at its lowest
value when the fuel tank is full, and at its highest
value when the tank is empty.
Refer to the
FUEL LEVEL SENSOR
in this subsec-
tion for fuel level sensor testing procedures.
Fuel Tank Venting
The entire vent system is incorporated within the
fuel tank cap.
WARNING
If the cap requires replacement, it must be re-
placed with an approved vented cap of the
same type supplied by BRP. Use of any other
cap, or use of a non-vented cap will not al-
low proper venting of the fuel tank. The re-
sult may be engine fuel starvation, fuel tank
overpressure, or fuel leaks which could lead
toafireoranexplosion.
INSPECTION
TESTING FUEL TANK FOR LEAKS
1. Visually inspect condition of hoses and clamps.
2. Remove
/open fuel tank cap.
3. Fill up fuel tank.
4. Install test cap on filler neck.
5. Use th
e following tool to pressurize fuel tank.
REQUIRED TOOL
VACUUM /PRESSURE PUMP
(P/N 529 021 800)
FUEL TANK TEST CAP
(P/N 529 036 242)
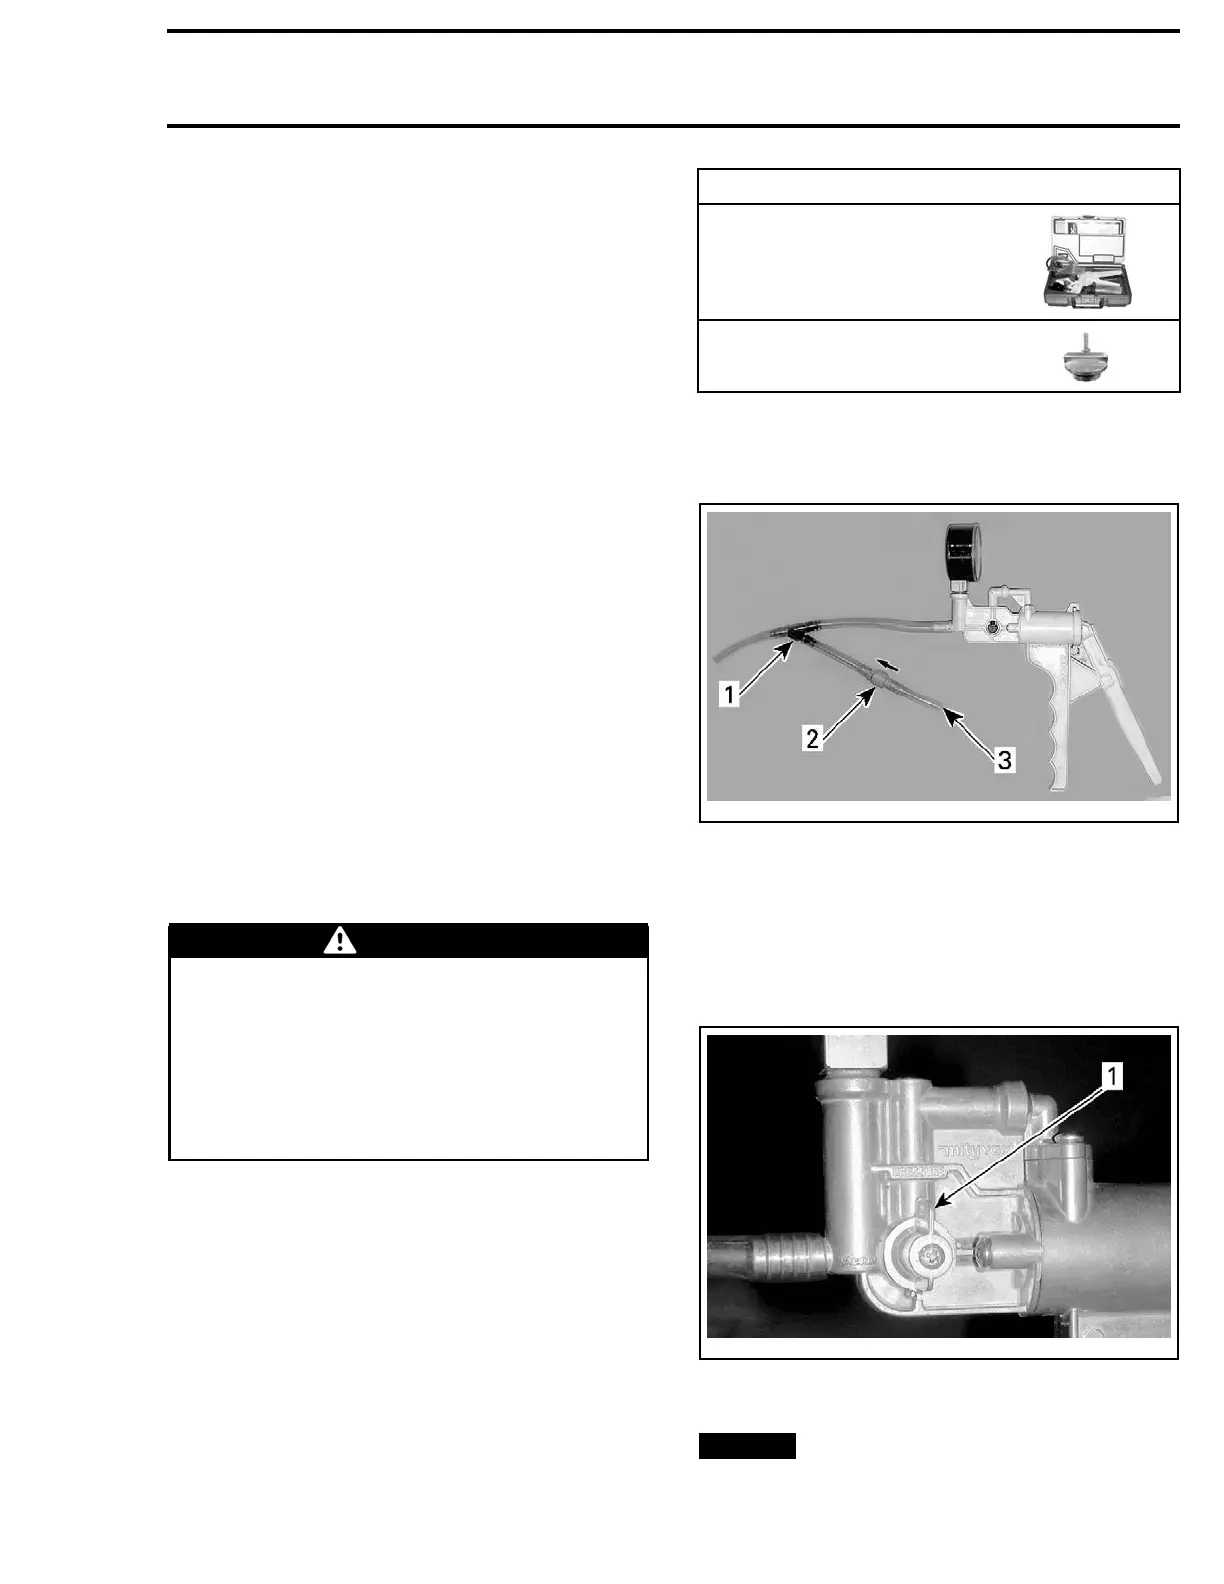
NOTE: AY-fit
ting and a check valve can be in-
stalled to us
e compressed air for quick pressure
build-up whe
n the fuel tank is not full.
mmr2009-121-004_a
1. Y-fitting (P/N 293 710 059)
2. Check valve (P/N 275 500 505)
3. Apply compressed air here
6. Install the fuel tank test cap.
7. Connect the vacuum/pressure pump to the nip-
ple of fuel tank test cap.
8. Set vacuum/pressure pump to PRESSURE.
smr2
009-031-012_a
1. Pressure selected
9. Pressurize fuel tank to specification.
NOTICE
Do n
ot exceed the specification
whe
n pressurizing the fuel tank.
219100893-021 91

 Loading...


