Section 02 ENGINE
Subsection 04 (COOLING SYSTEM - VEHICLE)
NOTE: In general leaking c oolant indicates a dam-
aged rotary seal. Leaking oil indicates a damaged
oil seal. If either seal is leaking, both seals must
be replaced at the same time. Refer to
WATER
PUMP
in
COOLING SYSTEM - ENGINE
in the ap-
propriate engine shop manual.
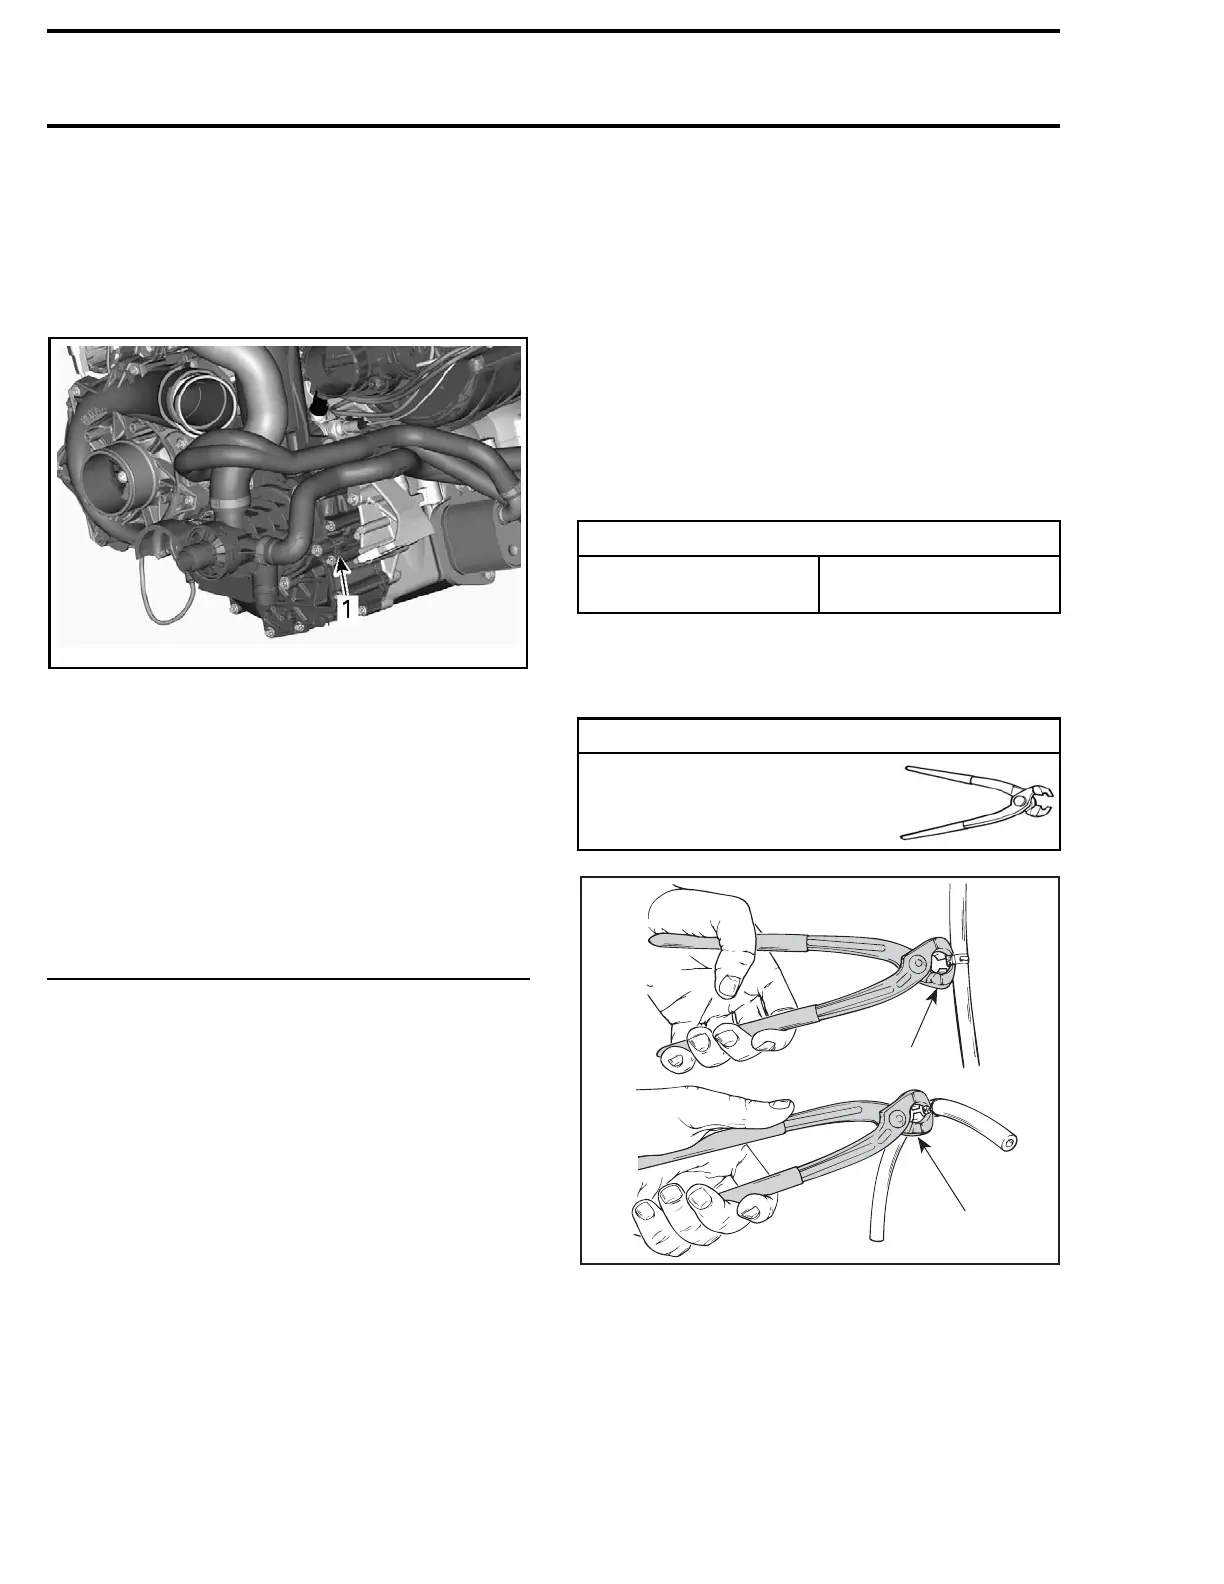
219100893-013-005_a
1. Leak indi
cator hole
TROUBLES
HOOTING
The following is provided to help in diagnosing the
probable s ource of troubles. It is a guideline and
it should not be assumed to list all possible prob-
lems.
Always check for fault codes. If a fault code is de-
tected, service the fault code first. Refer to
DIAG-
NOSTIC AND FAULT CODES
subsection.
ENGINE O
VERHEATING
1. Low coo
lant level.
- Refill and check for leaks (coolant leaking out
of engi
ne leak indicator hole, hoses or clam ps
missing/defective, cylinder head gaskets leaks,
ride plate leaking, etc.). Repair or replace.
2. Air in cooling system
- Refill an d bleed cooling system.
3. Thermostat defective (does not open when en-
gine g
ets hot)
- Replace thermostat housing.
4. Water pump failure
- Inspect and replace defective components.
5. Water temperature sensor defective
-Chec
k or replace. Refer to ELECTRON I C FUEL
INJECTION (EFI).
6. Ride plate or hoses damaged
-Che
ck or replace damaged components.
7. Exhaust system clogged
- Flush exhaust s ystem.
8. Internal passage blocked in cooling system
- Inspect and clean.
PROCEDURES
PRESSURE CAP
Testing the Pressure Cap
Using a pressure cap tester, check cap opening
pressure. If opening pressure is out of range, in-
stall a new pressure cap.
CAP OPENING PRESSURE
Opening range
90 kPa ± 10 k P
a
(13 PSI ± 1.5 PSI)
CLAMPS
Replacing t
he Oetiker Clamp
REQUIRED TOOL
OETIKER PLIER (P/N 295
000 070)
1
F01B2KA
2
1. Cutting clamp
2. Securing clamp
NOTE: Always check general condition of hoses
and clamp tightness.
54 219100963-007

 Loading...


