Product Overview
SDU-2000 Synchronization Distribution Unit
56 SSU-2000 User’s Guide 12713020-002-2 Revision D – April 2004
Expansion Shelf Features
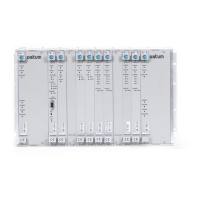
The SDU-2000 expansion shelf consists of the following major components.
Expansion shelf
One or two Buffer modules; where two provide a more robust system
Up to 14 Output modules, which can be a combination of Output module types
Connector panel with five groups of output connectors, SDU interface connector
group, dual power connectors, dual frame ground connectors, and a shelf
address switch.
Clock Source
The clock inputs for the first SDU-2000 expansion shelf in an SSU-2000 system are
supplied by the A and B Clock modules in the main shelf. A multi-pin connector on
the rear panel of the SSU-2000 (labeled J8 SDU Interface) provides the reference
signals from the main shelf Clock modules for use by the SDU-2000 expansion
shelves. The clock source is usually connected to J15.
SDU Backup Clock
For redundancy, a backup clock is supplied to each expansion shelf to allow it to
continue operating if the main expansion bus (cable) is accidently disconnected or
dislodged. The SSU-2000 provides a backup clock (Clock D) to the SDU Backup
Clock terminal, labeled J16. Using a Tee-connector, Connector J16 feeds an
additional SDU-2000 shelf.
When installing an expansion shelf, move the clock terminator from J9 on the
SSU-2000 or connector J16 from a previous SDU-2000 expansion shelf, and install
the terminator on J16 of the last expansion shelf in the daisy chain.
Setting the Expansion Shelf Address
Each SDU-2000 Expansion shelf must be correctly configured for its position in the
daisy chain. The main shelf’s address is 1. The SDU shelf address selector is
numbered from two to five. Set the first expansion shelf address to 2. Set the
address on additional shelves sequentially, as shown in Table 1-5.
Table 1-5. Expansion Shelf Addresses
Shelf Address
Main Shelf 1
Expansion Shelf 1 2
Expansion Shelf 2 3
Expansion Shelf 3 4
Expansion Shelf 4 5

 Loading...