Installing the SSU-2000
Connecting an SDU-2000 Expansion Shelf
76 SSU-2000 User’s Guide 12713020-002-2 Revision D – April 2004
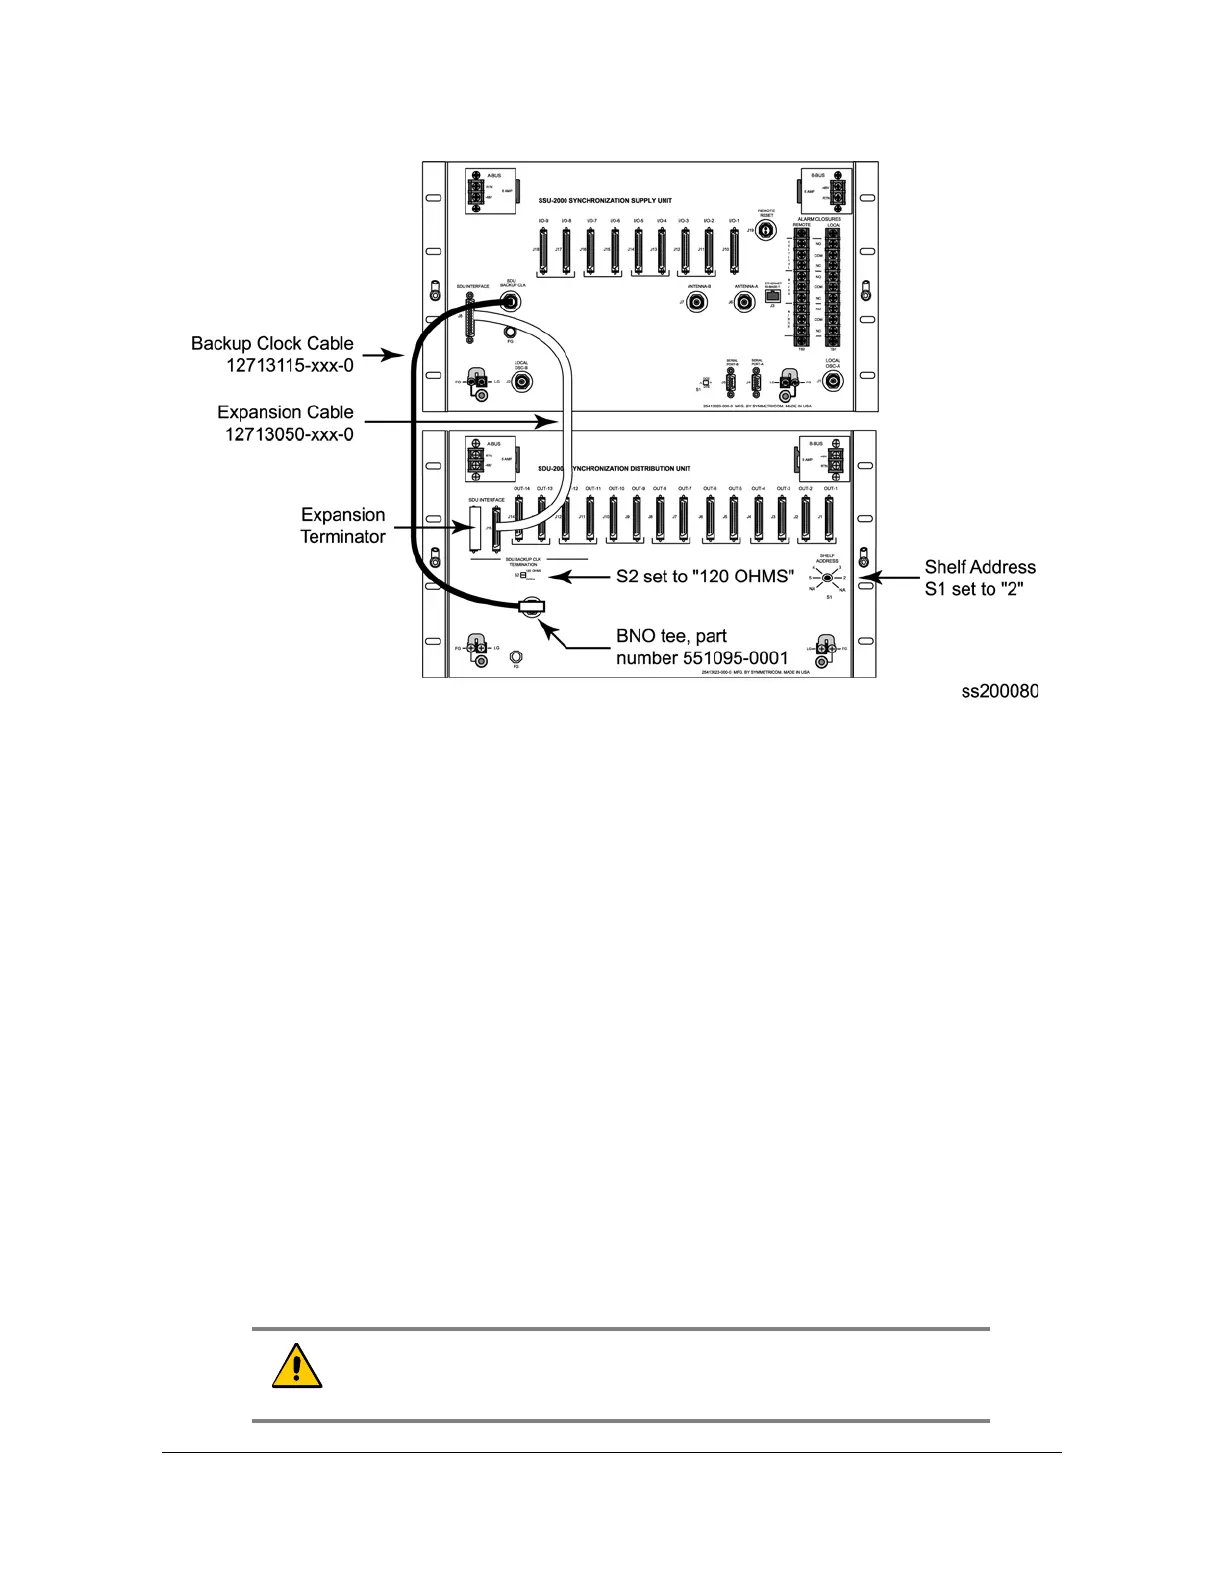
Figure 2-11. Wiring Diagram for a Single SDU-2000 Shelf
Connecting Additional SDU-2000 Expansion Shelves
To connect additional SDU shelves to an SDU, use the following procedure. Figure
2-12 illustrates the wiring for a system with three SDU-2000 shelves.
1. Remove the Expansion Terminator (if installed) from J17 or J15 on the rear
panel of the SDU-2000.
2. Attach one end of the Expansion Cable (part number 12013050-xxx-0; the xxx
indicates the length of the cable) to either J17 or J15 on the rear panel of the
first SDU-2000 shelf, whichever is available.
3. Attach the other end of the Expansion Cable to either J17 or J15 on the rear
panel of the second SDU-2000 shelf.
If you are not installing a third SDU-2000, then attach the Expansion Terminator
to either J17 or J15 of the second shelf, whichever is available.
4. Set the Clock Termination switch S2 on the rear panel of the first SDU-2000 to
the Open position.
Caution: To avoid damage to the BNO tee connector, be sure to align
its internal pins with the mating connector. The tee connector does
not rotate once it is installed.

 Loading...