Sysmex XP-300 2-11
Safety Information
Revised February 2013
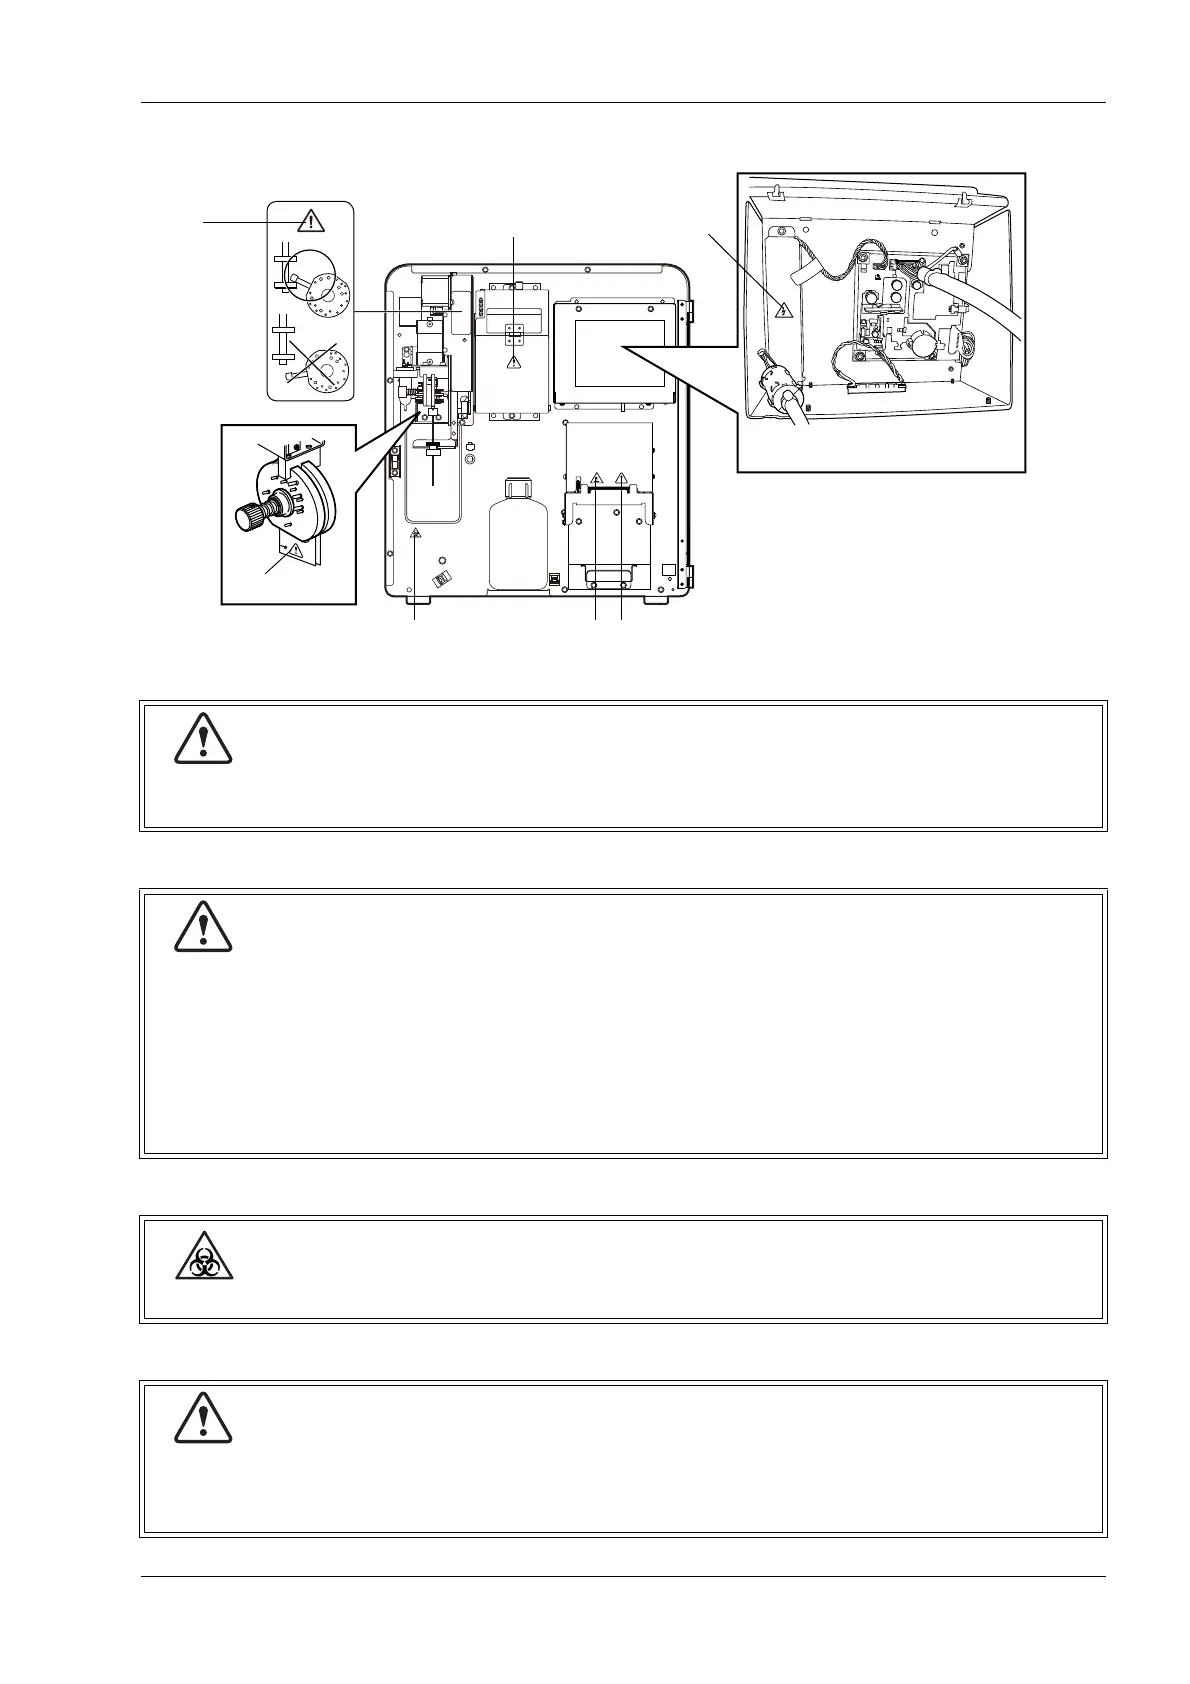
Front interior
(1)
(2)
(3)
(4)
Confirm that the metal knob is between the stoppers.
If it is not, malfunction will occur.
At instrument installation, remove the SRV fixing screw by turning it counterclockwise and
remove the two spacers. Then, clean the surfaces of fixed and rotary valves. Reassemble the
SRV.
Since the hydraulic lines are rinsed with distilled water before shipment, press the start switch
or the [Auto Rinse] button to wash it down. Upon completion of the instrument sequences,
verify that the background count is within the acceptable limit.
* These protection sheets are removed after installation.
In principle, all parts and surfaces of the instrument must be regarded as potentially infectious.
When opening the detector cover to clean the TD aperture, follow the instructions in
“12.12 Clean aperture of TD chamber (drain TD chamber)”.
Because there is a risk of electric shock, do not open this cover for any other purpose.
(2)
(1)
Back of the LCD screen
(4)
(7)
(3) (5) (6)